
eRacks Systems Tech Blog
Open Source Experts Since 1999
Building Your Online Presence
Because of digitalization, having a website is essential for individuals and businesses alike. It serves as your online identity and can significantly impact your visibility on search engines. Here’s a step-by-step guide to creating a website and ensuring it appears on search engines.
Having a website is crucial for a kids clothing website that sells modest girls dresses as it provides a platform to showcase and sell products to a global audience. A website allows customers to conveniently browse through the collection, learn about the brand, and make purchases from the comfort of their own homes. It also enables the business to establish an online presence, build trust, and reach a larger customer base, ultimately driving sales and growth.
Step 1: Choose Your Website Platform
Selecting the right platform is crucial. Popular options include WordPress, Wix, Squarespace, and Shopify (for e-commerce). Consider your website’s purpose and your technical proficiency when making this choice.
Step 2: Domain Name and Hosting
Choose a domain name that reflects your brand or content. Purchase domain hosting from a reliable provider. Many website builders offer domain registration as part of their services.
Step 3: Design Your Website
Design your website with your target audience in mind. Use clean and user-friendly layouts, readable fonts, and high-quality images. Ensure that your website is mobile-responsive to cater to smartphone users. You can visit sites like https://www.cleardigital.com/locations/web-design-houston/ and hire experts to do your site’s design.
Step 4: Create Quality Content
Content is king when it comes to search engine visibility. Regularly publish relevant, informative, and engaging content. Use proper headings (H1, H2, etc.), incorporate keywords naturally, and include internal and external links.
Step 5: Optimize for SEO
Search Engine Optimization (SEO) is essential for search engine visibility. Optimize your website by:
- Using relevant keywords in titles, headings, and content.
- Creating unique meta titles and descriptions for each page.
- Optimizing images with descriptive alt text.
- Ensuring fast loading times.
- Setting up an XML sitemap for search engines.
Hire SEO services to assist in targeting the right keywords.
Step 6: Mobile Optimization
Google prioritizes mobile-friendly websites in its search results. Ensure that your website looks and functions well on mobile devices to avoid a drop in rankings.
Step 7: Submit Your Website to Search Engines
Submit your website to search engines like Google, Bing, and Yahoo. Google Search Console and Bing Webmaster Tools offer valuable insights into your website’s performance.
Step 8: Build Backlinks
Backlinks from reputable websites can boost your search engine rankings. Create high-quality content that others will want to link to, and engage in ethical link-building practices.
Step 9: Monitor and Update
Regularly monitor your website’s performance using analytics tools like Google Analytics. Track your rankings, traffic, and user behavior. Update your content and website structure as needed to stay competitive.
Step 10: Be Patient
SEO is a long-term strategy. It may take several months to see significant improvements in your search engine rankings. Continue to provide valuable content and engage with your audience.
By following these steps and consistently working on your website’s content and optimization, you can create a strong online presence and improve your website’s visibility on search engines. Remember that SEO is an ongoing process, and staying up-to-date with best practices is key to long-term success.
joe October 30th, 2016
Posted In: How-To
Docker says: “Available for both Windows and Mac” – WTF?
![]() Docker, Please – “Available for both Windows and Mac” Are you kidding?
Docker, Please – “Available for both Windows and Mac” Are you kidding?
This reminds me of the legendary line from the Blues Brothers movie:
“We got BOTH kinds of music – Country AND Western!”
Sheesh.
Lame – it’s all based on Linux! And Open Source!
Docker runs natively on Linux – the only way to get it to run on Windows and/or Mac, is to run it inside a VM (Virtual Machine), running Linux. Ahem.
So apparently that’s what this does, although you couldn’t tell by the name, the marketing blurb, nor the description.
DOCKER TOOLBOX
The Docker Toolbox is an installer to quickly and easily install and setup a Docker environment on your computer.
Available for both Windows and Mac, the Toolbox installs Docker Client, Machine, Compose and Kitematic.
Source: Docker Toolbox | Docker
Sigh.
j
joe October 9th, 2016
Posted In: Linux, Open Source, Technology, Uncategorized
Tags: linux, Open Source, Technology
No Surprise: “The Hybrid Cloud Helps Midsize Companies…”
 This is what we’ve been saying for years now – that the best path to the cloud is to:
- Own your core / foundation infrastructure and hardware, at least one server worth, and
- Architect it properly with DRY DevOps best-practices and repeatability, to scale into the cloud as needed to meet spot demand.
Hybrid clouds are a strategic combination of public and private cloud environments, offering businesses the flexibility and scalability they need to meet their unique requirements. One crucial component of hybrid clouds is the software that enables seamless integration and management across multiple cloud platforms like Cloud 9 Software. With hybrid cloud software, organizations can leverage the best features of public and private clouds while maintaining control over sensitive data and applications. This software facilitates the seamless movement of workloads between on-premises infrastructure and public cloud providers, ensuring optimized performance, enhanced security, and cost efficiency. By harnessing the power of hybrid cloud software, businesses can create a unified and cohesive IT infrastructure that empowers them to achieve their digital transformation goals and drive innovation in the ever-evolving digital landscape.
Here’s the reference:
The Hybrid Cloud Helps Midsize Companies Compete This e-book is based on insights and recommendations by the Ventana Research, benchmark research report, “Business Technology Insights: Six Key Trends in Optimizing IT for Competitive Advantage.”
joe December 23rd, 2015
Posted In: How-To, servers, Uncategorized
Tags: Best-Practices, Cloud, DevOps, Hybrid Cloud
Why we Have to Say we Use Only New Components
 Many of you may know this already, but:
- We build all our systems to order, and
- We only use factory fresh, new components in our new systems.
This may seem like an obvious thing to say, but it still needs to be said.
Why?
About 4-5 times a week, we get emails like the one at the end of this page –
Offering “Clean pull” components for low prices in large lots – At best, these would be considered “Refurb” components, but are really just plain used. They have a much shorter (or no) warranty period than new components – they’re also often factory seconds or grey market parts, sold sideways to dodgy suppliers so that they can build systems cheaper.
We do not use these suppliers.
So again, we always use 100% new and factory-fresh components in our new-system builds – (on occasion we sell our B-Stock systems, which are clearly marked as such, and what they are – reconditioned, etc).
Some of the additional ways it is possible to cut corners on building and assembling IT equipment, in addition to used or refurbished parts, is to use factory lot-ends, factory seconds, factory defects with a “Workaroundable” defect – this is how Dell got their start – they would buy large lots of, say, NIC cards (This was before motherboards came with them onboard!), with a known defect, and write (and pre-install) the Windows driver for it – almost always unbeknownst to the end-user, or disclaimed in fine print in the EULA that the customer is forced to accept.
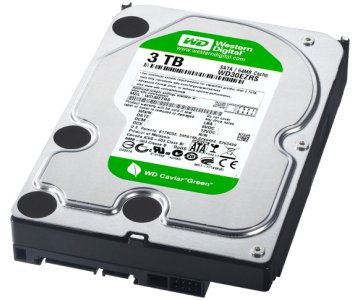
In this market, with plenty of storage servers, with large numbers of 3.5″ hard disk drives, this is especially tempting for some box-builders to use components such as these – again, we do not do this, and *always* purchase new parts only, from reputable, nationally-known suppliers of components and computer parts for our servers, especially such as hard disks, etc.
We consistently see product out there in the marketplace which is built with these dodgy components, and have many times been asked by our new customers to help them bring these products up to spec with new parts, and re-test and burn-in to ensure reliability and a fighting chance at a full product lifetime.
Best,
Joe
Joseph Wolff
Founder and CTO
eRacks Open Source Systems
Here is the example email:
Clean Pull HDD offer ( Lot# ST4815)
90 days warranty
Payment Bank wire only
EXW- CA USA

Seagate ST3120025ACE 120GB IDE 3.5" Qty 820 pcs take all deal @ 5.00 each
Seagate ST3120026AS 120GB 7200RPM SATA 3.5" Qty 1700 pcs  MOQ 500 pcs + @ $ 9.00 each
Seagate ST3320310CS 320GB SATA 3.5" Qty 2400 pcs MOQ 1000 pcs + @ $ 13.50 each
Seagate ST3320311CS 320GB SATA 3.5" Qty 1400 pcs MOQ 1000 pcs + @ $ 13.50 each
WD WD2500AAVS 250GB SATA 3.5" Qty 4000 pcs  MOQ 1000 pcs + @ $ 12.00 each
WD WD3200AAJS 320GB SATA 3.5" Qty 4500 pcs MOQ 1000 pcs + @ $ 14.00 each
WD WD2500AAVS 250GB SATA 3.5" Qty 4700 pcs MOQ 1000 pcs + @ $ 12.00 each


Axxxxx

Global XXX Enterprises,INC909-360-9993email: axxxx@xxxenterprises.net
email: xxxenterprisesusa@gmail.com
Walnut, CA 91789 USA
www.enterprises.net

Call/Email to us for large qty discount .

AGS  WTS /WTB  :
We carry a wide range of products. Please contact us for your other requirements........
Hard drive ( Pull/refurb/New) , CPU ( Pull/New), Laptop/Tablets ( Refurbished/New)
Memory, Monitors,Keyborad , Mice ,Networking Products ,Printer,  ETC
joe November 15th, 2015
Posted In: Backups, New products, servers, Storage
Tags: Archive Drives, HDD, New products
Ubuntu 15.10 Wily Werewolf now available
 Ubuntu 15.10 Wily Werewolf is now available on all eRacks systems.
Ubuntu 14.04 is also still available, as it is a Long Term Release (LTS) with a longer support window.
As always, if you want a different release, or even a beta, alpha or “Daily build” release, we’ll be happy to accommodate – just place it in the “Notes” field when you place your order or request a quote.
j
joe November 2nd, 2015
Posted In: Linux, ubuntu, Ubuntu 14.04
Tags: linux, ubuntu, Werewolf, Wily, Wily Werewolf