eRacks Systems Tech Blog
Open Source Experts Since 1999
Specs for first Intel 3D XPoint SSD: so-so transfer speed, awesome random I/O | Ars Technica
UPDATE 3/25/17 JJW:
The M.2 Optane won’t be readily available until later this year or likely 2018 – but it’s a good space to watch, as in our experience the internal interconnect technology and architecture will surely improve, to catch up with the underlying 3D X-Point silicon technology.
j
joe February 10th, 2017
Posted In: Open Source, Technology
Tags: Open Source, Technology
Docker says: “Available for both Windows and Mac” – WTF?
 Docker, Please – “Available for both Windows and Mac” Are you kidding?
This reminds me of the legendary line from the Blues Brothers movie:
“We got BOTH kinds of music – Country AND Western!”
Sheesh.
Lame – it’s all based on Linux! And Open Source!
Docker runs natively on Linux – the only way to get it to run on Windows and/or Mac, is to run it inside a VM (Virtual Machine), running Linux. Ahem.
So apparently that’s what this does, although you couldn’t tell by the name, the marketing blurb, nor the description.
DOCKER TOOLBOX
The Docker Toolbox is an installer to quickly and easily install and setup a Docker environment on your computer.
Available for both Windows and Mac, the Toolbox installs Docker Client, Machine, Compose and Kitematic.
Source: Docker Toolbox | Docker
Sigh.
j
joe October 9th, 2016
Posted In: Linux, Open Source, Technology, Uncategorized
Tags: linux, Open Source, Technology
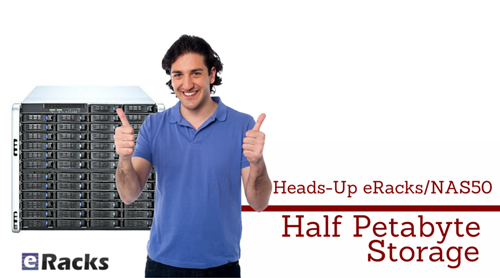
Heads-Up for Half Petabyte Cloud-Ready Storage Servers

eRacks/NAS50 Half Petabytes of Data Storage Server / Cloud Storage
We were extremely excited to announce the forthcoming release of 500 Terabyte (half Petabyte) storage space upgrade on our flagship product eRacks/NAS50 cloud data storage servers last week. The new model, to be released shortly, will incorporate 50 HGST 10 Terabyte HelioSeal™ hard drives. While the new model is not released yet, we are accepting pre-orders from customers. The current capacity, now available, of the eRacks/NAS50 is 400Terabytes in total, with currently-available 8Terabyte drives. The Azure devops security for data protection purposes as that must be a priority.
The new unit is rackmount and holds 50 removable drive bays. The 9U unit is suitable for any cloud storage application as well as NAS/Local LAN, since cloud services are really used now a days, you can learn how connecting to clouds directly can help businesses from this link. eRacks/NAS50™ is also a great solution for media libraries and other applications which require massive amounts of data storage capacity, you just have to make you are also backed up by the best data management services. Visit https://blog.couchbase.com/fuzzy-matching/ and get more information!
Our new servers are truly a remarkable Petascale solution. The HGST 10 Terabyte HelioSeal™ drives that come with eRacks/NAS50 use two technologies that greatly add to the value that this server carries with it, including other server services from sites as https://www.servermania.com/kb/articles/what-are-the-requirements-for-ubuntu-server/ for ubuntu projects.
The first is referred to as the HelioSeal™ technology. The HGST hard drives using this technology replace the air inside of the drive with helium. This would make the drive much lighter as well as allowing the disks to be much thinner. Due to the helium inside, the thinness of disks will not cause any disruptive turbulence effects. This will allow us to have more disks inside each drive which in turn means more data space. Additionally, helium drives have much lower power consumption, as much as 27%, making our NAS50 models truly a green product.
The new drives in the eRacks/NAS50 servers also make use of a technology called SMR. That is short for Shingled Magnetic Recording. This technology by itself adds another 25 to 100 percent storage capacity to HGST hard drives.
We are proud of our new eRacks/NAS50 and are ready to take pre-orders. We are prepared to customize the unit per your instructions with all Open-Source software necessary so your order will reach you completely pre-installed.
Please contact us for pre-orders or any questions you may have.
eRacks Open Source Systems
Phone: (714) 758-5423
Fax: (631) 392-9842
http://www.eRacks.com
eMail: info@eracks.com
Ron September 12th, 2015
Posted In: NAS50, New products, News, Open Source, servers, Upgrades
Tags: 500TB-class, 8TB, Archive Drives, Cloud Computing, Cloud Storage Server, HDD, HelioSeal. HGST, Hybrid Cloud, Internet, linux, NAS50, Open Source, Private Cloud, Rackmount, seagate, SMR, Storage Server
eRacks NAS36 Servers Store More Data At Lower Cost
We can’t help it with our innovations. Our NAS36 servers offered almost 200 Terabytes of data space already. That is considered quite high for a mid-range data storage server. But we just decided to jump even higher and exchange the standard 6-terabyte disks into 8-terabyte ones. That mean our NAS36 model storage servers are now able to hold 288 terabytes of data in total.
The new NAS36 model with higher data capacity brings even more value to our customers not just because of the storage space it provides but also for its price. Yes, we have decided to slash the prices down below $25,000. That is going to bring considerable saving to our customers. [UPDATE Sep 2015: current price for maxed-out 288TB config with Seagate Archive 8TB drives is just under $22,000]
We are proud to announce this latest upgrade as we continue to provide petascale data storage servers at affordable prices.
We remain dedicated to open-source systems. We also remain committed to delivering pre-installed, pre-configured systems to our customers.
The NAS36 servers are rack-mount servers. We designed the 4U unit specially to hold large number of drives in a very limited space. That leaves ample amount of space for other necessary accessories inside your data center rack.
The 36 drives in the unit are all Seagate Archive Drives, mounted on a single backplane and controlled by a RAID controller. The unit holds 24 drives in front and 12 in the back making the unit case quite compact.
eRacks Systems is a leading provider of high-capacity, petascale data storage server solutions to companies and enterprises requiring massive amounts of storage data.
Our servers are suitable for application and web security on the cloud as well as Near-Line Storage. They are also configurable for NAS (Network Attached Storage) applications.
For a great storage solution at a considerable low price, contact us. We are available through email, phone and our website.
Ron August 19th, 2015
Posted In: NAS36, New products, Open Source, servers, Upgrades
Tags: 288TB-class, 8TB, Archive Drives, Cloud Computing, Cloud Storage Server, HDD, Hybrid Cloud, Internet, linux, NAS36, Open Source, Private Cloud, Rackmount, seagate, Storage Server
eRacks beta-testing an Ubuntu based tablet
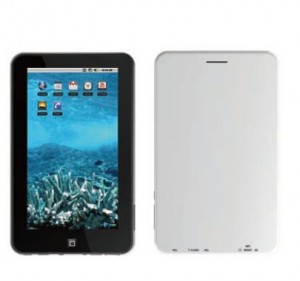
 eRacks is set to begin testing a Linux Ubuntu based tablet. The 7 inch tablet would retail for around $200 and would include several key features missing from the Kindle Fire: including a micro SD slot, a built in ip cameras live 24/7 while the battery has power, HDMI out and GPS support. If you’re in the market for a tablet, you may want to keep an eye on the eRacks website. An upcoming software update would make it possible for the tablet install and run Android apps.
Greg April 13th, 2012
Posted In: Uncategorized
Tags: Android, eRacks, google tablet, ipad 3, kindle fire, linux, Open Source, ubuntu

