
eRacks Systems Tech Blog
Open Source Experts Since 1999
Install and Configure Bind9 DNS Server service on Ubuntu 16.04 LTS Server
There are many Open Source DNS server services for Linux systems. Here we’ll discuss about installing and configuring one of the most popular DNS server services among them known as “Bind9”. We’ll use another most popular Debian based Linux server operating system distributed by Canonical which is Ubuntu 16.04 LTS Server edition.
Other good DNS implementations include the native OpenBSD DNS implementation, as well as Dan Bernstein’s tinyDNS (AKA djbdns), but these are topics for future articles. (We use djbdns on OpenBSD, internally).
Successfully installing and configuring Bind9 Server service on Ubuntu 16.04 LTS server edition require several steps. For better understanding we’ll divide the total process into two main steps as ‘Basic installs’ and ‘Securing the DNS Server’ service. Each main category could be divided into several additional steps.
Basic Installing Steps:
- Install fresh Ubuntu 16.04 LTS Server OS on a server.
- Preparing the Ubuntu 16.04 LTS Server OS for installing Bind9 DNS Server Service.
- Install Bind9 DNS Server Service and configure Caching-only name server.
- Install and configure Primary DNS server or Master DNS server.
- Bind9 Post installation Configurations for successful service run on Ubuntu Server.
- Install and configure Secondary DNS server or Slave DNS server.
Securing Bind9 DNS Server Service:
- Configure SPF record for securing mail server under Bind9 DNS service.
- Configure DKIM record for securing mail server under Bind9 DNS service.
- Configure DNSSEC signing on Bind9 DNS Server Services.
- Configure DMARC Record for securing mail server under Bind9 DNS service.
For this tutorial we’ll use ‘eracks.com’ as domain and local IP address for demo and real time configurations (tested) behind the NAT network. The global & dedicated Systems could be configured just by replacing with your own domain and real IP assigned from your ISP. If you need further assistance please contact our eRacks Systems’ experts. Also, you could buy securely configured “DNS Server” as your requirements from eRacks Systems’ showRoom without any hassle. For your requirement please checkout.
For configuring DNS Servers we’ll use private IP from 192.168.88.0/24 network block where the usable Host IP Range is: 192.168.88.1 – 192.168.88.254; and Subnet Mask: 255.255.255.0. Our Router/NAT-gateway IP address is already configured as 192.168.88.1.
IP Address Block:	192.168.88.0/24
Usable Host IP Range:	192.168.88.1 - 192.168.88.254
Broadcast Address:	192.168.88.255
Total Number of Hosts:	256
Number of Usable Hosts:	254
Subnet Mask:	255.255.255.0
Wildcard Mask:	0.0.0.255
| Options | Primary/Master DNS Server | Secondary/Slave DNS Server | Client/Host Server |
| Host Name | dnsmaster | dnsslave | hostserver |
| Domain | eracks.com | eracks.com | eracks.com |
| IP Address | IPv4: 192.168.88.17 IPv6: ::8817 |
IPv4: 192.168.88.250 IPv6: ::8250 |
IPv4: 192.168.88.17 IPv6: ::8221 |
| FQDN | dnsmaster.eracks.com | dnsslave.eracks.com | hostserver.eracks.com |
Enough talk – Let’s see how it’s done!
eRacks/DNS

Get your Own Open Source DNS Server as pre-configured as ‘plug & Play’ from eRacks Systems’ ShowRoom.
Step 1: Install fresh Ubuntu 16.04 LTS Server OS on a server.
For learn how to install a fresh copy of Ubuntu 16.04 LTS Server OS on a server system visit this link.
Step 2: Preparing the Ubuntu 16.04 LTS Server OS for installing Bind9 DNS Server Service.
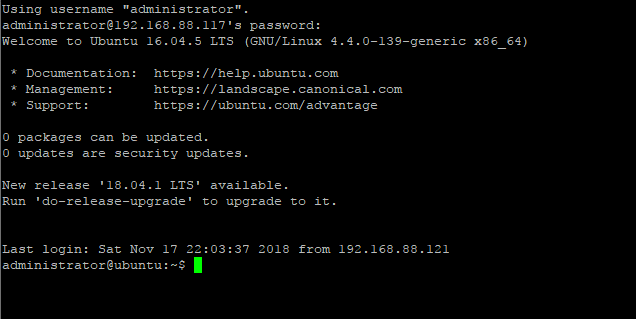
After installing, login the server directly or using SSH tunnel with IP address with user with root privileges.
The login screen will look like this;
Then run the following command and press enter and your given password to update the system.

For avoiding “sudo” command, we’ll configure the server as ‘root’ user. To do so, type the following command and press enter.

Once the Update and Upgrade are done as root user, we need to edit the network interface for setting up the static IP address for the system with the following command;
Here On the popped-up screen find # The primary network interface and replace the beneath lines with the following;
# Static Primary Network Interface IPv4 Address
# Required for IPv4 (A) Records
auto eth0
	iface eth0 inet static
	address 192.168.88.17
	netmask 255.255.255.0
	network 192.168.88.0
	broadcast 192.168.88.255
	gateway 192.168.88.1
	dns-nameservers 8.8.8.8 8.8.4.4
	dns-domain eracks.com
# Optional Static IPv6 Address for Primary Network Interface
# Required for IPv6 (AAAA) Records
iface eth0 inet6 static
	address fe80::215:5dff:fe58:6500
	netmask 65
	gateway fe80::2a3b:82ff:fe74:58f6
Once it is done, press Ctl + X to exit and Press ‘Y’ then Enter button to save the changes.
Next, we need to set up the hostname for this server. Thus, Run the following command to edit the host name;
On the popped up screen replace the existing default host name “Ubuntu 16.04 LTS” with “dnsmaster” (since we’ll be setting the hostname as “dnsmaster“) then Press control + X to exit. And Press ‘Y’ then Enter button to save the changes. And then Run the following command to edit the hosts file;
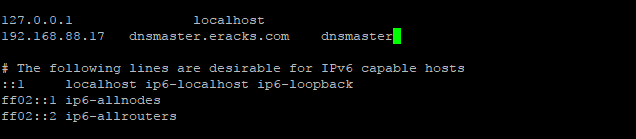
Replace the existing with the following host record entries with the following;
The entries will look like this;
Once done, press control + X to exit and Press ‘Y’ then Enter button to save the changes and reboot your system with the “reboot” command.
After rebooting and login to the server we’ll see that the default host name “ubuntu” is replaced with hostname “dnsmaster”. To get assure we could check the hostname and FQDN with the following commands respectively;
root@dnsmaster:~$ hostname -f

Once these are done the system is ready for installing the Bind9 DNS Server Service. And we could proceed to the next steps.
Note:We’ll login as as root user from the start.
Step3: Install Bind9 DNS Server Service and configure Caching-only name server.
Before installing ‘Bind9’ DNS Server on this server we need to make sure all the packages are up to date. So, we’ll update and upgrade all the apt packages with following command;
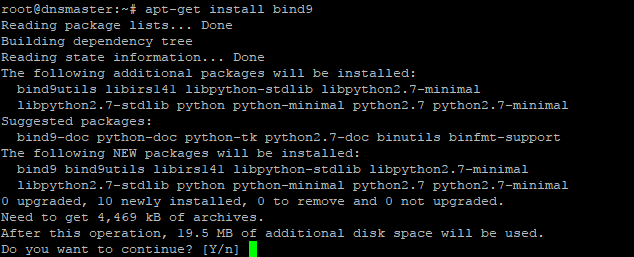
Once the Update and Upgrade are done, we’ll install the ‘Bind9’ Packages with the following command;
The screen will pop up for your permission for using additional disk space. For approval, press “Y” and then Enter button for installing the packages. The installation process will take a few whiles.
When the installation is done the system is ready for configuring Caching-only name server with Bind9 DNS Server service package. For configuring Caching-only name server run the following command.
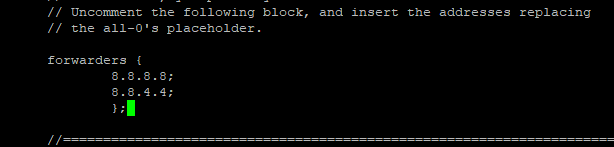
On the popped-up screen find & uncomment the forwarders & set the forwarders as follows with google public DNS IP address & or with your ISP’s DNS IP address.
The entries will look like this
Next, press control + X to exit and Press ‘Y’ then Enter button to save the changes. And restart the Bind9 DNS Service with the following command.
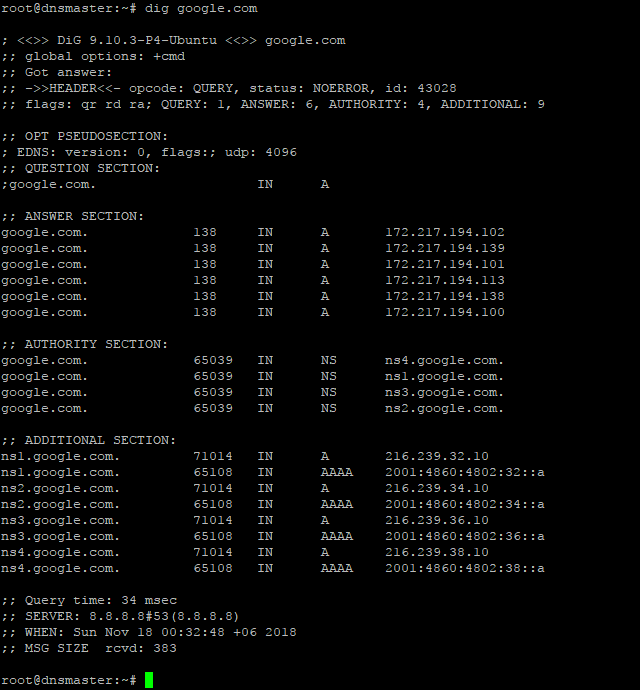
For testing the Caching-only name server we need to run the dig command as follows;
If everything is okay, the command will dig up the following records;
Step4: Install and configure Primary DNS server or Master DNS server.
Before proceeding further, first we need to make sure the Ubuntu server is up-to-date. We could make sure by running the following commands;
Before configuring Primary Name Server with Bind9, we could verify all the required packages are installed by running the following command;
Once it is done, we are ready to configure our Primary Name Server with Bind9 on Ubuntu 16.04 LTS Server. And All configuration files be will be available under /etc/bind/ directory. To do so, we need to edit ‘named.conf.local’ file first, and make entry for our domain zone.
So, we’ll run the following command line for setting up our domain’s forward look up zone.
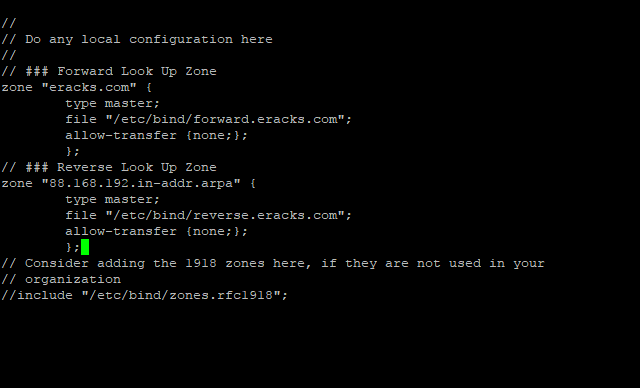
Then make the following entries for Forward Look Up Zone
// ### Forward Look Up Zone
zone "eracks.com" {
	type master;
	file "/etc/bind/forward.eracks.com";
	allow-transfer {none;};
	};
Reverse, look up zone is also recorded here. So, we’ll add the reverse look up zone with the first there part of the IP address in reverse way by ending with “.in-addr.arpa”. The zone name it’ll look like “88.168.192.in-addr.arpa” this. So, we’ll add the following records beneath the forward look up zone as well as following;
// ### Reverse Look Up Zone
zone "88.168.192.in-addr.arpa" {
	type master;
	file "/etc/bind/reverse.eracks.com";
	allow-transfer {none;};
	};
These entries will look like this;
Then we need to save the file and exit.
We’ve identified forward lookup zone via “file “/etc/bind/forward.eracks.com”;” and reverse lookup zone via “file “/etc/bind/reverse.eracks.com”;” on the “named.conf.local” file. Therefore, we need to create those two-database files for use as forward & reverse lookup zone under “/etc/bind/” directory.
For “forward.eracks.com” database, we’ll copy the existing “db.local” database file that is created as default with Binid9 installation under ‘/etc/bind/’ directory. To, do so we’ll run the following command;
Then we’ll edit the newly copied database file with the following command;
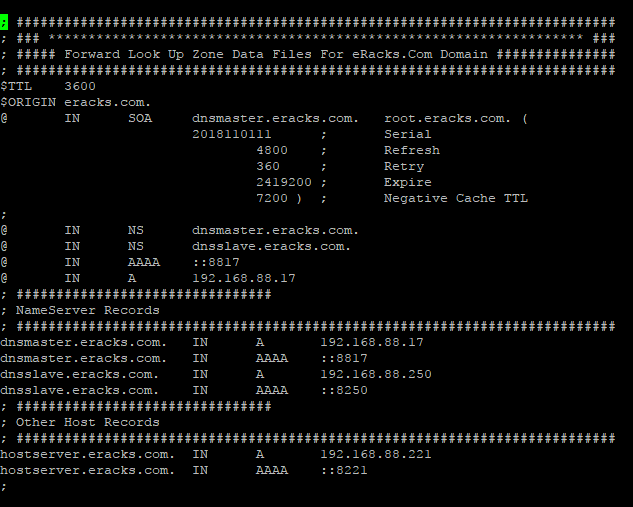
Then make the following entries for the database records;
; ###########################################################################
; ### ******************************************************************* ###
; ##### Forward Look Up Zone Data Files For eRacks.Com Domain ###############
; ###########################################################################
$TTL    3600
$ORIGIN eracks.com.
@	IN	SOA	dnsmaster.eracks.com.	root.eracks.com. (
								2018110111	;	Serial
										4800	;	Refresh
										360	;	Retry
									2419200	;	Expire
										7200 )	;	Negative Cache TTL
;
@	IN	NS	dnsmaster.eracks.com.
@	IN	NS	dnsslave.eracks.com.
@	IN	AAAA	::8817
@	IN	A	192.168.88.17
; ################################
; NameServer Records
; ###########################################################################
dnsmaster.eracks.com.	IN	A	192.168.88.17
dnsmaster.eracks.com.	IN	AAAA	::8817
dnsslave.eracks.com.	IN	A	192.168.88.250
dnsslave.eracks.com.	IN	AAAA	::8250
; ################################
; Other Host Records
; ###########################################################################
hostserver.eracks.com.	IN	A	192.168.88.221
hostserver.eracks.com.	IN	AAAA	::8221
;
It’ll look like this;
Next for “reverse.eracks.com” database, we’ll copy the existing “db.127” database file that is created as default with Binid9 installation under ‘/etc/bind/’ directory as well. So, we’ll run the following command;
And edit using the following command
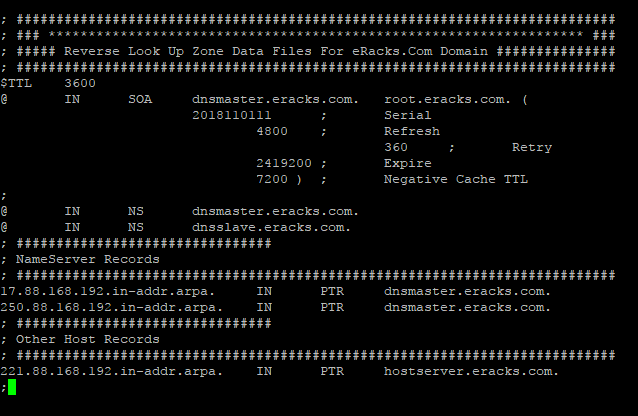
Entries for the database are follows
; ###########################################################################
; ### ******************************************************************* ###
; ##### Reverse Look Up Zone Data Files For eRacks.Com Domain ###############
; ###########################################################################
$TTL    3600
@	IN	SOA	dnsmaster.eracks.com.	root.eracks.com. (
								2018110111	;	Serial
										4800	;	Refresh
										360	;	Retry
									2419200	;	Expire
										7200 )	;	Negative Cache TTL
;
@	IN	NS	dnsmaster.eracks.com.
@	IN	NS	dnsslave.eracks.com.
; ################################
; NameServer Records
; ###########################################################################
17.88.168.192.in-addr.arpa.	IN	PTR	dnsmaster.eracks.com.
250.88.168.192.in-addr.arpa.	IN	PTR	dnsslave.eracks.com.
; ################################
; Other Host Records
; ###########################################################################
221.88.168.192.in-addr.arpa.	IN	PTR	hostserver.eracks.com.
;
Once it is done, we’ll save the file and exit.
It’ll look like this;
After that, we’ll restart the bind9 DNS Server Service with the following command.
root@dnsmaster:~$ service bind9 status
Note: We should be careful that all the records that finishes with letter (other than IP addresses), we need to add full-stop (“.”) at their end point to declare it is finished. Else, the bind9 will show an error.
For instant checkup, we need to set the resolver with nameserver as localhost IP 127.0.0.1 using following command;
And at the beginning of the name server lists we need to add the following line, then save and exit.
nameserver 127.0.0.1
For checkup we’ll use the “dig” command for specific host record like following
The command will dig up the host records from the local DNS Server as follow

If the configuration is correct then the above command will not show any error. or if there is any error, we need to look at log file and troubleshoot the error. For detail about bind9 troubleshooting on Ubuntu Server please visit Ubuntu’s official “DNS Troubleshooting Page” or contact eRacks Systems’ expertise for the help.
Step 6: Bind9 Post installation Configurations for successful service run on Ubuntu Server.
When, the bind9 shows no error, we need to set the post installation configuration for Bind9 DNS Server Service to run successfully on Ubuntu Server. To do so, we’ll run these following commands for give appropriate access permission to the Bind9 Server Service and Allow through Ubuntu Firewall (ufw).At first, we’ll enable the bind9 DNS Server Service at the system start up with the following command. So that the Bind9 always starts automatically after the system reboot.
Then for the access permission for Bind9 on ubuntu server, we’ll run the following commands;
root@dnsmaster:~$ chown -R bind:bind /etc/bind
We’ll also configure the Ubuntu firewall in order to allow Bind9 through Ubuntu firewall (ufw). For configuring ufw we’ll run the following commands one by one.
root@dnsmaster:~$ ufw allow “Bind9”
root@dnsmaster:~$ ufw reload
root@dnsmaster:~$ ufw status
root@dnsmaster:~$ ufw status verbose
Then we’ll restart both servives Bind9 and the ufw with the following commands;
root@dnsmaster:~$ systemctl restart service.service
We could always restart and check status of the Bind9 DNS Server Service with following command.
root@dnsmaster:~$ service bind9 status
If everything is alright, the Bind9 status report will show no error. Beside, we could always visit this MxToolbox website for more detail reports and troubleshooting by entering the domain.
Asif Raihan May 8th, 2018
Posted In: How-To, Linux, Open Source, servers
Tags: linux, Open Source, tutorial, ubuntu
Building Your Online Presence
Because of digitalization, having a website is essential for individuals and businesses alike. It serves as your online identity and can significantly impact your visibility on search engines. Here’s a step-by-step guide to creating a website and ensuring it appears on search engines.
Having a website is crucial for a kids clothing website that sells modest girls dresses as it provides a platform to showcase and sell products to a global audience. A website allows customers to conveniently browse through the collection, learn about the brand, and make purchases from the comfort of their own homes. It also enables the business to establish an online presence, build trust, and reach a larger customer base, ultimately driving sales and growth.
Step 1: Choose Your Website Platform
Selecting the right platform is crucial. Popular options include WordPress, Wix, Squarespace, and Shopify (for e-commerce). Consider your website’s purpose and your technical proficiency when making this choice.
Step 2: Domain Name and Hosting
Choose a domain name that reflects your brand or content. Purchase domain hosting from a reliable provider. Many website builders offer domain registration as part of their services.
Step 3: Design Your Website
Design your website with your target audience in mind. Use clean and user-friendly layouts, readable fonts, and high-quality images. Ensure that your website is mobile-responsive to cater to smartphone users. You can visit sites like https://www.cleardigital.com/locations/web-design-houston/ and hire experts to do your site’s design.
Step 4: Create Quality Content
Content is king when it comes to search engine visibility. Regularly publish relevant, informative, and engaging content. Use proper headings (H1, H2, etc.), incorporate keywords naturally, and include internal and external links.
Step 5: Optimize for SEO
Search Engine Optimization (SEO) is essential for search engine visibility. Optimize your website by:
- Using relevant keywords in titles, headings, and content.
- Creating unique meta titles and descriptions for each page.
- Optimizing images with descriptive alt text.
- Ensuring fast loading times.
- Setting up an XML sitemap for search engines.
Hire SEO services to assist in targeting the right keywords.
Step 6: Mobile Optimization
Google prioritizes mobile-friendly websites in its search results. Ensure that your website looks and functions well on mobile devices to avoid a drop in rankings.
Step 7: Submit Your Website to Search Engines
Submit your website to search engines like Google, Bing, and Yahoo. Google Search Console and Bing Webmaster Tools offer valuable insights into your website’s performance.
Step 8: Build Backlinks
Backlinks from reputable websites can boost your search engine rankings. Create high-quality content that others will want to link to, and engage in ethical link-building practices.
Step 9: Monitor and Update
Regularly monitor your website’s performance using analytics tools like Google Analytics. Track your rankings, traffic, and user behavior. Update your content and website structure as needed to stay competitive.
Step 10: Be Patient
SEO is a long-term strategy. It may take several months to see significant improvements in your search engine rankings. Continue to provide valuable content and engage with your audience.
By following these steps and consistently working on your website’s content and optimization, you can create a strong online presence and improve your website’s visibility on search engines. Remember that SEO is an ongoing process, and staying up-to-date with best practices is key to long-term success.
joe October 30th, 2016
Posted In: How-To
Things to know before buying a rack cabinet
What is a Rack?
Racks are frame structures designed for mounting standard 19″ rack-mount equipment-servers, switches, routers, UPS systems, audio/video-regardless of vendor. They provide rack equipment organization, security and cable management while enabling airflow. There are two basic types: rack enclosures (also called rack cabinets) and open-frame racks.
Where are Racks used?
- Server rooms and data centers
- Audio/video installations
- Closets housing telecommunications equipment
- Industrial environments such as a factory floor
What type of rack do you require?
|
Floor Standing |
Wall Mount |
||
| Rack Enclosure | Open Frame | Rack Enclosure | Open Frame |

If access control and equipment protection are important to you, we recommend a Rack Enclosure |
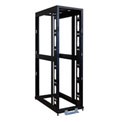
If you simply need an economical way to organize IT equipment, we suggest an Open-Frame Rack. |
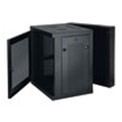
Wall Mount Racks are ideal for securely housing IT equipment in classrooms or sites with limited floor space. |

In small but secure locations, a wall mount open frame rack provides excellent airflow and easy access to wiring. |
What size of rack do you need?
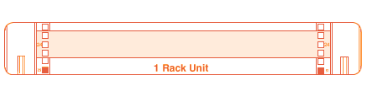
The height of a rack, and the height of equipment in it, is expressed in “rack units” (a rack unit is 1.75 inches, or 44.45mm). The actual height of a 42U rack is therefore 42 x 1.75 = 73.5 inches. A 2U server would occupy two of the available 42 rack units.
Be sure to make an accurate assessment of the amount of rack space you currently need, and allow for future growth.
Rack Depth
Determine the maximum rack depth required to mount your equipment in a floor-standing or wall-mount rack enclosure cabinet.
Floor-Standing Rack Depth Designations
| Rack | Depth (in.) | Ideal for… |
| Shallow | 27 | A/V equipment, limited space |
| Mid-depth | 31 | Limited space |
| Standard | 37 | Servers |
| Deep | 42 | Extra cables, improved airflow |
Wall-Mount Rack Depth Designations
| Rack | Depth (in.) | Ideal for… |
| Patch-depth | < 16 | Patch panels |
| Switch-depth | 16 – 23.99 | Switches |
| UPS-depth | 24 – 31.99 | UPS systems |
| Server-depth | > 32 | Servers |
Can the rack handle the weight of your equipment?

Do you need any special features?
|
PCI-Compliance
The Payment Card Industry (PCI) Data Security Standard requires that all companies that process, store or transmit credit card information maintain a secure environment. |
Shock Pallet Packaging
Shock Pallet models feature additional reinforcement and shock-absorbing material for safely re-shipping loaded racks to remote sites.
|
Expansion
Expansion models can be bayed together easily to form rows, which is ideal for hot-aisle/cold-aisle cooling techniques.
|
Disassembled Shipping
Racks ship fully assembled for easy installation. However, sometimes doorways or tight spaces cannot accommodate fully assembled racks, so knockdown models ship disassembled for easier transportation. |
Heat Removal
Thermal Duct Rack Enclosures directly connect to a facility’s exhaust system to remove hot air not only from the rack but from the entire room.
|
Co-Location
Some data center sites host multiple users in a single Rack Cabinet. Co-location models have two separate compartments to allow secure access to the correct users.
|
Extra Width
In addition to extended-depth models, extra-wide models provide extra space for cables and improved airflow.
|
TAA-Compliance
GSA schedule purchases and other government contracts require products that comply with the Trade Agreement Act (TAA).
|
Seismic Protection
Seismic Enclosures have a rugged welded construction and are tested to Seismic Zone 4 standards, making them ideal for sites that are earthquake-prone or are subject to regular vibration, such as an airport or factory. |
|
|
Cable Management & Accessories
Shelves, mounting rails, stabilization, cooling, patch panels, hardware kits, casters, and more enable custom installations to accommodate any space limitation or expansion requirement.
|


If you are in need of a rack cabinet, enclosure, or open-frame rack, or
have any questions, or just need advice on your installation, please do
not hesitate to contact us at info@eracks.com, or use our contact form at: https://eracks.com/contact/
Shahzad May 23rd, 2016
Posted In: How-To
No Surprise: “The Hybrid Cloud Helps Midsize Companies…”
 This is what we’ve been saying for years now – that the best path to the cloud is to:
- Own your core / foundation infrastructure and hardware, at least one server worth, and
- Architect it properly with DRY DevOps best-practices and repeatability, to scale into the cloud as needed to meet spot demand.
Hybrid clouds are a strategic combination of public and private cloud environments, offering businesses the flexibility and scalability they need to meet their unique requirements. One crucial component of hybrid clouds is the software that enables seamless integration and management across multiple cloud platforms like Cloud 9 Software. With hybrid cloud software, organizations can leverage the best features of public and private clouds while maintaining control over sensitive data and applications. This software facilitates the seamless movement of workloads between on-premises infrastructure and public cloud providers, ensuring optimized performance, enhanced security, and cost efficiency. By harnessing the power of hybrid cloud software, businesses can create a unified and cohesive IT infrastructure that empowers them to achieve their digital transformation goals and drive innovation in the ever-evolving digital landscape.
Here’s the reference:
The Hybrid Cloud Helps Midsize Companies Compete This e-book is based on insights and recommendations by the Ventana Research, benchmark research report, “Business Technology Insights: Six Key Trends in Optimizing IT for Competitive Advantage.”
joe December 23rd, 2015
Posted In: How-To, servers, Uncategorized
Tags: Best-Practices, Cloud, DevOps, Hybrid Cloud
UEFI and the eRacks/ZENBOOK13
 Minty Zenbook
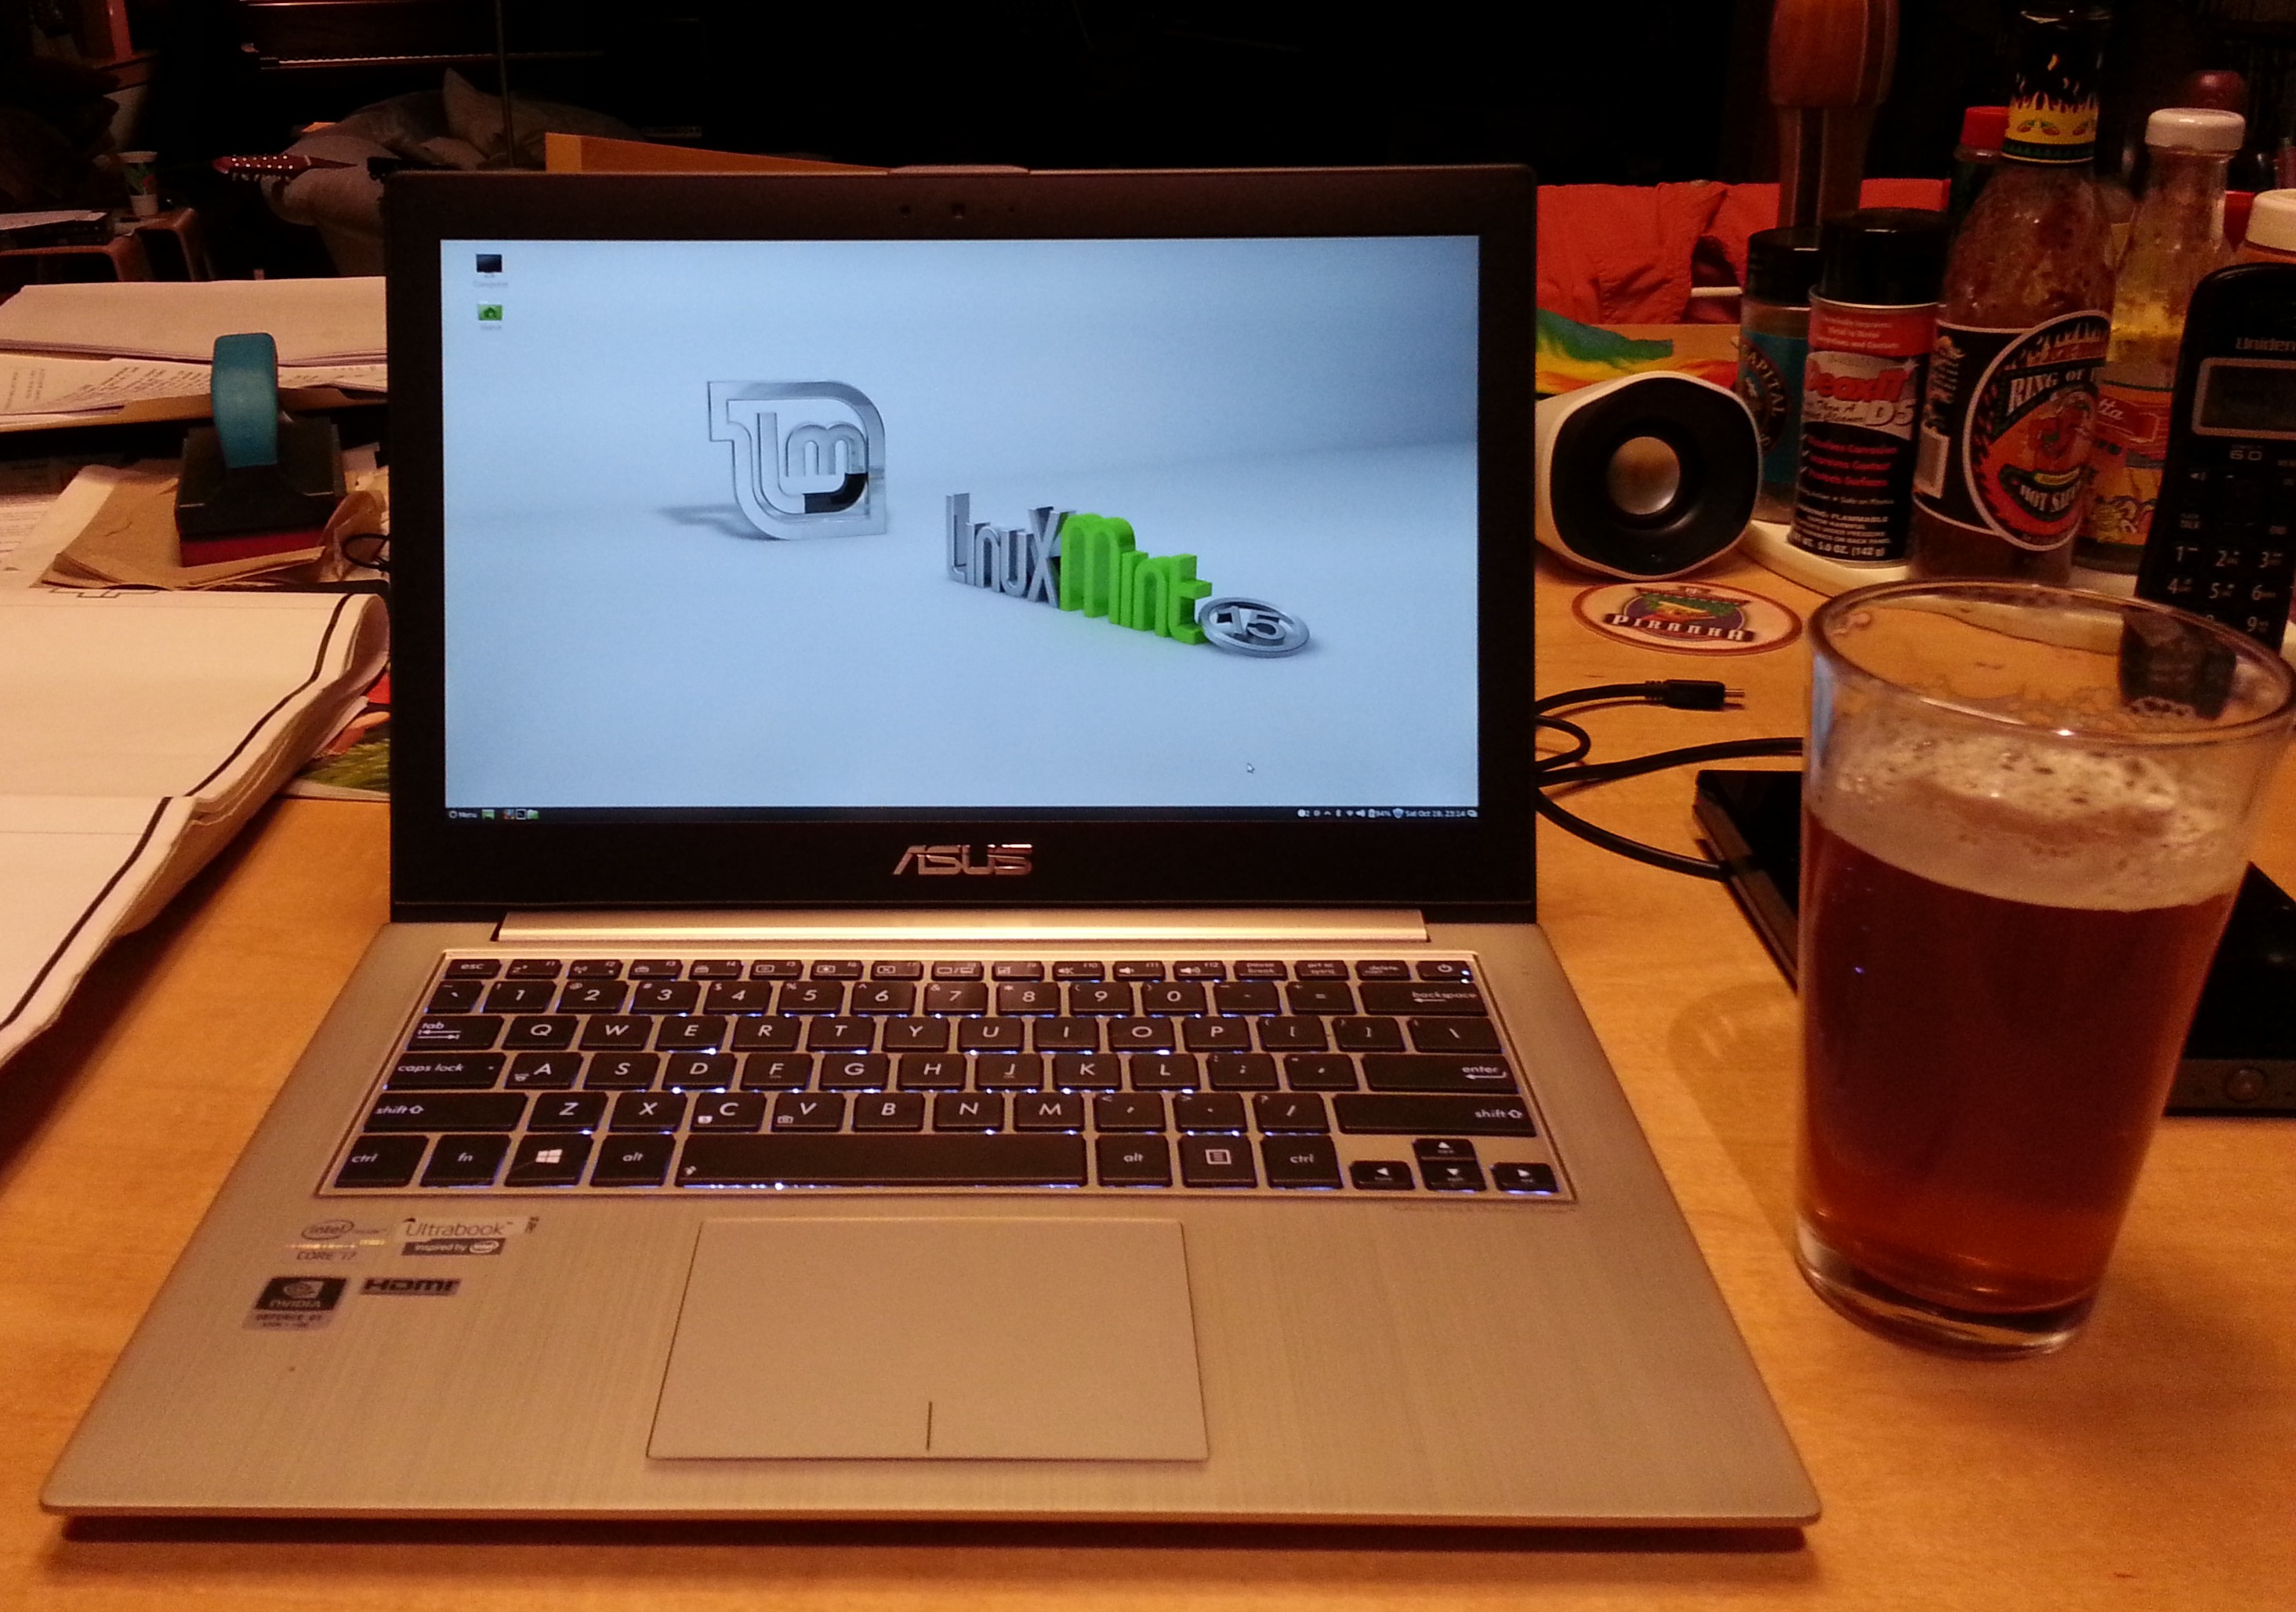
I am typing this on a nifty new eRacks/ZENBOOK13, with Linux Mint15 installed.
This is a slightly newer rev of the very pretty Asus Zenbook line, with twin 128GB SSD modules installed in a small carrier which screws into the standard 2.5″ HD space (it could also be replaced or upgraded with one of our standard HD/SSD choices, here: http://eracks.com/products/laptops/ZENBOOK13/)
This post will walk you through what we had to do for the installation, with the details.
Installation Cookbook
- Boot to an Ubuntu 13.04 install disk. (13.10 should work, or Ubuntustudio works too, that’s what I used). For some reason, the Mint installer doesn’t install the default EFI boot choice properly, so you have to start with Ubuntu, then replace it with Mint. Read on.
- Using gparted (fdisk could work, too), delete the partition tables on /dev/sda and /dev/sdb, and replace the GPT-based partition tables with with msdos-type partition tables.
- Install Ubuntu on the 1st of the two SSDs. Don’t worry about the 2nd disk (_yet_). Be sure to check the “Install with LVM” box after you select the default “Erase and install…”.
- Reboot into Ubuntu, and note the partitions cerated.
- Boot into a Mint 15 Install disk.
- Install Mint15 into the same partition structure – in other words, do NOT select the default “erase and install…” , but rather the “Something else” choice, and tell it to put the root partition on the same partition you noted in step 4.
- Install rEFInd (http://www.rodsbooks.com/refind/) from a rEFInd install disk, that you downloaded and burned from there. (I used v0.74). Be sure to install it in the /boot/efi partition (typically /dev/sda2) created earlier. The reason to install rEFInd, is it’s an invaluable tool to use to boot from any EFI-capable location on your computer, and will be used later on. I put mine in EFI\refind\refind_x64.efi
- Be sure to also copy shell64.efi into /boot/efi/EFI/tools/, so rEFInd can find it, and show you the EFI Shell choice & icon.
- Boot from rEFInd.
- Choose the EFI shell.
- Using the bcfg command, (help -v bcfg is your friend!), list the boot choices, and verify that “ubuntu” is there.
- Add “mint” as a boot choice, pointing to EFI\linuxmint\grub64.efi – mimic the way the “ubuntu” boot choice is done.
- Reboot into the boot menu (hold Esc down during the Asus logo) and verify that “mint” and “rEFInd” are there.
- Test them both out – rEFInd should also give other interesting choices you can try out.
- You should be able to launch Mint from either the “Mint” choice in the Asus boot (holding Esc), or from the Mint choice in rEFInd.
- Optionally, you can add the 2nd SSD (mentioned in step 3) to the main volume using LVM, to use the full 256GB.
That’s it!
Wrap and Beverage
I must say, this is a BEAUTIFUL machine – I want one myself!
Between the FullHD display, and being roughly the same thickness and sizeas the magazines I often carry into any given bar / restaurant here in Los Gatos, this is a joy compared to my regular 1920×1080 Asus laptop..
…And it beats the heck out of a tablet..
…And the battery life seems great, it barely made a dent in the hour or so I spent surfing with it while drinking my beverage of choice at one of the local establishments here.
…And did I mention it’s screaming fast, with the i7 CPU and 10GB RAM?!
Bon Appetit,
j
joe October 20th, 2013
Posted In: How-To, Laptop cookbooks, New products, News, Open Source, Products, ubuntu
Tags: Dual-boot, EFI, FHD, FullHD, Mint, rEFInd, rEFIt, ubuntu, UEFI