
eRacks Systems Tech Blog
Open Source Experts Since 1999
LSI Logic 6Gbps mps Driver for FreeBSD 8.2-RELEASE
EDIT: Binary modules have now also been provided for 7.4, 8.1 and 8.0. The instructions below should apply to all three, with the exception that you’ll want to download either mps-bin-7.4.tar.gz, mps-bin-8.1.tar.gz or mps-bin-8.0.tar.gz.
Unfortunately, the mps driver, which supports LSI Logic’s 6Gbps series of RAID controllers, didn’t make it into the FreeBSD kernel until after 8.2-RELEASE. As a result, FreeBSD users who require this driver are forced to either install 8-STABLE — which, despite the name, is a development branch — or pull the driver’s source code from 8-STABLE and build it on FreeBSD 8.2-RELEASE. Since we recently needed to use the mps driver and had to stick with a production-ready release, we opted for the second option. Along the way, we decided to bundle up the driver’s source to make the task easier for those who don’t want to install a development branch, and to pre-compile binary modules for those who wish to install 8.2-RELEASE directly to the hardware RAID array.
If you have a separate hard drive for the operating system that’s not on a 6Gbps LSI controller and simply use the hardware RAID for additional storage, you can do a normal install of FreeBSD 8.2-RELEASE to the hard drive, boot into the new system and perform the following steps:
1) Download mps.tar.gz
2) Extract it, cd to the ‘mps’ directory and type make && make install
3) Edit /boot/loader.conf and add the following line at the end: mps_load="YES"
4) Reboot (or type kldload mps.ko without rebooting)
If instead you want to install 8.2-RELEASE directly to an array on your 6Gbps LSI controller, a few extra steps are required.
First, download mps-bin.tar.gz, extract it by typing tar -zvxf mps-bin.tar.gz and place the contents on some form of removable media mountable by FreeBSD. A USB thumb drive, a floppy disk or a CD will suffice (though, a CD would be an awful waste of space… :))
Second, make sure to download the FreeBSD DVD and not the CD. We will require the live filesystem that’s contained only on the larger DVD. Once the installer is running, choose your language as usual, then select “Fixit” instead of the usual installation method. Choose the CDROM/DVD option.
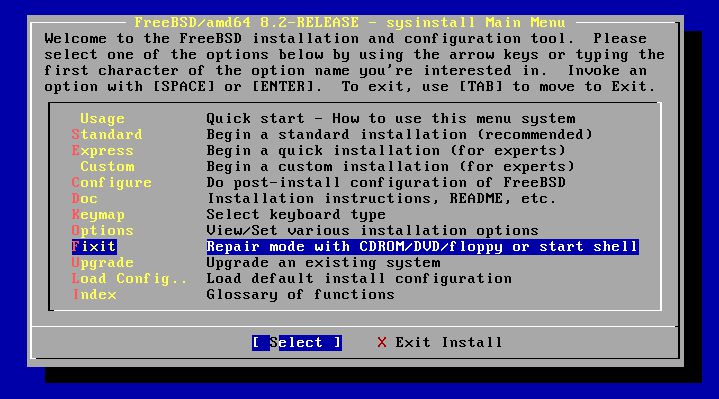
Figure 1: Select 'Fixit' instead of an installation method
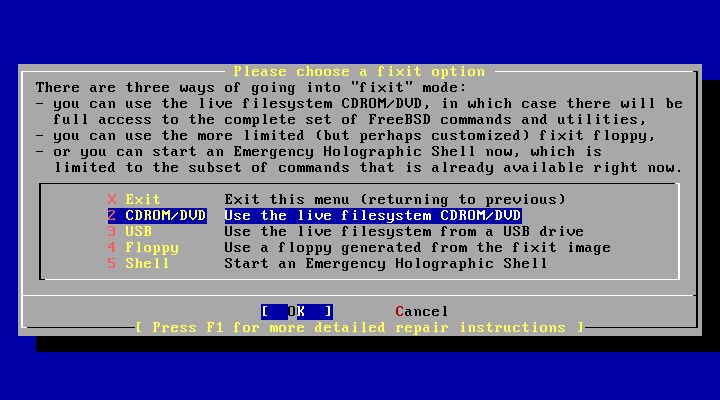
Figure 2: Select 'CDROM/DVD'
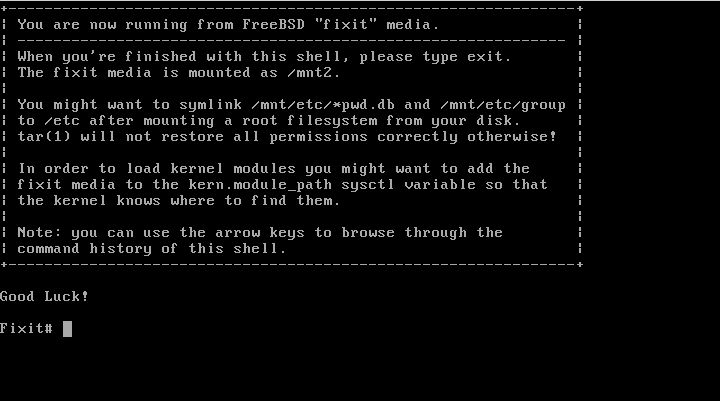
Figure 3: The 'Fixit' Prompt
Now, insert your removable media. For our example, we’ll assume a USB thumb drive with a device node on /dev/da0.
Before continuing, let me first warn you that the ordinary mount command will most likely not work. Usually, mount will determine the filesystem type and automatically call the appropriate binary. However, the way the live filesystem is setup, this doesn’t work — or at least, it didn’t work on my machine. So instead, you’ll want to call the command for your filesystem type directly. If it’s a CD, that command will be mount_cd9660. If you’re using a USB thumb drive with a FAT32 filesystem on it (as we will be in our example), the command will be mount_msdosfs.
Assuming our example with the USB thumb drive, you’ll issue the following commands:
#mount_msdosfs /dev/da0 /mnt
#cd /mnt/mps-bin/i386 for 32-bit (or #cd /mnt/mps-bin/amd64 for 64-bit)
#kldload ./mps.ko
#exit
At this point, you’ll be returned to the FreeBSD installer. Make sure to re-insert the DVD, then continue with the installation as usual. Once the installation is complete, don’t reboot! If you do, you won’t be able to start up FreeBSD, as we still have to install our kernel module and tell the boot loader to load it on boot.
So, now that the installation is finished, re-insert the DVD and return to the Fixit prompt. Once again, choose the ‘CDROM/DVD’ option. Assuming our USB thumb drive on /dev/da0 from before — the commands you use will differ based on the media you choose — type the following commands:
#mount_msdosfs /dev/da0 /mnt
#cd /mnt/mps-bin/i386 for 32-bit (or #cd /mnt/mps-bin/amd64 for 64-bit)
#./install.sh
If all goes well, the shell script will terminate without any output. Incidentally, it’s worth mentioning that the newly installed root filesystem is mounted on / when you enter the Fixit environment after installation. Now that we have the kernel module installed, we just need to tell FreeBSD to load it on boot. To do so, we just have one last command:
#echo 'mps_load="YES"' >> /boot/loader.conf
That’s it! Just unmount your media and exit the Fixit prompt.
#umount /mnt

#exit
At this point, you can exit the installer as usual and reboot. Once the system starts, you should find yourself face to face with a shiny new instance of FreeBSD 🙂
james August 10th, 2011
Posted In: FreeBSD, How-To, Open Source
Tags: 6gbps, 7.4-release, 8-stable, 8.0-release, 8.1-release, 8.2, 8.2-release, binary, driver, freebsd, howto, kernel, kernel module, lsi, lsi logic, module, mps, Open Source, raid, source, stable, tutorial
Complete GPT Support Coming to FreeBSD 9.0
![]()
According to the release notes for FreeBSD 9.0 CURRENT:
[amd64, i386] A new gptboot boot loader has been added to support
booting from a GPT labeled disk. A new boot command has been added to
gpt(8), which makes a GPT disk bootable by writing the required bits of
the boot loader, creating a new boot partition if required. [MERGED]
This is excellent news for those who wish to boot directly from hard drives larger than 2TB. GPT has been partially supported for some time by previous versions of FreeBSD, but this will be the first release in which booting from a GPT partition table is supported. At the moment, 9.0 is a “bleeding edge” development branch and has not yet been released. However, it’s likely to be sometime this summer. Stay tuned!
james July 1st, 2011
Tags: boot, boot loader, bootloader, freebsd, gpt, guid partition table, operating system, partition, partition table
4TB Hard Drives, Coming to a System Near You!
Earlier this year, Samsung announced it had achieved 1TB/platter, allowing them to produce 4TB hard drives. A prototype was subsequently shown off at the CeBIT trade show. Samsung refused to provide a projected date for its commercial release, but did reveal that they intended to begin shipping them in 2011. There are only 6 months left in 2011. Let’s see what happens!
For further details, check out this link: http://www.xbitlabs.com/news/storage/display/20110308081634_Samsung_Shows_Off_Prototype_of_4TB_Hard_Disk_Drive.html
james June 17th, 2011
Posted In: Uncategorized
It May be Debian, but it’s also FreeBSD!
Debian. That’s a Linux distribution, right? Debian is (understandably) strongly associated with Linux. But, did you also know that a port of Debian exists that’s built on top of the FreeBSD kernel?
Say What?
The project is called KFreeBSD. At first glance, it may sound like a contradiction. After all, how can you run Linux on FreeBSD? The answer to this apparent paradox is that you’re not running Linux at all. Linux is just a kernel, and actually has little to do with the rest of the operating system. An entire Linux-based OS consists of much more, specifically a hierarchy of libraries and executables. These libraries and executables don’t have to run on top of Linux. In fact, they can operate on any *NIX-like platform. All the Debian developers have done is to port these libraries and executables over to the same kernel used by FreeBSD.
But, What’s it Good For?
Lots of stuff. Unlike Linux, the FreeBSD kernel has support for ZFS. Unlike Linux, the FreeBSD kernel has built-in support for NDIS drivers. Unlike Linux, the FreeBSD kernel interfaces have changed relatively little and have remained largely consistent.
Ok, then why not just use FreeBSD? You may prefer the Debian package manager to FreeBSD’s ports. Perhaps you prefer a Debian-style init system. Maybe you’d like to take advantage of code licensed under the GPL without having to compile third party kernel modules, like built-in support for ReiserFS or XFS.
For more information about why you might be interested in giving KFreeBSD a try, have a look at this: http://wiki.debian.org/Debian_GNU/kFreeBSD_why.
Ok, I’m Interested. Is it hard to install?
Not at all! If you know how to install Debian Linux, you also know how to install KFreeBSD. The process is identical. When you first boot off the CD image, you’re presented with the following GRUB prompt:
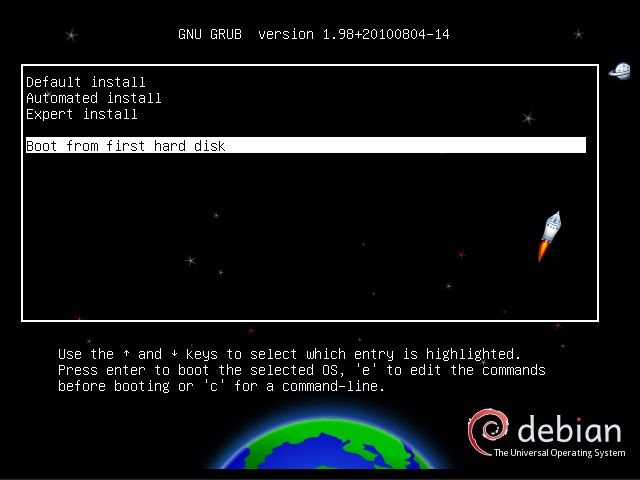
CD Boot Prompt
Once the installer starts running, you will see the following screens throughout the installation process:

Language Selection

Setting the Hostname

Disk Partitioning

Disk Partitioning

Installing Packages
Look familiar? 🙂
Is it Easy to Use?
Yes! KFreeBSD is as easy to use as Debian Linux. The only unfamiliar sight you may encounter is when the kernel starts to boot:

Booting the FreeBSD Kernel
After all the foreign kernel messages, you’ll immediately recognize the init scripts that are being called, as well as the login prompt when the system is ready:

KFreeBSD Login Prompt
Want to install an application? Simply type apt-get install <application>, just like you would on Linux:

Installing a Package
Do you prefer to use a GUI? Simply choose to install a Desktop Environment during installation and you’ll be presented with the following GDM prompt after the system boots:

GDM Login
Once logged in, you’ll get to navigate around using the already very familiar GNOME window manager:

GNOME Window Manager
What’s the Catch?
Unfortunately, there are a few. For starters, due to a bug in the Debian userland, wireless network adapters, while supported by the kernel, do not function. This can be worked around by running the FreeBSD version of ifconfig in a chroot jail. Also, there’s only partial support for Java via GIJ. This very incomplete implementation does not include Swing. The Sun JDK has yet to be ported, though there’s hope for the future on this point, since Sun’s Java does run natively when linked against the FreeBSD userland. Finally, the port is still experimental, which means you will likely encounter bugs.
For more information about KFreeBSD and the trade-offs of using it versus Debian Linux, consult the FAQ.
Conclusion
Part of what makes Open Source so attractive is choice. With the Debian userland now at least partially ported over to the FreeBSD kernel — a third port also exists based on GNU’s HURD — Debian users now have more freedom than before to mix and match technologies according to preference. While KFreeBSD’s experimental and in some respects incomplete status precludes it from ordinary use, it is nevertheless an interesting project, and one that will serve its users well when complete.
james June 15th, 2011
Posted In: Open Source
USB 3.0 and SATA 3: Is It Worth It?
Two new high speed buses have recently become available to consumers, USB 3.0 and SATA 3. But are they worth considering now, or should you wait until they’ve been around for a while? Let’s first examine the differences between these interfaces and their predecessors, then take a look at the devices that are available and their associated costs and finally determine whether or not we should consider investing in them so soon.
What is USB 3.0?
USB 3.0 is the latest generation of the Universal Serial Bus standard, and was released in November 2008. USB has been in existence since 1994 and has been popular since 1998 with the release of the 1.1 revision, thanks to the true plug and play nature of the interface.
USB 2.0, the most common revision of the standard in use today, was released in April 2000, and supports a theoretical maximum data transfer rate of 480 Mbits/s, or 60MB/s. By contrast, USB 3.0, which was fully specified in November 2008, supports a theoretical raw maximum of 5 Gbits/s, or ~600MB/s, and is believed by the developers of the standard to be reasonably capable of sustaining 3.2Gbits/s, or ~400MB/s. Thus, USB 3.0 is roughly 10 times as fast as its predecessor.
Devices supporting USB 3.0 have been available to consumers since January 2010.
What is SATA 3?
Similarly, SATA 3 is the successor to the highly successful SATA 2 standard. Short for Serial Advanced Technology Attachment, SATA has been around since 2003. Both SATA 1 and SATA 2 were widely adopted and quickly grew popular, superceding the archaic IDE interface.
The final revision of the SATA 3 standard, released in May 2009, supports a theoretical maximum raw throughput of 6Gbits/s (in practice, peak throughput reaches ~600MB/s), twice the bandwidth of SATA 2 at 3Gbits/s, which itself is twice the bandwidth of SATA 1 at 1.5Gbits/s.
Devices supporting SATA 3 have been available to consumers since June 2010.
Is It Worth It?
First, let’s consider USB 3.0. Currently, there are a few USB thumb drives and external hard drives available that take advantage of the new standard. Unlike USB 2.0, which only supports a maximum of 60MB/s, USB 3.0 is capable of sustaining the highest data transfer rates hard drives can offer and more. USB 3.0 thumb drives are significantly more expensive than their USB 2.0 counterparts, but the external hard drives aren’t that much more expensive (the price difference between a USB 2.0 and a USB 3.0 external 1TB hard drive is only $10-$20), and given that two USB 3.0 ports will only cost you somewhere around $50, it might be worth upgrading if you have a need to access external storage quickly.
Now, what about SATA 3? Right now, you can purchase a Western Digital 1TB SATA2 drive for about $70.00. Conversely, a Western Digital SATA 3 disk of equal capacity will cost you about $95.00. The price difference between these two is only $25.00, so it’s not that much more expensive if you decide you’d like to double your bandwidth.
Keep in mind that if you’re using a 1x PCI-E SATA 3 controller, you won’t get the full 6Gb/s, but only ~4Gb/s. This is a limitation of the 1x PCI-E slot. With this in mind, if you’re not going to use an onboard SATA 3 controller, you’ll want to get a 4x card.
What eRacks Can Do for You
eRacks prides itself in staying up to date with the latest technologies. We currently offer on our high end models, upon request, support for both USB 3.0 and SATA 3, and can also build custom systems. Visit the eRacks website and place an order or request a quote today!
james September 7th, 2010
Posted In: Uncategorized