
eRacks Systems Tech Blog
Open Source Experts Since 1999
Ubuntu 18.10 “Cosmic Cuttlefish” is available.
Ubuntu 18.10, aka ‘Cosmic Cuttlefish’, is available now on all eRacks systems.

Ubuntu 18.10 ‘Cosmic Cuttlefish’ supported with 9 months of security updates, bug fixes and select app upgrades. Users of it will be able to upgrade to Ubuntu 19.04 when it’s released in April, 2019.
When the release of a new version as Ubuntu 18.10 ‘Cosmic Cuttlefish’, the first question arrives in mind, “What are updated comparing with the current Ubuntu 18.04 LTS version?”

The most important update in ‘Cosmic Cuttlefish’ is, it has updated Linux Kernel. Ubuntu 18.10 has Linux Kernel 4.18. This Kernel version has some improvements for AMD and Nvidia GPU, USB Type-C and Thunderbolt, and performance optimizations in CPUfreq among several other features.
Another important thing is having faster installation and boot with new compression algorithms. Working with new compression algorithms like LZ4 and ztsd, ‘Cosmic Cuttlefish’ is supposed to have around 10% faster boot. The installation will be slightly faster as well. Which is definitely the good news for all Ubuntu users.
As always Ubuntu 18.10 will have this new GNOME version. Most of the visual and under the hood changes in GNOME 3.30 will be seen in Ubuntu 18.10 as well.
Taking cue from Fedora 28, Canonical is also working to improve battery life for laptops. Linux kernel has options to switch HDD controllers, USB controllers and other such devices to a low power state when not in use. This lowers the overall power consumption and thus improves the battery life.
Ubuntu 18.04 was supposed to have a new look with the community developed Community theme. This theme could not be completed in time for the 18.04 release. But Ubuntu 18.10 has it. The ‘Cosmic Cuttlefish’ has the Yaru Community theme installed by default, giving it a ravishing fresh look.
Some other changes in the Ubuntu 18.10 ‘Cosmic Cuttlefish’ are as follows:
- Support for fingerprint scanner.
- Startup time boost and XDG Portals support for Snap applications.
- 32-Bit support diminishing from flavors.
- UI and UX improvements to GNOME Software (possibility).
- DLNA support for connecting Ubuntu with DLNA supported Smart TVs, tablets and other devices.
- A new and improved installer (less likely to be completed before 18.10 release).
- Ubuntu Software removes dependencies while uninstalling software.
- Ubuntu Software will show a green verified tick for Snap applications developed by the owner of the brand. The same can be found on the recently redesigned Snap store website.
Ubuntu 18.10 ‘Cosmic Cuttlefish’ is a modest update compared to 18.04. The vast majority of notable improvements are tucked away out of sight, ‘under the hood’. Ubuntu 18.10 feels faster than 18.04, But you can’t “see” the changes that shape Ubuntu 18.10 ‘Cosmic Cuttlefish’, you almost certainly will feel them.
Asif Raihan October 24th, 2018
Posted In: Linux, New products, News, Open Source, Operating Systems, ubuntu
Tags: linux, New products, News, Open Source, operating system, ubuntu
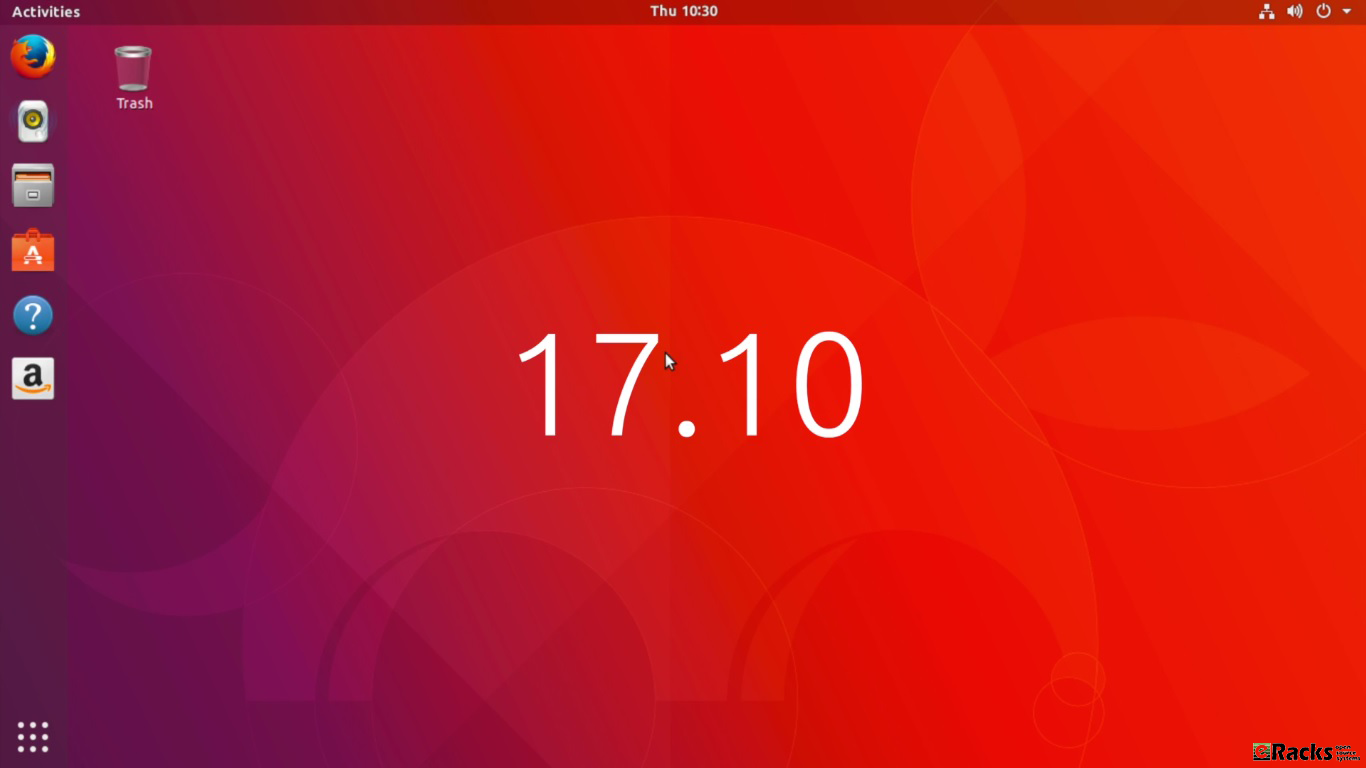
Ubuntu 18.04 LTS (Bionic Beaver) is out!
Ubuntu 18.04 LTS (Bionic Beaver) has been released on 26th April 2018 following its planned release schedule. Canonical named this Long Term Support version with codename “Bionic Beaver”, where ‘Bionic‘ is an adjective meaning to have or use an artificial, typically electromechanical, body part. And a ‘Beaver‘ is large nocturnal rodent able to swim in water. Beavers are famous for building dams, canals, and homes along river banks.

Ubuntu 18.04 LTS (Bionic Beaver)
On 26 January 2018, Will Cooke (Desktop Engineering Manager) wrote in an Ubuntu’s Blog post about Ubuntu 18.04 LTS (Bionic Beaver) as, “Bionic Beaver, the codename for the next Ubuntu LTS release, is due in April 2018 and will ship with both the traditional Xorg graphics stack as well as the newer Wayland based stack, but Xorg will be the default.”
Ubuntu 18.04 LTS (Bionic Beaver) Support lifespan
Ubuntu 18.04 is an LTS version, which means that the ‘main’ archive of Ubuntu 18.04 LTS will be supported for 5 years until April 2023 from its release date April 2018. Ubuntu 18.04 LTS will be supported for 5 years for Ubuntu Desktop, Ubuntu Server, and Ubuntu Core. Ubuntu Studio 18.04 will be supported for 9 months. All other flavors will be supported for 3 years.
Compared with the previous Ubuntu LTS edition (Ubuntu 16.04.4 LTS Xenial Xerus), there are a lot of changes in the new Ubuntu LTS release (Ubuntu 18.04 LTS Bionic Beaver).
Let’s see what’s new in Ubuntu 18.04 LTS Bionic Beaver release:

What’s new in Ubuntu 18.04 LTS (Bionic Beaver)
Xorg will be used by default instead of Wayland
Ubuntu 17.10 used the Wayland graphics server by default. With Ubuntu 18.04, the default graphics server will change to Xorg. Wayland will still be available as an option, but Xorg will be the default, out-of-the-box one. The Ubuntu Desktop team decided to go with Xorg for its compatibility with services like Skype, Google Hangouts, WebRTC services, VNC and RDP, and more.
Xorg with Ubuntu 18.04 LTS
Ubuntu 18.04 minimal install option
Ubuntu 18.04 will use Ubiquity, the Ubuntu installer you’re probably already familiar with. Though the developers plan on implementing Subiquity, 18.04 will use Ubiquity, which will have a new “minimal install” option that you can choose during setup. Minimal install basically means the same Ubuntu, but without most of the pre-installed software. The minimal install option saves about 500 MB, and is only 28MB in size when it is compressed.
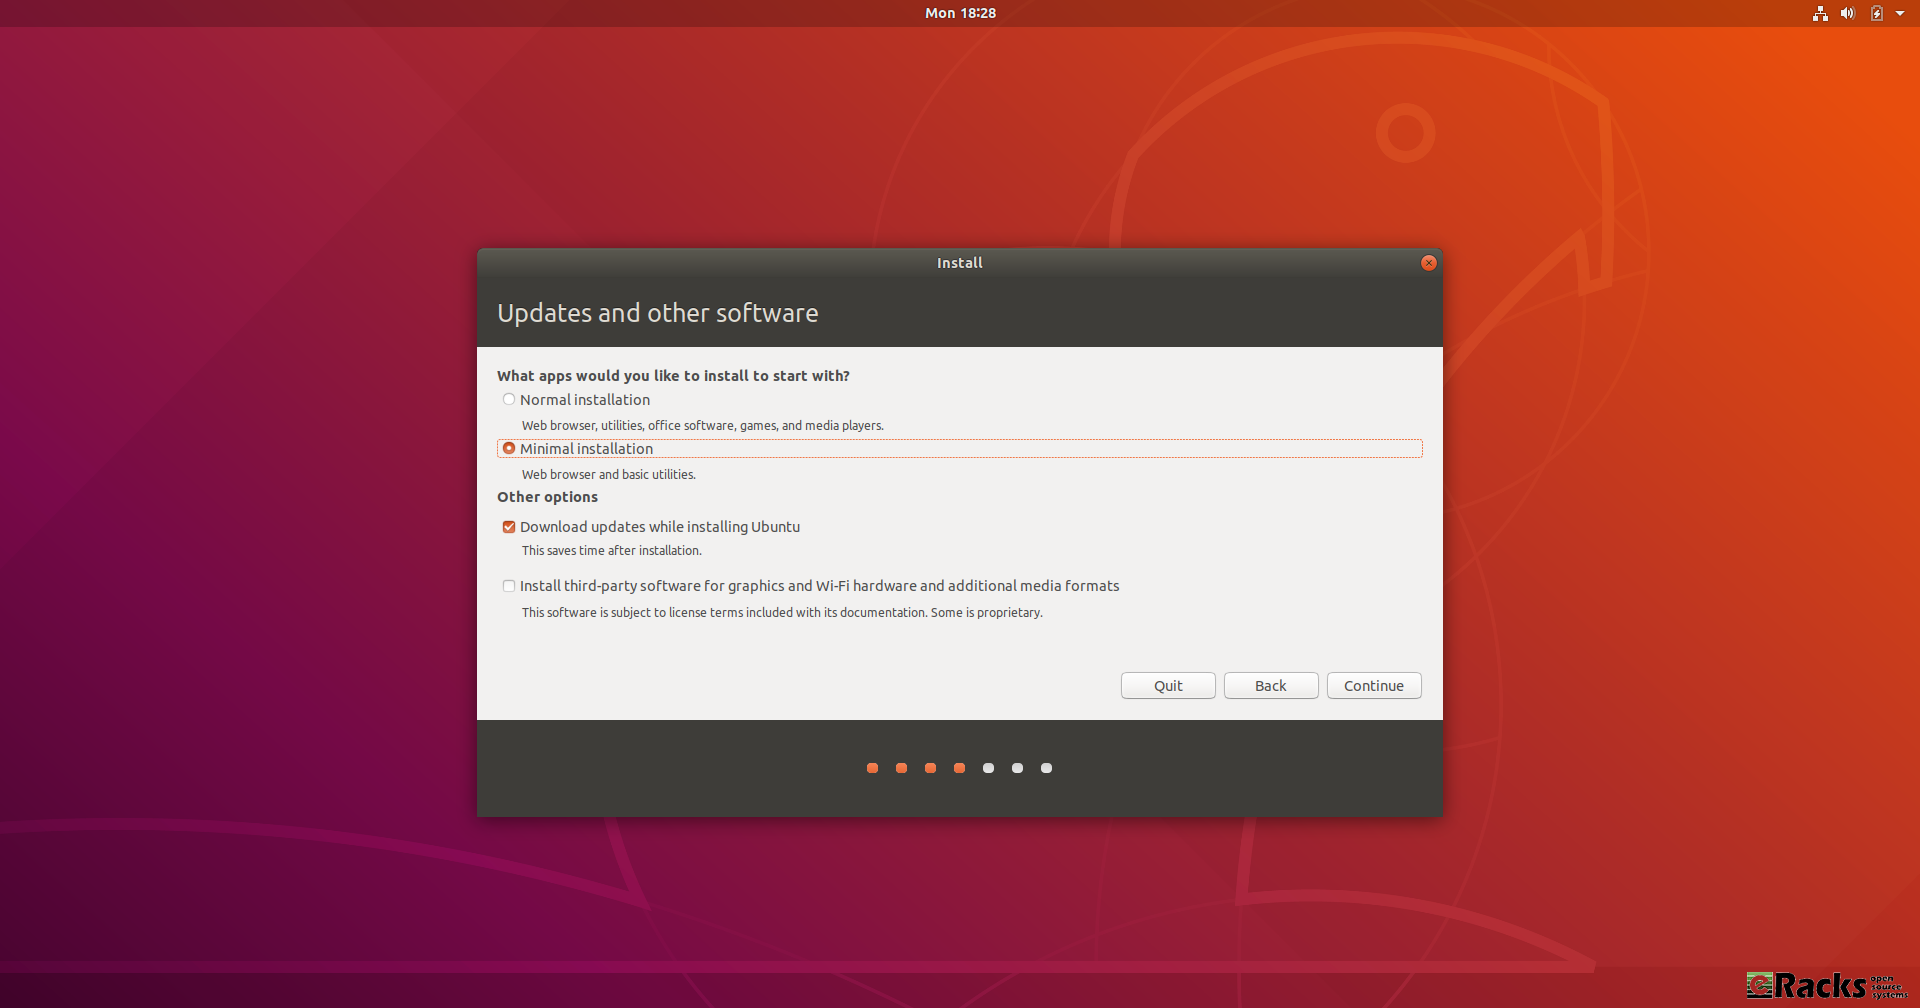
Minimal Install
CPU usage improvements and bug fixes
The most notable improvement will be in CPU usage. The Ubuntu Desktop team has greatly improved and reduced the CPU usage caused by Ubuntu 18.04. They’ve also fixed hundreds of bugs and made hundreds of other small improvements.
Software, updates and other tweaks
If you missed the Ubuntu Welcome tool you can still enable LivePatch via Software & Updates. Open Activities and search for Software & Updates.

Software & Updates.
From the Updates tab you can enable and disable Live Patch:

Enable/ Disable Live Patch
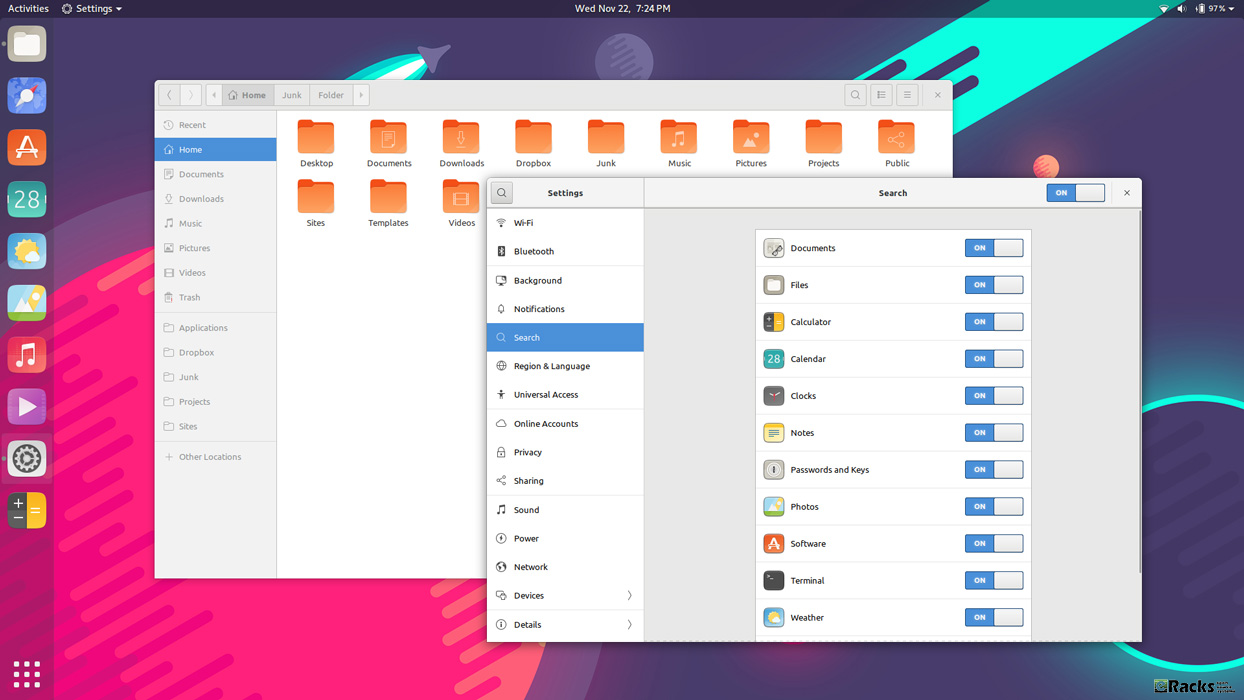
There are some other useful settings in GNOME Control Center which you might like to toggle:
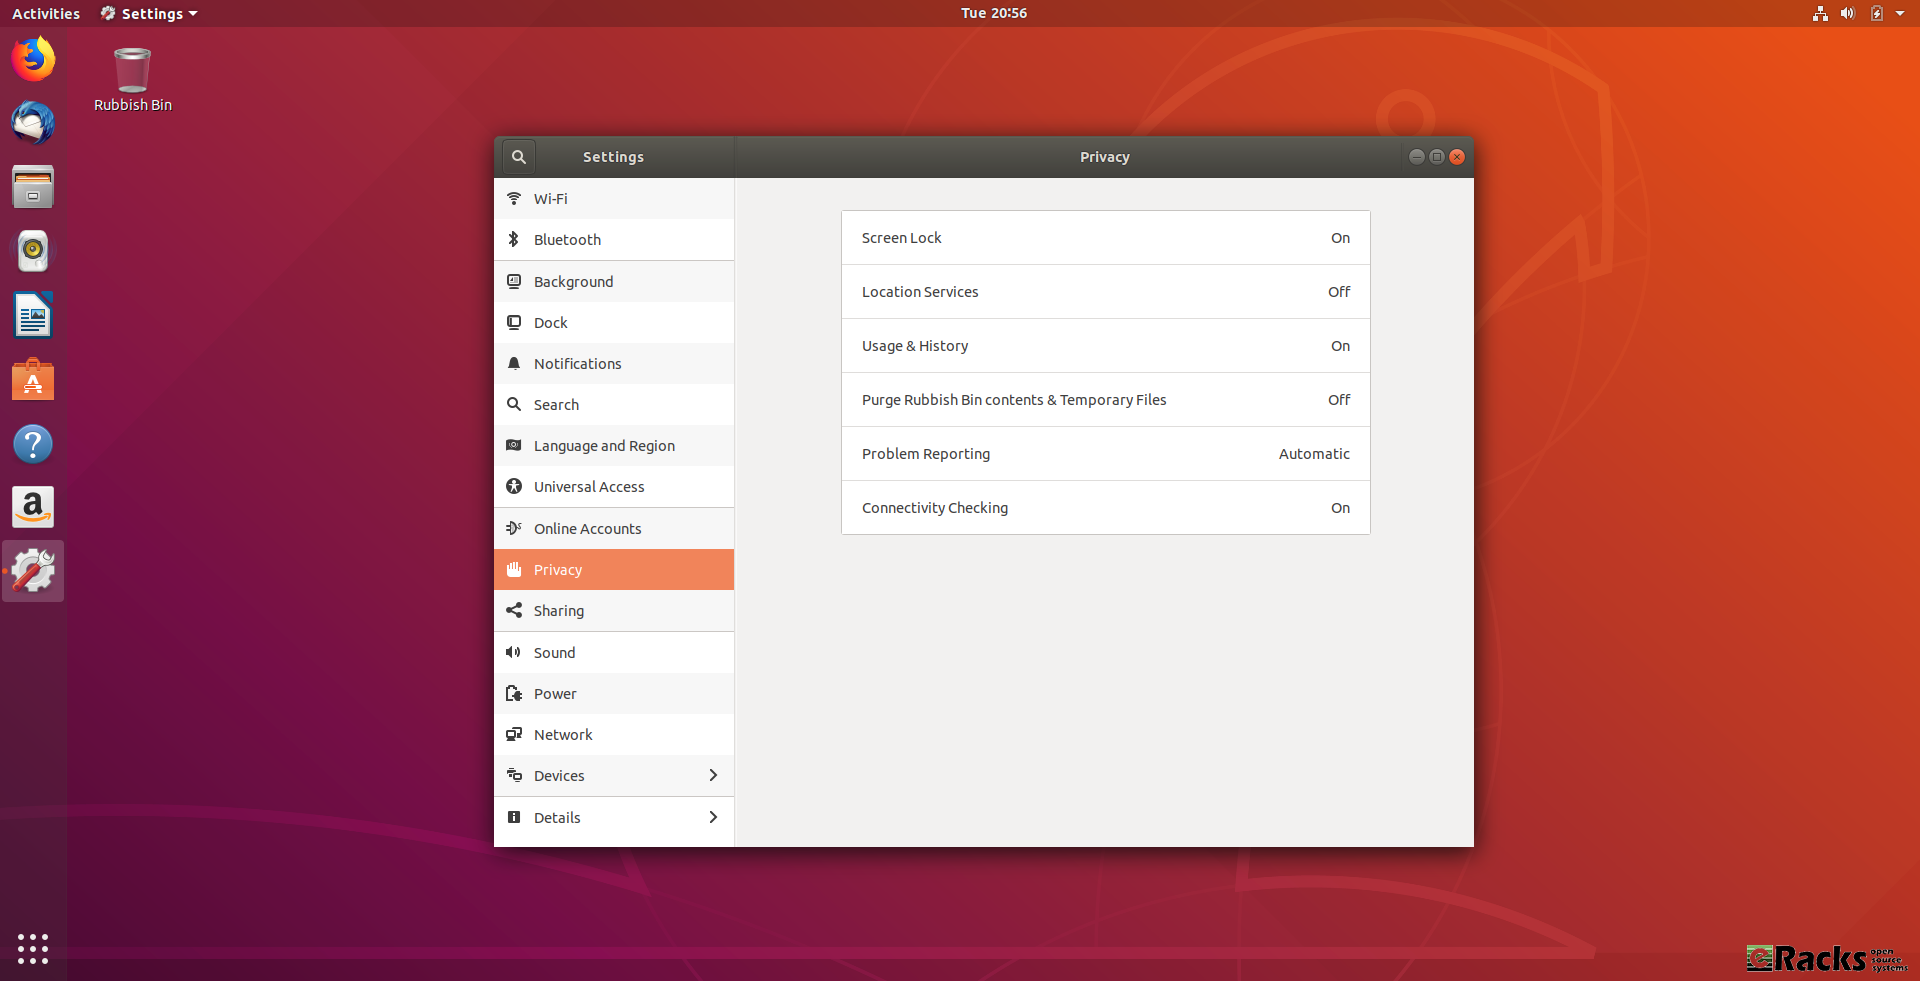
GNOME Control Center
By enabling Location Services your clock can automatically switch to the correct time zone for where you are which is useful for frequent travelers. By enabling automatic error reporting crash reports will be automatically generated and uploaded. By collecting these error reports, Canonical can easily spot trends in common problems and make sure they work on getting the most common bugs fixed first.
Ubuntu 18.04 Desktop will have a new theme
Ubuntu 18.04 will ship with Ambience and it won’t use a new theme by default. The new Communitheme won’t even be installed. The Desktop team has decided to do this for various reasons, including bugs and lack of testing.
Luckily, you can still use the Communitheme, but you’ll have to install it yourself. The Communitheme can be installed easily via a snap, but you can always install it manually.
New Communitheme with Ubuntu 18.04 LTS
GNOME Desktop Environment
Ubuntu started using the GNOME desktop environment with Ubuntu 17.10 instead of the default Unity environment. Ubuntu 18.04 will continue using GNOME. This is not a major change to Ubuntu, but GNOME has also done a lot of changes to their desktop environment, as well as new features. An improved dock, an on-screen keyboard, and more.
GNOME Desktop Environment
Ubuntu 18.04 Desktop will have a new app pre-installed
The new LTS desktop release will ship with a new app pre-installed by default. The app is GNOME To Do and it’s a very useful app for organizing lists, tasks, and more. You can prioritize them. color them, set due dates, and a number of other features.
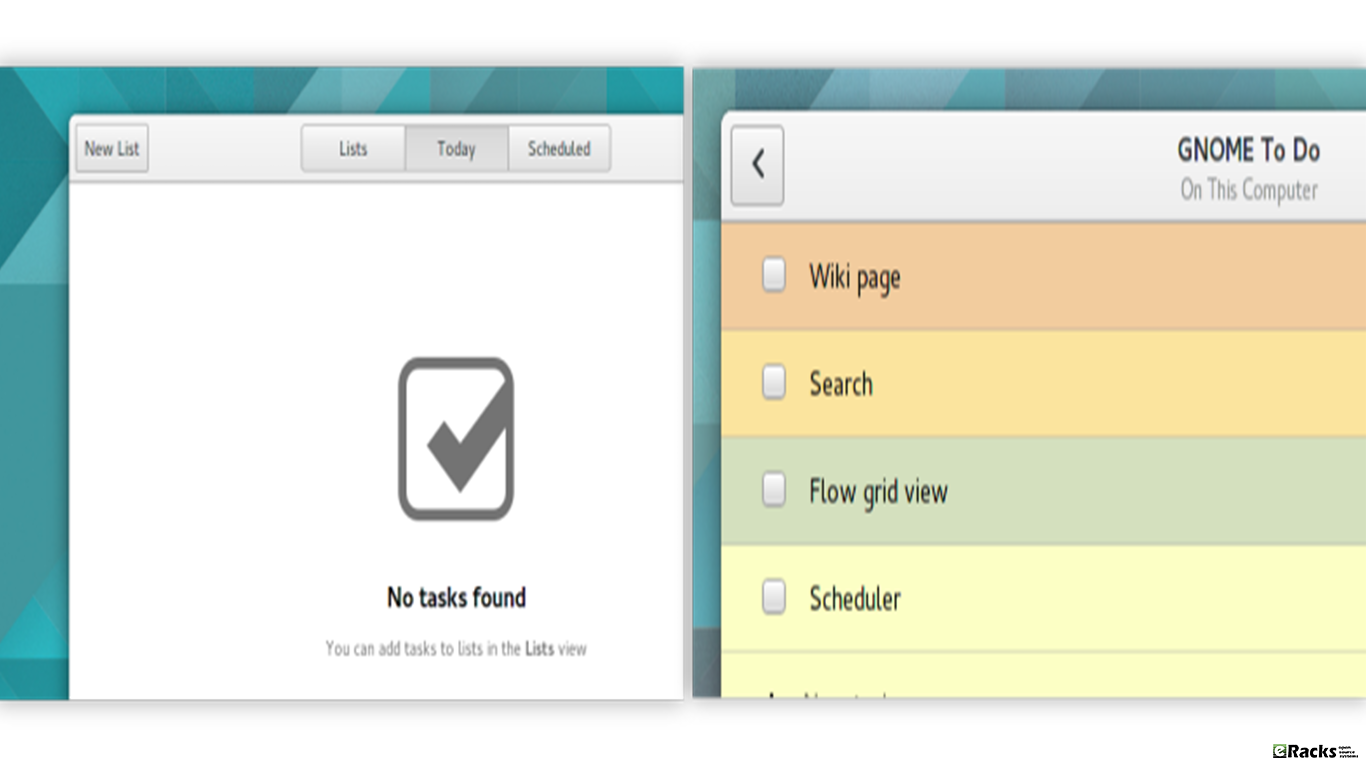
GNOME To Do
Applications will be installed as snaps by default
They been planning on using snaps for a while, and they finally shipped GNOME Calculator as a snap instead of a deb. This is a test to help the Desktop team find and fix any bugs. They’ll later on move more applications to snap in the final release. Using snaps will make the process of installing and updating apps much easier. You can even install snaps on any distro and device.
Some New Apps
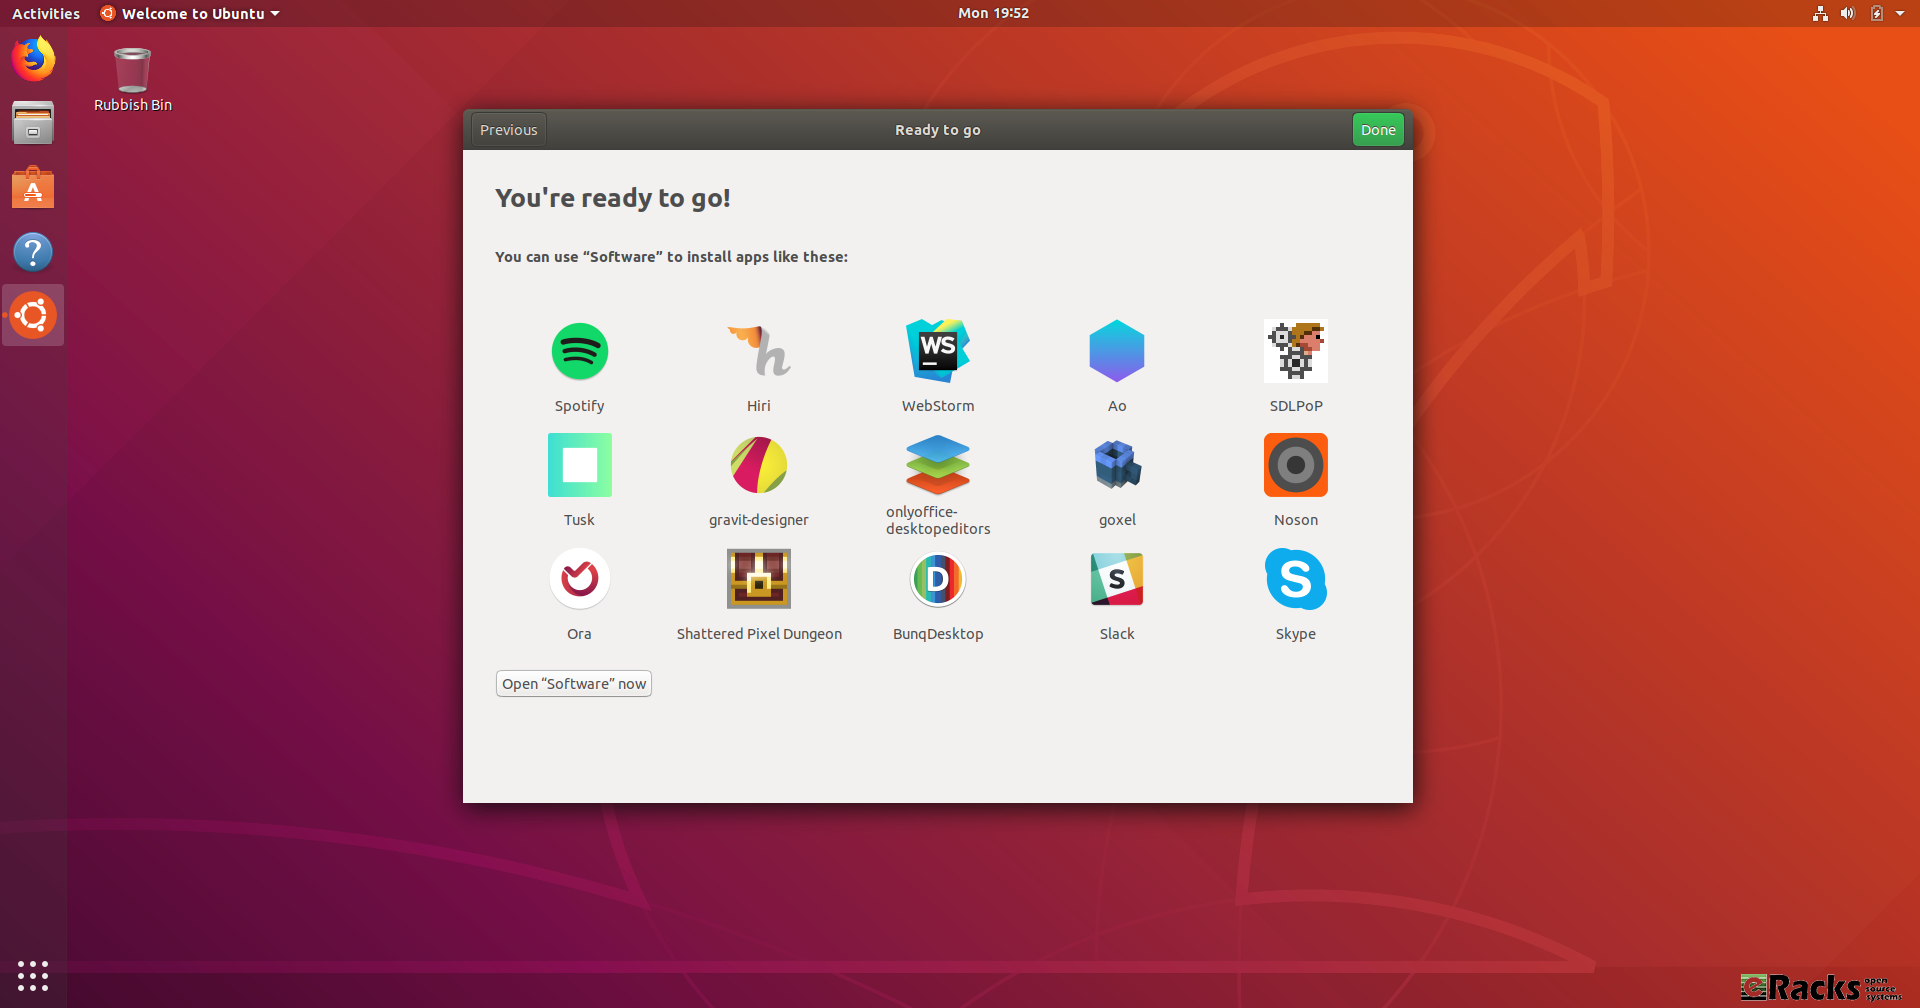
Some New Apps
New snaps are being added to the store all the time, and you can already download essentials like Spotify, Skype and Slack. You can browse the full range of applications via GNOME Software (click the Open “Software” now button) or access the highlights directly by clicking on their icon.
A Brand New Icon Set
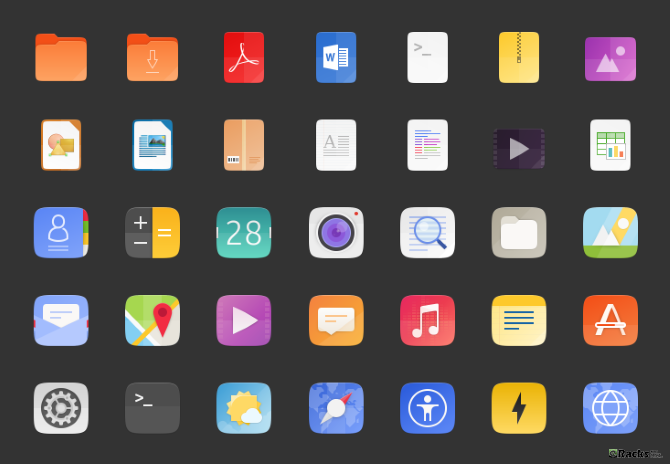
A Brand New Icon Set
Open source icon project Suru has been incorporated into Ubuntu 18.04. These icons were originally seen in the abandoned Ubuntu Touch mobile operating system. Despite hopes to the contrary and a dedicated community project, Ubuntu 18.04 will not boast a fresh new look. However, while the Ambiance theme is hanging around, new icons are expected in Ubuntu.
Color Emojis
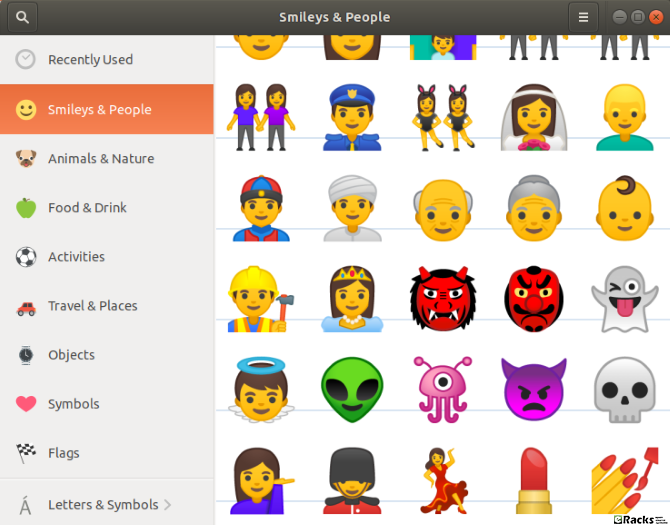
Color Emojis
Some tweaks will give you color emojis on versions of Ubuntu prior to 18.04 LTS, this is the first time they’ve been included by default. The emojis you’ll find in Ubuntu 18.04 LTS are the same open source emojis as found on Android. For many users, these will be familiar.
Ubuntu 18.04 will collect data about your system and make it public
Ubuntu 18.04 will collect data like the Ubuntu flavor you’re using, hardware stats, your country etc. Anyone can opt-out of this, but it’s enabled by default. What’s interesting about this is that the data they collect will be public, and no sensitive data will be collected. so most of the Ubuntu community supports this decision.
However, there is a potential security concern that you should be aware of. With Ubuntu 18.04 LTS, Canonical intends to collect data from your computer. Though there is nothing personally identifiable in this data. Instead, it is to establish your computer’s hardware components, what version of Ubuntu you’re running, your location (based on your choice when setting up Ubuntu) and a few other things.
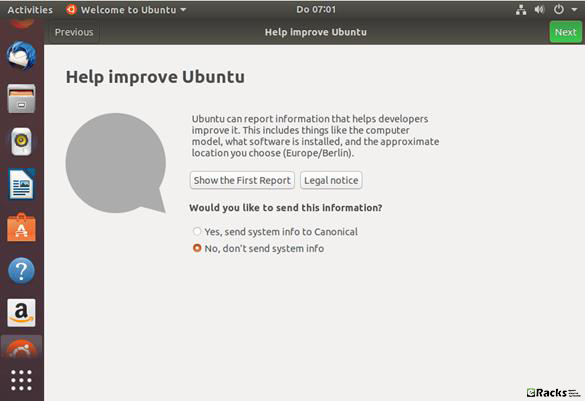
Collecting data about your system
This marks a change from Canonical’s previous attitude to this sort of data collection, but is understandable given how flakey figures are for Linux usage around the world. Crucially, this data collection can be opted out of; if you’re upgrading from a previous version of Ubuntu, meanwhile, you can also opt in.
Alongside these changes Canonical has made some noticeable upgrade on packages for Ubuntu 18.04 Bionic Beaver too. Some of them are as follows,
Linux kernel 4.15
Ubuntu 18.04 ships with a v4.15 based Linux kernel, enabling the latest hardware and peripherals available. The 18.04 kernel delivers new features inherited from upstream, including:
- CPU controller for the cgroup v2 interface.
- AMD secure memory encryption support.
- The latest MD driver with software RAID enhancements.
- Improved power management for systems with SATA Link Power Management.
- Linux security module stacking support.
- Support for signing of POWER host and NV kernels.
OpenJDK
As of 18.04 release, OpenJDK 10 is the default JRE/JDK. Once OpenJDK 11 reaches GA in September 2018, it will become the default in 18.04.
OpenJDK 8 has moved to universe and will remain available there for the life of 18.04, to provide migration time for packages, custom applications, or scripts that can’t be built with OpenJDK 10 or 11. OpenJDK 8 will be updated in 18.04 after Ubuntu 16.04 LTS reaches EOL in April 2021.
Security Improvements
In Ubuntu 18.04 LTS, gcc is now set by default to compile applications as position independent executables (PIE) as well as with immediate binding, to make more effective use of Address Space Layout Randomization (ASLR). All packages in main have been rebuilt to take advantage of this, with a few exceptions. Also, bolt and thunderbolt-tools have been promoted to main to provide security controls for Thunderbolt devices.
Default CIFS/SMB protocol version change in CIFS mounts
Since 17.10, the default SMB protocol used when mounting remote CIFS file systems via “mount.cifs” is changed to 2.1 or higher, depending on what is negotiated with the server.
At a glance change in Ubuntu 18.04 LTS (Bionic Beaver) Desktop Edition
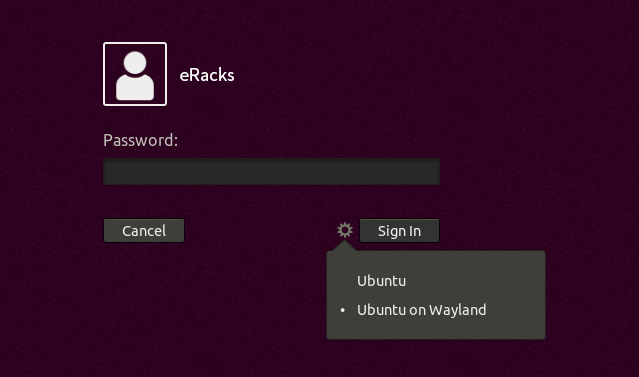
- Wayland is provided as a Technical Preview and is expected to be the default display server in 20.04 LTS. To try it out, just choose Ubuntu on Wayland from the cog on the log in screen.
- The installer offers a minimal install option for a basic desktop environment with a web browser and core system utilities. Many official 18.04 desktop flavors are using this new feature too!
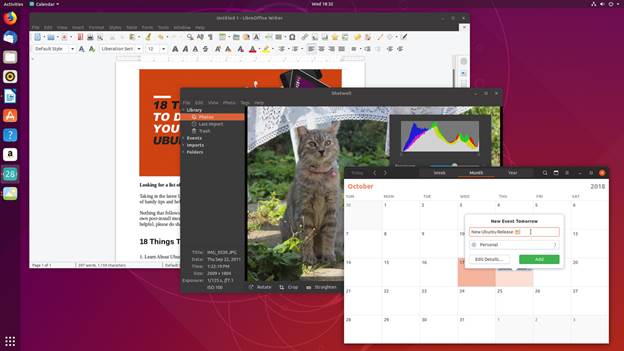
- Apps provided by GNOME have been updated to 3.28.
- LibreOffice has been updated to 6.0.
- Emoji now show in color in most apps. Keyboard shortcuts for the emoji input chooser are Ctrl+. or Ctrl+;
- Calendar now supports weather forecasts.
- Some utilities have been switched to the snap format for new installs. Snap apps provide better isolation which allows them to be upgraded to new stable releases during the LTS lifecycle.
- The Characters app replaces the older Character Map by default.
- The Ubuntu Software app allows easy switching between different channels for Snap apps.
- The ‘To Do’ app has been added to the default normal install.
- spice-vdagent is pre-installed for better performance for spice clients such as the GNOME Boxes app.
- The right-click method for touchpads without physical buttons has changed to a two-finger click instead of clicking in the bottom right of the touchpad.
- Although libinput is the default driver for mice and touchpads, it is now possible to use the synaptics driver with the Settings App. Support for the synaptics driver will be dropped in a future Ubuntu release.
- Computers will automatically suspend after 20 minutes of inactivity while on battery power.
- GNOME Shell now supports Thunderbolt 3.

eRacks/FLASH48
Configure eRacks/FLASH48 an All-Flash Server With Ubuntu 18.04 LTS (Bionic Beaver) Server Edition.
Comparing with Ubuntu 17.10 (Artful Aardvark) & Ubuntu 16.04.4 LTS (Xenial Xerus) the latest Ubuntu 18.04 Bionic Beaver Server edition’s packages are upgraded as well. Some of them are as follows,
Server installer
The next generation Subiquity server installer, brings the comfortable live session and speedy install of Ubuntu Desktop to server users at last.
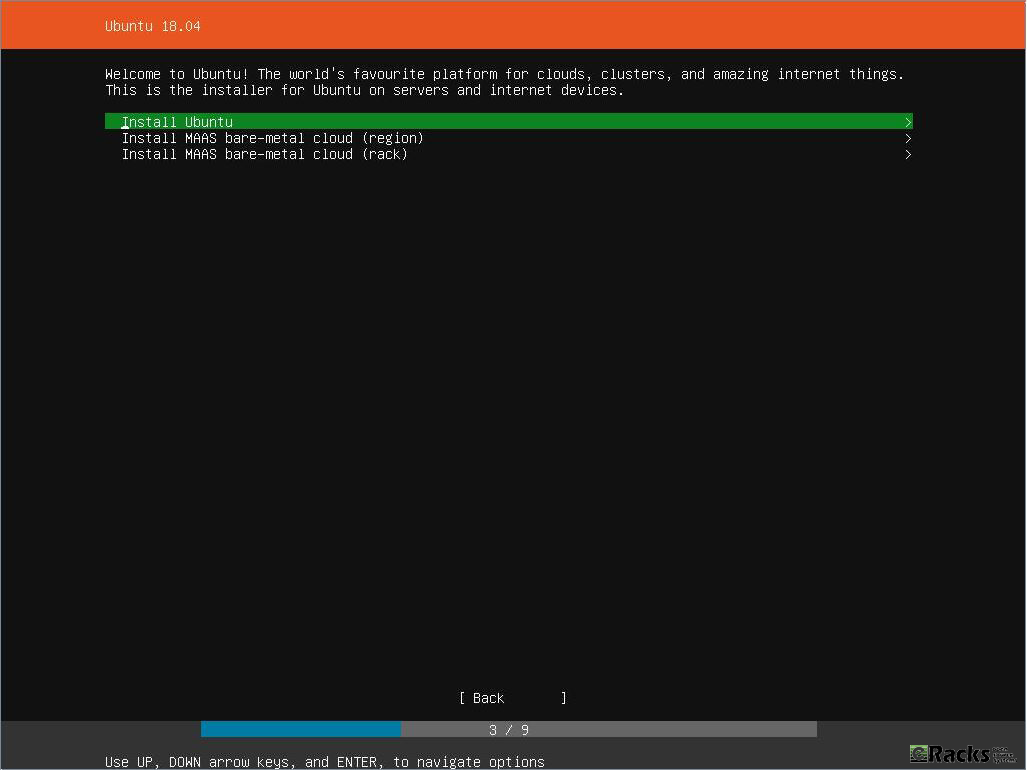
Ubuntu 18.04 Bionic Beaver Server Edition Installer
Netplan.io
ifupdown has been deprecated in favor of netplan.io and is no longer present on new installs. Backend configuration on Ubuntu Server by default is provided by systemd-networkd.
LXD 3.0
LXD is the system container manager that ships with all Ubuntu servers. Ubuntu 18.04 includes the all new LXD 3.0 release, some of the highlights include:
- Clustering of LXD servers (one big virtual LXD)
- Support for NVIDIA runtime pass-through
- Remote transfer of custom storage volumes
- Extended /dev/lxd API inside the containers
- Support for port redirection
- Numerous improvements to the command line tools
A new external tool called lxd-p2c is also available to turn existing systems into LXD containers.
QEMU 2.11.1
QEMU has been updated to the 2.11.1 release.
Among many other changes, fixes around Meltdown/Spectre are included. Since fully utilizing these mitigations needs more than just an upgrade, it is recommended to read details at the qemu.org blog post.
QEMU in Ubuntu 18.04 now has rdma support enabled as over the past year much unification in the rdma-core project has occurred.
Migrations from former versions are supported just as usual. When upgrading it is always recommended to upgrade the machine types allowing guests to fully benefit from all the improvements and fixes of the most recent version.
libvirt 4.0
libvirt has been updated to version 4.0.
The packaging now builds libvirt storage drivers as pluggable libraries. This slims down the installation requirements but some drivers of less general interest will now be found in universe. On the other hand, that means that a few formerly integrated features like rbd or zfs now might require you to install the package after upgrade.
DPDK 17.11.x
Ubuntu includes 17.11.x the latest stable release branch of DPDK.
By the new Stable Release exception for DPDK future stable updates to 17.11.x will be made available to Ubuntu 18.04 LTS.
Open vSwitch 2.9
Open vSwitch has been updated to 2.9.
- NSH implementation now conforms to latest draft (draft-ietf-sfc-nsh-28).
- Ovs-vsctl and other commands that display data in tables now support amax-column-width option to limit column width.
- Added support to send IPv6 Router Advertisement packets in response to the IPv6 Router Solicitation packets from the VIF ports.
- No longer send packets to the Linux TAP device if it’s DOWN unless it is in another networking namespace.
Chrony
In Ubuntu 18.04 LTS chrony will replace ntpd as the recommended server for the NTP protocol. The comparison among ntp servers by the chrony maintainers may interest some users looking to see a high-level reason why this change was made. It does lack the rather new and not yet completely ready ntpsec, but otherwise is a fair analysis.
For simple time sync needs the base system already comes with systemd-timesyncd. Chrony is only needed to act as a time server or if you want the advertised more accurate and efficient syncing.
Going along with this change, ntpd has been demoted from main to universe. ntpd will continue to work but will only receive best-effort security maintenance. When upgrading to Ubuntu 18.04 LTS it is highly recommended to migrate to chrony if you had set up ntpd before.
Cloud-Init
The version was updated to 18.2. Notable new features include:
- VMware: support for 64-bit platforms and identifying OVF data source provided.
- GCE: Improvements and changes to ssh key behavior for default user.
- Azure pre-provisioning speed improvements.
- NoCloudKVM and EC2 tests now run in continuous integration.
- New cloud support: IBMCloud and HetznerCloud now have official data sources and OpenTelekom is now recognized by cloud-id.
- OpenNebula: Improve network configuration support.
- New cloud-init command-line tools available: status, analyze and clean.
- New ubuntu cloud-config modules for managing snaps and ubuntu-advantage services.
Curtin
The version was updated to 18.1. Notable features include:
- Add experimental zpool and zfs filesystem support, including ZFS on root.
- Add support for installing remote sources that are a filesystem image.
- Add pollinate user-agent configuration support.
- Improved device teardown of dirty devices to support re-deployment.
- Default config now automatically tars curtin logs upon error using new curtin collect-logs command.
- storage: accept filesystem mount options.
- Extensive integration test coverage and improvements.
MAAS
The version was updated to 2.4b2. Notable features include:
- Add audit logging.
- Add KVM pod support to create tags, select the storage pool, and compose machines with multiple storage pools.
- Add UI for DNS management.
- Add the commissioning template framework for HBA management.
- Add the commissioning template framework for Firmware Upgrades.
- Improve UI performance by performance.
- Improve MAAS’ backend performance.
- Improve the UI for the Settings.
- Add experimental support to configure zfs as the root filesystem.
- Switch to use Chrony instead of ntp.
SSSD
SSSD was updated to version 1.16.x and its secrets service is now enabled. Previously it was disabled because it required the http-parser library which lived in Universe, but a successful MIR brought it to main so SSSD could link with it.
Nginx
nginx was updated to version 1.14.0. New features include the mirror module, HTTP/2 push, and the gRPC proxy module.
PHP
PHP is updated to version 7.2.x.
Apache
Apache was updated to version 2.4.29. Additionally, HTTP/2 support is now enabled in 18.04 LTS.
landscape-client
landscape-client has been ported to Python 3 and is now available to install on the default image.
Ubuntu-advantage-tools
- New dynamic MOTD support for Canonical Livepatch. This indicates, at a glance, the status of livepatches when logging in on a console.
- New enable-fips-updates command to enable a special FIPS repository with non-certified updates for FIPS enabled systems.
OpenStack Queens
Ubuntu 18.04 includes the latest OpenStack release. OpenStack Queens is also provided via the Ubuntu Cloud Archive for OpenStack Queens for Ubuntu 16.04 LTS users.

eRacks’ Custom Cloud Server system with OpenStack Queens and Ubuntu 18.04 LTS OS.
Note: Upgrading an OpenStack deployment is a non-trivial process and care should be taken to plan and test upgrade procedures which will be specific to each OpenStack deployment.
To make things easier, eRacks Systems offers Custom Enterprise Cloud Server with OpenStack Queens (or another cloud software according to custom request) and Ubuntu 18.04 LTS OS.
To download Ubuntu 18.04 LTS (Bionic Beaver) select the desire install image or visit Ubuntu 18.04 LTS (Bionic Beaver) official download page.
As with release of latest version of Ubuntu 18.04 LTS Bionic Beaver, we, the eRacks Systems (Open Source experts since 1999) offer latest Ubuntu 18.04 LTS (Bionic Beaver) both Desktop or Server edition with our systems as pre-configured according to your custom quote…
Asif Raihan May 18th, 2018
Posted In: Open Source, Operating Systems, ubuntu
Tags: linux, Open Source, ubuntu
Install and Configure Bind9 DNS Server service on Ubuntu 16.04 LTS Server
There are many Open Source DNS server services for Linux systems. Here we’ll discuss about installing and configuring one of the most popular DNS server services among them known as “Bind9”. We’ll use another most popular Debian based Linux server operating system distributed by Canonical which is Ubuntu 16.04 LTS Server edition.
Other good DNS implementations include the native OpenBSD DNS implementation, as well as Dan Bernstein’s tinyDNS (AKA djbdns), but these are topics for future articles. (We use djbdns on OpenBSD, internally).
Successfully installing and configuring Bind9 Server service on Ubuntu 16.04 LTS server edition require several steps. For better understanding we’ll divide the total process into two main steps as ‘Basic installs’ and ‘Securing the DNS Server’ service. Each main category could be divided into several additional steps.
Basic Installing Steps:
- Install fresh Ubuntu 16.04 LTS Server OS on a server.
- Preparing the Ubuntu 16.04 LTS Server OS for installing Bind9 DNS Server Service.
- Install Bind9 DNS Server Service and configure Caching-only name server.
- Install and configure Primary DNS server or Master DNS server.
- Bind9 Post installation Configurations for successful service run on Ubuntu Server.
- Install and configure Secondary DNS server or Slave DNS server.
Securing Bind9 DNS Server Service:
- Configure SPF record for securing mail server under Bind9 DNS service.
- Configure DKIM record for securing mail server under Bind9 DNS service.
- Configure DNSSEC signing on Bind9 DNS Server Services.
- Configure DMARC Record for securing mail server under Bind9 DNS service.
For this tutorial we’ll use ‘eracks.com’ as domain and local IP address for demo and real time configurations (tested) behind the NAT network. The global & dedicated Systems could be configured just by replacing with your own domain and real IP assigned from your ISP. If you need further assistance please contact our eRacks Systems’ experts. Also, you could buy securely configured “DNS Server” as your requirements from eRacks Systems’ showRoom without any hassle. For your requirement please checkout.
For configuring DNS Servers we’ll use private IP from 192.168.88.0/24 network block where the usable Host IP Range is: 192.168.88.1 – 192.168.88.254; and Subnet Mask: 255.255.255.0. Our Router/NAT-gateway IP address is already configured as 192.168.88.1.
IP Address Block:	192.168.88.0/24
Usable Host IP Range:	192.168.88.1 - 192.168.88.254
Broadcast Address:	192.168.88.255
Total Number of Hosts:	256
Number of Usable Hosts:	254
Subnet Mask:	255.255.255.0
Wildcard Mask:	0.0.0.255
| Options | Primary/Master DNS Server | Secondary/Slave DNS Server | Client/Host Server |
| Host Name | dnsmaster | dnsslave | hostserver |
| Domain | eracks.com | eracks.com | eracks.com |
| IP Address | IPv4: 192.168.88.17 IPv6: ::8817 |
IPv4: 192.168.88.250 IPv6: ::8250 |
IPv4: 192.168.88.17 IPv6: ::8221 |
| FQDN | dnsmaster.eracks.com | dnsslave.eracks.com | hostserver.eracks.com |
Enough talk – Let’s see how it’s done!
eRacks/DNS

Get your Own Open Source DNS Server as pre-configured as ‘plug & Play’ from eRacks Systems’ ShowRoom.
Step 1: Install fresh Ubuntu 16.04 LTS Server OS on a server.
For learn how to install a fresh copy of Ubuntu 16.04 LTS Server OS on a server system visit this link.
Step 2: Preparing the Ubuntu 16.04 LTS Server OS for installing Bind9 DNS Server Service.
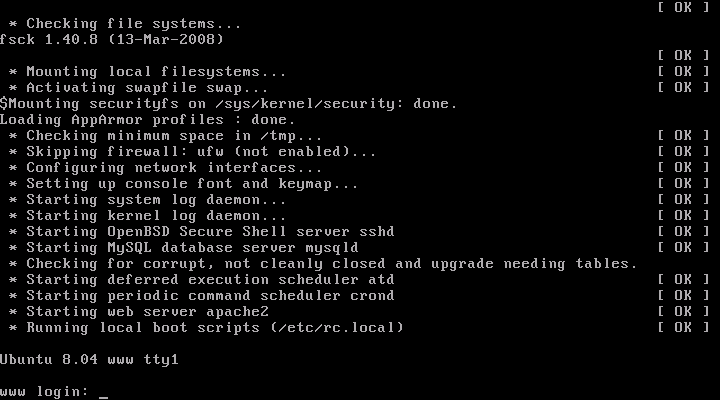
After installing, login the server directly or using SSH tunnel with IP address with user with root privileges.
The login screen will look like this;
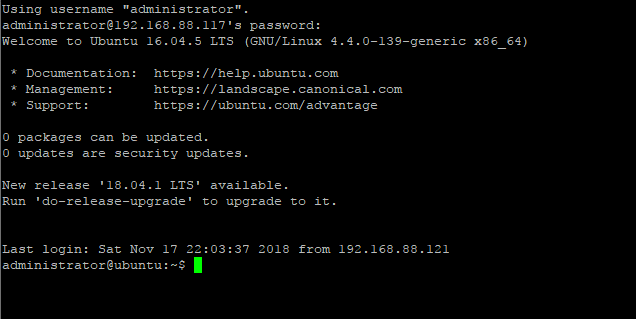
Then run the following command and press enter and your given password to update the system.

For avoiding “sudo” command, we’ll configure the server as ‘root’ user. To do so, type the following command and press enter.

Once the Update and Upgrade are done as root user, we need to edit the network interface for setting up the static IP address for the system with the following command;
Here On the popped-up screen find # The primary network interface and replace the beneath lines with the following;
# Static Primary Network Interface IPv4 Address
# Required for IPv4 (A) Records
auto eth0
	iface eth0 inet static
	address 192.168.88.17
	netmask 255.255.255.0
	network 192.168.88.0
	broadcast 192.168.88.255
	gateway 192.168.88.1
	dns-nameservers 8.8.8.8 8.8.4.4
	dns-domain eracks.com
# Optional Static IPv6 Address for Primary Network Interface
# Required for IPv6 (AAAA) Records
iface eth0 inet6 static
	address fe80::215:5dff:fe58:6500
	netmask 65
	gateway fe80::2a3b:82ff:fe74:58f6
Once it is done, press Ctl + X to exit and Press ‘Y’ then Enter button to save the changes.
Next, we need to set up the hostname for this server. Thus, Run the following command to edit the host name;
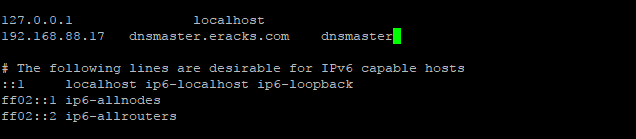
On the popped up screen replace the existing default host name “Ubuntu 16.04 LTS” with “dnsmaster” (since we’ll be setting the hostname as “dnsmaster“) then Press control + X to exit. And Press ‘Y’ then Enter button to save the changes. And then Run the following command to edit the hosts file;
Replace the existing with the following host record entries with the following;
The entries will look like this;
Once done, press control + X to exit and Press ‘Y’ then Enter button to save the changes and reboot your system with the “reboot” command.
After rebooting and login to the server we’ll see that the default host name “ubuntu” is replaced with hostname “dnsmaster”. To get assure we could check the hostname and FQDN with the following commands respectively;
root@dnsmaster:~$ hostname -f

Once these are done the system is ready for installing the Bind9 DNS Server Service. And we could proceed to the next steps.
Note:We’ll login as as root user from the start.
Step3: Install Bind9 DNS Server Service and configure Caching-only name server.
Before installing ‘Bind9’ DNS Server on this server we need to make sure all the packages are up to date. So, we’ll update and upgrade all the apt packages with following command;
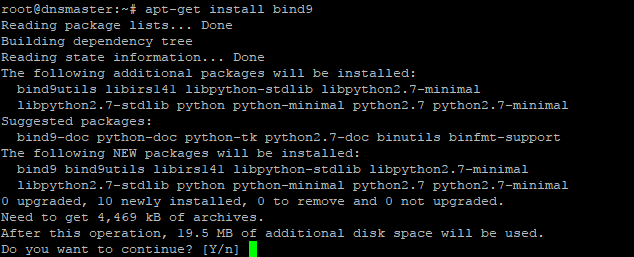
Once the Update and Upgrade are done, we’ll install the ‘Bind9’ Packages with the following command;
The screen will pop up for your permission for using additional disk space. For approval, press “Y” and then Enter button for installing the packages. The installation process will take a few whiles.
When the installation is done the system is ready for configuring Caching-only name server with Bind9 DNS Server service package. For configuring Caching-only name server run the following command.
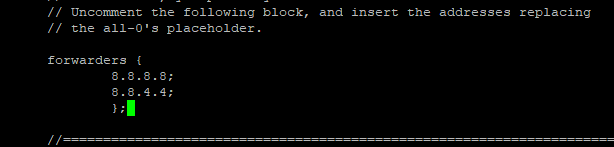
On the popped-up screen find & uncomment the forwarders & set the forwarders as follows with google public DNS IP address & or with your ISP’s DNS IP address.
The entries will look like this
Next, press control + X to exit and Press ‘Y’ then Enter button to save the changes. And restart the Bind9 DNS Service with the following command.
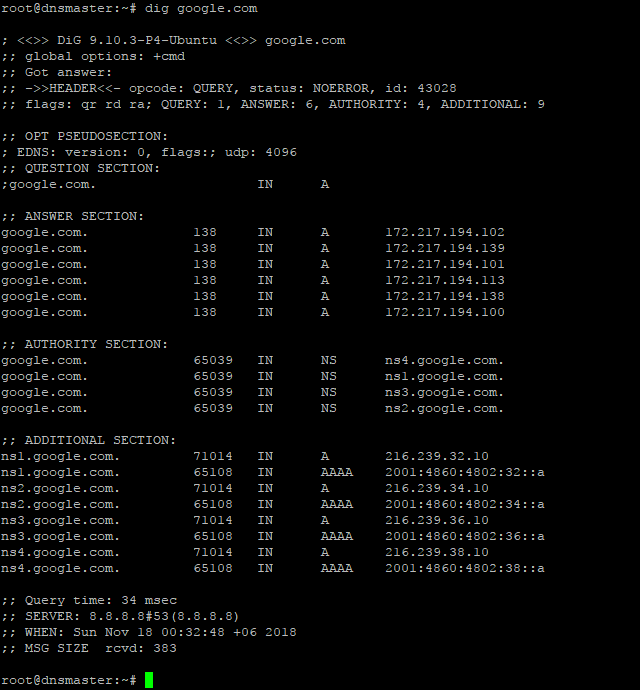
For testing the Caching-only name server we need to run the dig command as follows;
If everything is okay, the command will dig up the following records;
Step4: Install and configure Primary DNS server or Master DNS server.
Before proceeding further, first we need to make sure the Ubuntu server is up-to-date. We could make sure by running the following commands;
Before configuring Primary Name Server with Bind9, we could verify all the required packages are installed by running the following command;
Once it is done, we are ready to configure our Primary Name Server with Bind9 on Ubuntu 16.04 LTS Server. And All configuration files be will be available under /etc/bind/ directory. To do so, we need to edit ‘named.conf.local’ file first, and make entry for our domain zone.
So, we’ll run the following command line for setting up our domain’s forward look up zone.
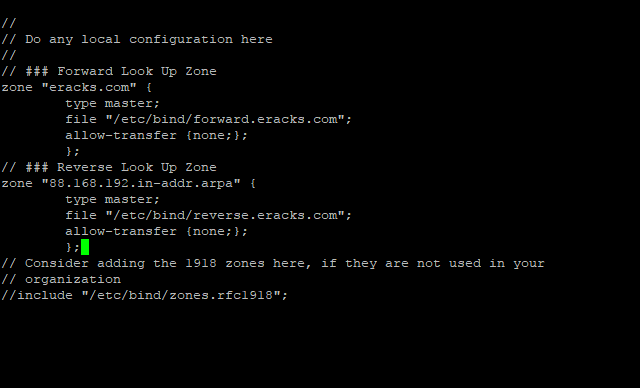
Then make the following entries for Forward Look Up Zone
// ### Forward Look Up Zone
zone "eracks.com" {
	type master;
	file "/etc/bind/forward.eracks.com";
	allow-transfer {none;};
	};
Reverse, look up zone is also recorded here. So, we’ll add the reverse look up zone with the first there part of the IP address in reverse way by ending with “.in-addr.arpa”. The zone name it’ll look like “88.168.192.in-addr.arpa” this. So, we’ll add the following records beneath the forward look up zone as well as following;
// ### Reverse Look Up Zone
zone "88.168.192.in-addr.arpa" {
	type master;
	file "/etc/bind/reverse.eracks.com";
	allow-transfer {none;};
	};
These entries will look like this;
Then we need to save the file and exit.
We’ve identified forward lookup zone via “file “/etc/bind/forward.eracks.com”;” and reverse lookup zone via “file “/etc/bind/reverse.eracks.com”;” on the “named.conf.local” file. Therefore, we need to create those two-database files for use as forward & reverse lookup zone under “/etc/bind/” directory.
For “forward.eracks.com” database, we’ll copy the existing “db.local” database file that is created as default with Binid9 installation under ‘/etc/bind/’ directory. To, do so we’ll run the following command;
Then we’ll edit the newly copied database file with the following command;
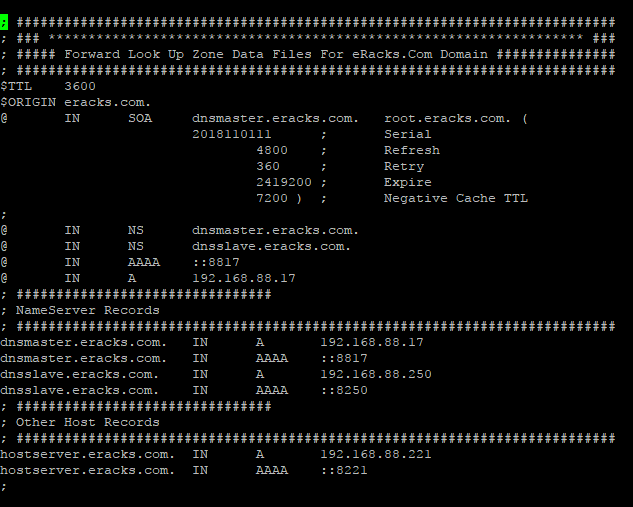
Then make the following entries for the database records;
; ###########################################################################
; ### ******************************************************************* ###
; ##### Forward Look Up Zone Data Files For eRacks.Com Domain ###############
; ###########################################################################
$TTL    3600
$ORIGIN eracks.com.
@	IN	SOA	dnsmaster.eracks.com.	root.eracks.com. (
								2018110111	;	Serial
										4800	;	Refresh
										360	;	Retry
									2419200	;	Expire
										7200 )	;	Negative Cache TTL
;
@	IN	NS	dnsmaster.eracks.com.
@	IN	NS	dnsslave.eracks.com.
@	IN	AAAA	::8817
@	IN	A	192.168.88.17
; ################################
; NameServer Records
; ###########################################################################
dnsmaster.eracks.com.	IN	A	192.168.88.17
dnsmaster.eracks.com.	IN	AAAA	::8817
dnsslave.eracks.com.	IN	A	192.168.88.250
dnsslave.eracks.com.	IN	AAAA	::8250
; ################################
; Other Host Records
; ###########################################################################
hostserver.eracks.com.	IN	A	192.168.88.221
hostserver.eracks.com.	IN	AAAA	::8221
;
It’ll look like this;
Next for “reverse.eracks.com” database, we’ll copy the existing “db.127” database file that is created as default with Binid9 installation under ‘/etc/bind/’ directory as well. So, we’ll run the following command;
And edit using the following command
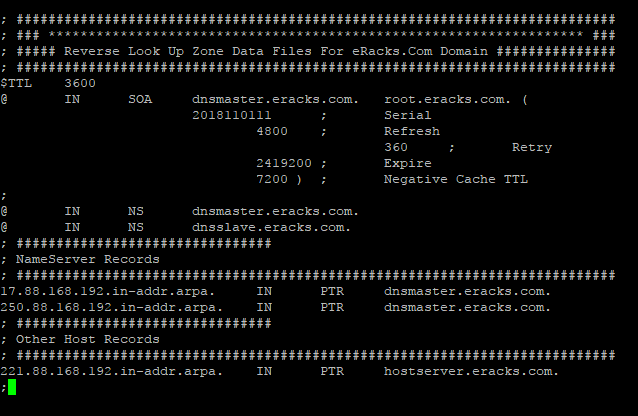
Entries for the database are follows
; ###########################################################################
; ### ******************************************************************* ###
; ##### Reverse Look Up Zone Data Files For eRacks.Com Domain ###############
; ###########################################################################
$TTL    3600
@	IN	SOA	dnsmaster.eracks.com.	root.eracks.com. (
								2018110111	;	Serial
										4800	;	Refresh
										360	;	Retry
									2419200	;	Expire
										7200 )	;	Negative Cache TTL
;
@	IN	NS	dnsmaster.eracks.com.
@	IN	NS	dnsslave.eracks.com.
; ################################
; NameServer Records
; ###########################################################################
17.88.168.192.in-addr.arpa.	IN	PTR	dnsmaster.eracks.com.
250.88.168.192.in-addr.arpa.	IN	PTR	dnsslave.eracks.com.
; ################################
; Other Host Records
; ###########################################################################
221.88.168.192.in-addr.arpa.	IN	PTR	hostserver.eracks.com.
;
Once it is done, we’ll save the file and exit.
It’ll look like this;
After that, we’ll restart the bind9 DNS Server Service with the following command.
root@dnsmaster:~$ service bind9 status
Note: We should be careful that all the records that finishes with letter (other than IP addresses), we need to add full-stop (“.”) at their end point to declare it is finished. Else, the bind9 will show an error.
For instant checkup, we need to set the resolver with nameserver as localhost IP 127.0.0.1 using following command;
And at the beginning of the name server lists we need to add the following line, then save and exit.
nameserver 127.0.0.1
For checkup we’ll use the “dig” command for specific host record like following
The command will dig up the host records from the local DNS Server as follow

If the configuration is correct then the above command will not show any error. or if there is any error, we need to look at log file and troubleshoot the error. For detail about bind9 troubleshooting on Ubuntu Server please visit Ubuntu’s official “DNS Troubleshooting Page” or contact eRacks Systems’ expertise for the help.
Step 6: Bind9 Post installation Configurations for successful service run on Ubuntu Server.
When, the bind9 shows no error, we need to set the post installation configuration for Bind9 DNS Server Service to run successfully on Ubuntu Server. To do so, we’ll run these following commands for give appropriate access permission to the Bind9 Server Service and Allow through Ubuntu Firewall (ufw).At first, we’ll enable the bind9 DNS Server Service at the system start up with the following command. So that the Bind9 always starts automatically after the system reboot.
Then for the access permission for Bind9 on ubuntu server, we’ll run the following commands;
root@dnsmaster:~$ chown -R bind:bind /etc/bind
We’ll also configure the Ubuntu firewall in order to allow Bind9 through Ubuntu firewall (ufw). For configuring ufw we’ll run the following commands one by one.
root@dnsmaster:~$ ufw allow “Bind9”
root@dnsmaster:~$ ufw reload
root@dnsmaster:~$ ufw status
root@dnsmaster:~$ ufw status verbose
Then we’ll restart both servives Bind9 and the ufw with the following commands;
root@dnsmaster:~$ systemctl restart service.service
We could always restart and check status of the Bind9 DNS Server Service with following command.
root@dnsmaster:~$ service bind9 status
If everything is alright, the Bind9 status report will show no error. Beside, we could always visit this MxToolbox website for more detail reports and troubleshooting by entering the domain.
Asif Raihan May 8th, 2018
Posted In: How-To, Linux, Open Source, servers
Tags: linux, Open Source, tutorial, ubuntu
Ubuntu 17.10 Artful Aardvark!
Ubuntu 17.10, code named Artful Aardvark; I guess you already know that Artful means full of art or skill. And Aardvark is a medium-sized, burrowing, nocturnal mammal native to Africa. Colloquially, it is called African Ant Eater.
Nowadays Ubuntu become the world’s most popular desktop Linux operating system, and with its latest short-term support release, it’s clear Canonical want to keep a firm grip on the title.
‘Artful Aardvark’ (Ubuntu 17.10)
As release with Artful Aardvark (Ubuntu 17.10) in October 19, 2017 Canonical continues Ubuntu’s proud tradition of integrating the latest and greatest open source technology into a high-quality, easy-to-use Linux distribution. Ubuntu 17.10 Artful Aardvark marks an all-new chapter in Ubuntu’s already rich history. As always, the team has been hard at work through this cycle, introducing new features and fixing bugs.
Ubuntu 17.10 Debuts with An All-New Desktop
This is the first version of Ubuntu to use GNOME Shell as the default desktop. ‘The HUD, global menu, and other Unity features are no longer included’. By choosing to drop Unity most of Ubuntu’s home-grown usability efforts also fall by the wayside.
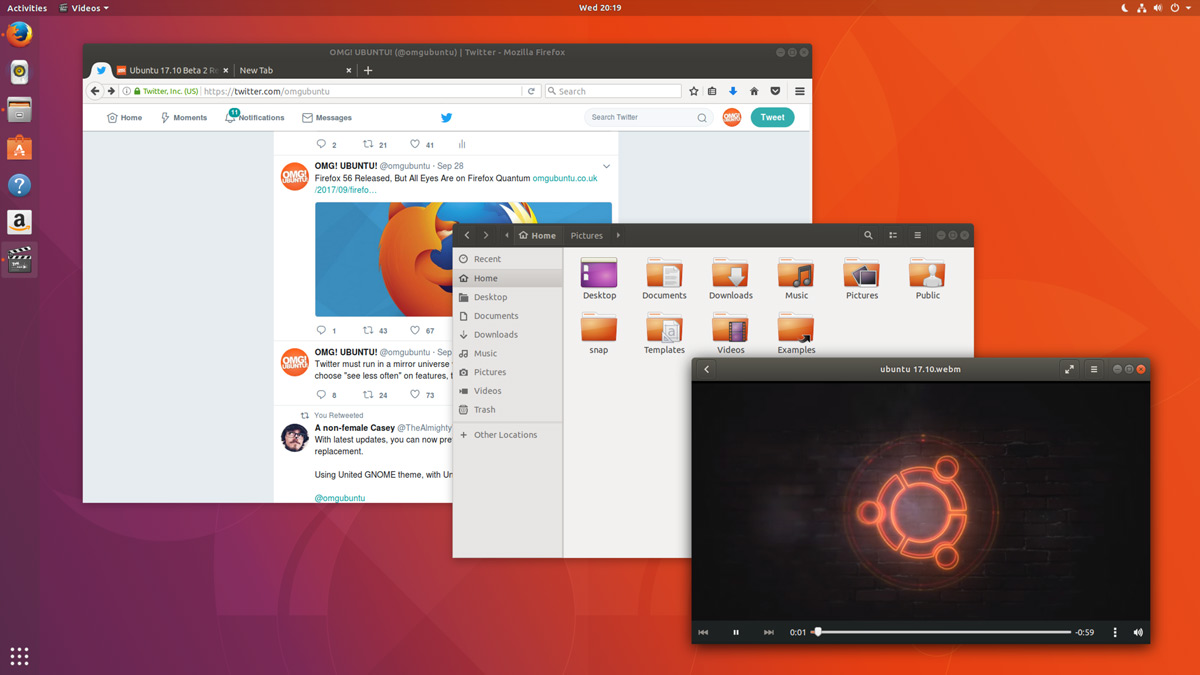
Ubuntu 17.10 Desktop
In Unity’s place comes a bespoke version of GNOME Shell that is ‘customized’ to resemble something that’s superficially close to the Unity desktop layout. The Ubuntu 17.10 desktop uses a two-panel layout: a full-height vertical dock sits on the left-hand side of the screen, while a ‘top bar’ is stripped across the top.
The top bar plays host a new type of app menu, a calendar applet/message tray, app indicators, and a unified status menu for managing network, volume, Bluetooth and user sessions.
Ubuntu Dock
The new Ubuntu Dock is both a task manager and an application launcher. It shows icons for open and running software windows as well as ‘pinned’ launchers for user’s favorite apps.
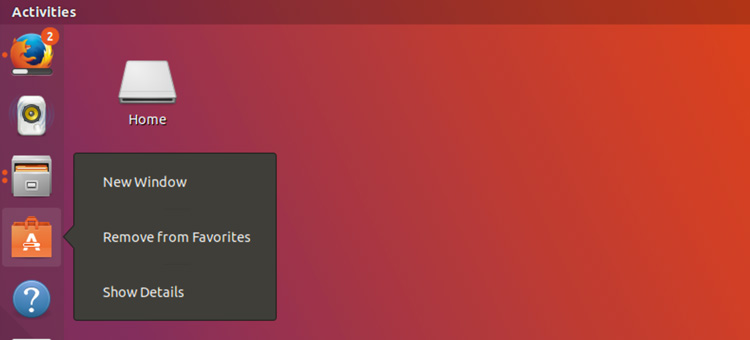
Ubuntu Dock
The dock is also global; it displays icons/applications from all workspaces regardless of which one user is actually viewing.
Both the Ubuntu Dock and the top bar are semi-transparent, which adds nice visual presence. When a window touches either element the “dynamic transparency” feature kicks in to render both dock and top bar darker, making panel label contents more legible in the foreground.
Activities & Workspaces
The main “desktop” area remains a usable space on which user can place icons, folders and files.
Though there’s no longer a true global app menu, but the majority of apps place a small menu in the top bar bearing the name of the app in focus. These app menus contain a solitary ‘quit’ button at the least, or a full complement of options at most.

Activities & Workspaces
Workspaces are a common feature found on most modern desktop operating systems including Windows 10, so it’s a good thing that Ubuntu hasn’t ditched them. User can easily move windows between workspaces by clicking on a window and moving it on over the workspace.
Applications Overview
In Ubuntu 17.10 Applications are listed alphabetically, ordered into scrollable pages. User can launch an application by clicking on it, selecting it with keyboard arrow keys and pressing enter, or by touching it.
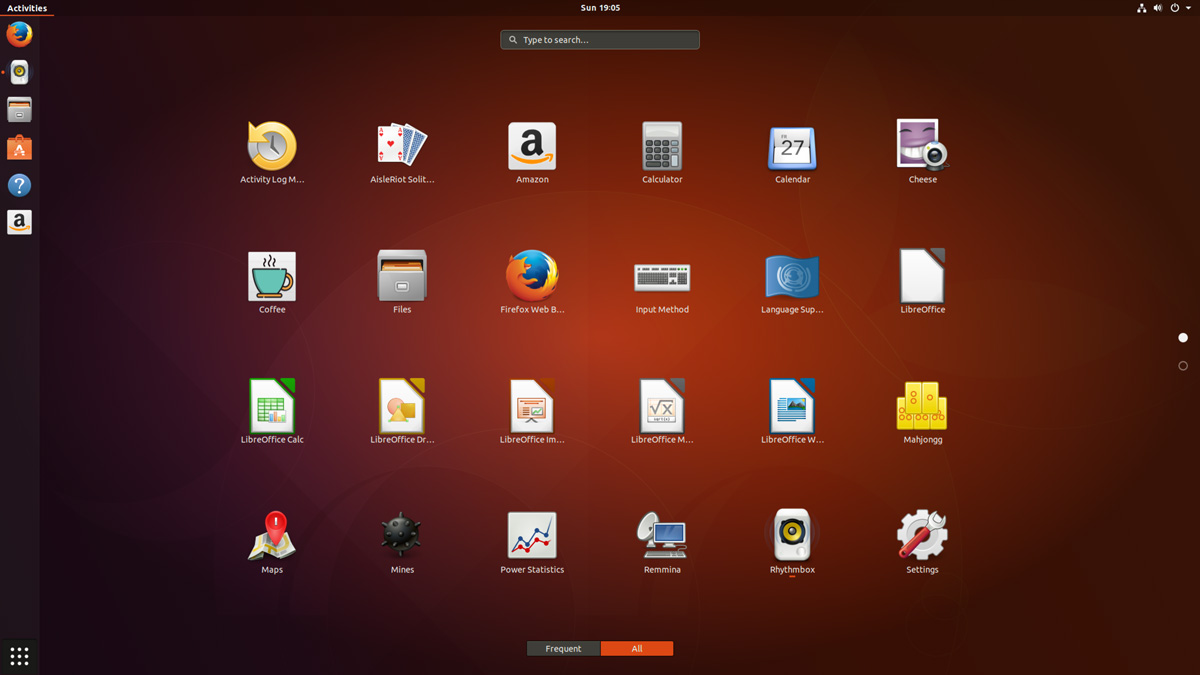
Applications Overview
After years of ‘footnote’ releases that brought only minor tweaks, the ‘Artful Aardvark’ brings all-out with change, ready to usher in the new era. Under the hood, there have been updates to many core packages, including a new 4.13-based kernel, glibc 2.26, gcc 7.2, and much more in Ubuntu Desktop. Let’s have a brief list view on some of those updates.
- On supported systems, Wayland is now the default display server. The older display server is still available: just choose Ubuntu on Xorg from the cog on the log in screen.
- GDM has replaced LightDM as the default display manager. The login screen now uses virtual terminal 1 instead of virtual terminal 7.
- Printer configuration is now done in the Settings app: Choose Devices and then Printers. The tool uses the same algorithms for identifying printers and choosing drivers as the formerly used system-config-printer, and makes full use of driverless printing to support as many printers as possible.
- The default on screen keyboard is GNOME’s Caribou instead of Onboard.
- Calendar now supports recurring events.
- LibreOffice has been updated to 5.4.
- Python 2 is no longer installed by default. Python 3 has been updated to 3.6.
- The ‘Rhythm box’ music player now uses the alternate user interface created by Ubuntu Budgie developer David Mohamed.
- The Ubuntu GNOME flavor has been discontinued. If a user is using Ubuntu GNOME, he will be upgraded to Ubuntu.
Note: Install gnome-session and choose GNOME from the cog on the login screen if user would like to try a more upstream version of GNOME. If any user’ d like to also install more core apps, he’d install the vanilla-gnome-desktop met package.
Not only the Ubuntu 17.10 Desktop but also, there are significant changes into the Ubuntu 17.10 Server version too. For the Ubuntu Server 17.10, the OS Version for the printing server has been increased to announce Windows Server 2003 R2 SP2 ID mapping checks added to the testparm(1) tool. There are some ID mapping backends too, which are not allowed to be used for the default backend. Winbind will no longer start if an invalid backend is configured as the default backend. The others are as follows,
Ubuntu 17.10 Server
Qemu 2.10
Qemu has been updated to the 2.10 release. Since the last version was 2.8.
Among many other changes there is one that might need follow on activity by the user/admin: Image locking is added and enabled by default. This generally makes execution much safer, but can break some old use cases that now explicitly have to opt-in to ignore/share the locks by tools and subcommands using the –force-share option or the share-rw dqev property.
Libvirt 3.6
Libvirt has been updated to version 3.6.
LXD 2.18
LXD was updated to version 2.18. Some of the top new features of LXD 2.18 are:
- Native Ceph RBD support.
- Support for cloud instance types.
- Pre-seeding of the “lxd init” questions through yaml.
- New client library.
- Improved storage handling (volume resize, auto re-mapping on attach, …).
- A lot of small improvements to the client tool.
DPDK 17.05.2
Ubuntu 17.10 includes the latest release of DPDK that has stable updates: 17.05.2. This made it possible to integrate Open vSwitch 2.8.
Open vSwitch 2.8
Open vSwitch has been updated to 2.8. Though user need to specify dpdk devices via dpdk-devargs.
New BIND9 KSK
The DNS server BIND9 was updated to include the new Key Signing Key (KSK) that was published on July 11, 2017. Starting on October 11, 2017, that key will sign the root zone key, which in turn is used to sign the actual root zones.
Cloud-Init
The cloud-init version was updated to 17.1. Notable new features for cloud-init are as follows,
- Python 3.6 support.
- Ec2 support for IPv6 instance configuration.
- Expedited boot time through cloud-id optimization.
- Support for netplan yaml in cloud-init.
- Add cloud-init subcommands collect-logs, analyze and schema for developers.
- Apport integration from cloud-init via ‘ubuntu-bug cloud-init’.
- Significant unit test and integration test coverage improvements.
Curtin
The Curtin version is updated to ‘0.1.0~bzr519-0ubuntu1’. New features are:
- Network configuration passthrough for ubuntu and centos.
- More resilient UEFI/grub interaction.
- Better support for mdadm arrays.
- Ubuntu Core 16 Support.
- Improved bcache support.
Samba
Samba is updated to version 4.6.7. Important changes in the 4.6.x series are:
- Multi-process Net logon support.
- New options for controlling TCP ports used for RPC services.
- AD LDAP and replication performance improvements.
- DNS improvements.
There are many other changes too. We recommend that all users read the release notes, which document caveats, workarounds for known issues, as well as more in-depth Release Notes.
Users of Ubuntu 17.04 will be offered an automatic upgrade to 17.10. As always, upgrades to the latest version of Ubuntu are entirely free of charge.
Remember, here at eRacks, we offer pre-installed Ubuntu 17.10 Artful Aardvark with our new systems either directly from the OS dropdown, or by custom quote.
Asif Raihan October 25th, 2017
Posted In: Debian, Linux, Open Source, servers, ubuntu
Tags: linux, New products, Open Source, OS, ubuntu
Ubuntu 17.04 Zesty Zapus!
Ubuntu 17.04, code named Zesty Zapus; Zesty, is an adjective for ‘great enthusiasm and energy’, while Zapus, is the genus name of a North-American mouse that is said to be the only mammal on Earth that has up to 18 teeth in total.

Zesty Zapus
Ubuntu 17.04 or Zesty Zapus final release is available from April 13, 2017 and let’s see what’s new in Zesty Zapus!
Updated Kernel
Ubuntu 17.04 Alpha 2 was released on the 26th of January and all the opt-in flavors are powered by an updated kernel, version 4.9.5.
The final Zesty Zapus includes the Linux kernel 4.10, which is known to enhance the performance of Intel Kaby Lake and AMD Ryzen systems.
Driverless Printing
We all know that printers are not that friendly with Linux. Vivaldi Snapshot 1.3.537.5 Brings Improved Proprietary Media Support on Zesty Zapus.
Ubuntu 17.04 is bringing the support for IPP Everywhere. It’s a new protocol that allows personal computers and mobile devices to find and print to networked and USB printers without using vendor-specific software.
Most of the printers sold these days already support IPP protocol. This means that you don’t need to install drivers for printer from XYZ manufacturer. You can search for it on the network and use it for printing.
Unity 8
Ubuntu users have been hearing a lot about Unity 8 for the last couple of years but so far Unity 8 is nowhere to be seen officially. Of course, there are ways you can run Unity 8 in Ubuntu releases already but the fact is that you should use them only if you are Linux-savvy.
Zesty Zapus does bring this experimental build of Unity 8. Though Unity 7 will still be the default desktop environment, you can select between Unity 7 and Unity 8 at the login screen.
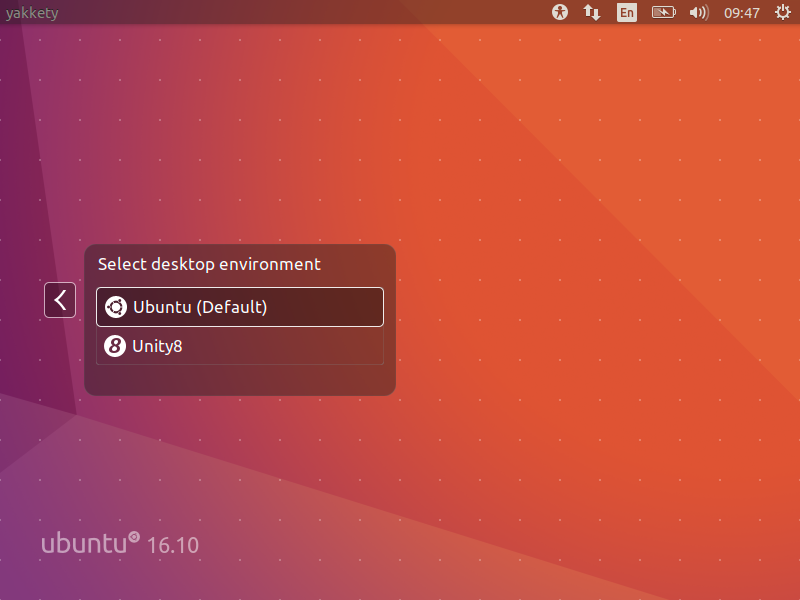
Unity 8
Note: Unity 8 won’t be the default desktop on Ubuntu 17.04 or 17.10 or 18.04. Ubuntu Unity is dead and GNOME will be the default desktop environment starting Ubuntu 18.04.
Swap File Instead of Swap Partition
Canonical’s Dimitri John Ledkov announced that Ubuntu 17.04 will use Swap files by default on non-LVM installs.
He explains that, quite simply, the need for a separate swap partition that’s (at least) twice the RAM size “makes little sense” on systems where memory isn’t limited.
For a common, general, machine most of the time this swap will not be used at all. Or if said swap space is in use but is of inappropriate size, changing it in-place in retrospect is painful.
Ubuntu17.04 Zesty Zapus will use swap files by default. Sizing of swap files is different to the swap partitions and typically use no more than 5% of free disk space (or 2048MB of RAM), which is another potential benefit.
The change does not apply to those who install Ubuntu using the LVM (Logical Volume Manager) option.
What’s important here is that some form of swap is maintained, it doesn’t matter how the swap is implemented. Anyone who’s ever used or set-up a ‘no swap’ system only to then run out of memory will know it’s not a pretty experience!
More Snaps
Canonical’s Will Cooke said that “by 18.04 everything will be Snaps and Unity 8 all the way down” and Engineering director Kevin Gunn, added that, “Canonical has an aggressive internal goal to try to get a usable all-snaps based image for Unity 8 out by 17.04”. So, although Snaps wouldn’t be replacing apt anytime soon.
32-bit PowerPC Support is Dropped
You might not have realized but Ubuntu till now used to support the aging 32-bit PowerPC architecture. As Debian has decided to drop this support, naturally Ubuntu followed the suit and has decided to drop the support for 32-bit PowerPC too, starting from Ubuntu 17.04.
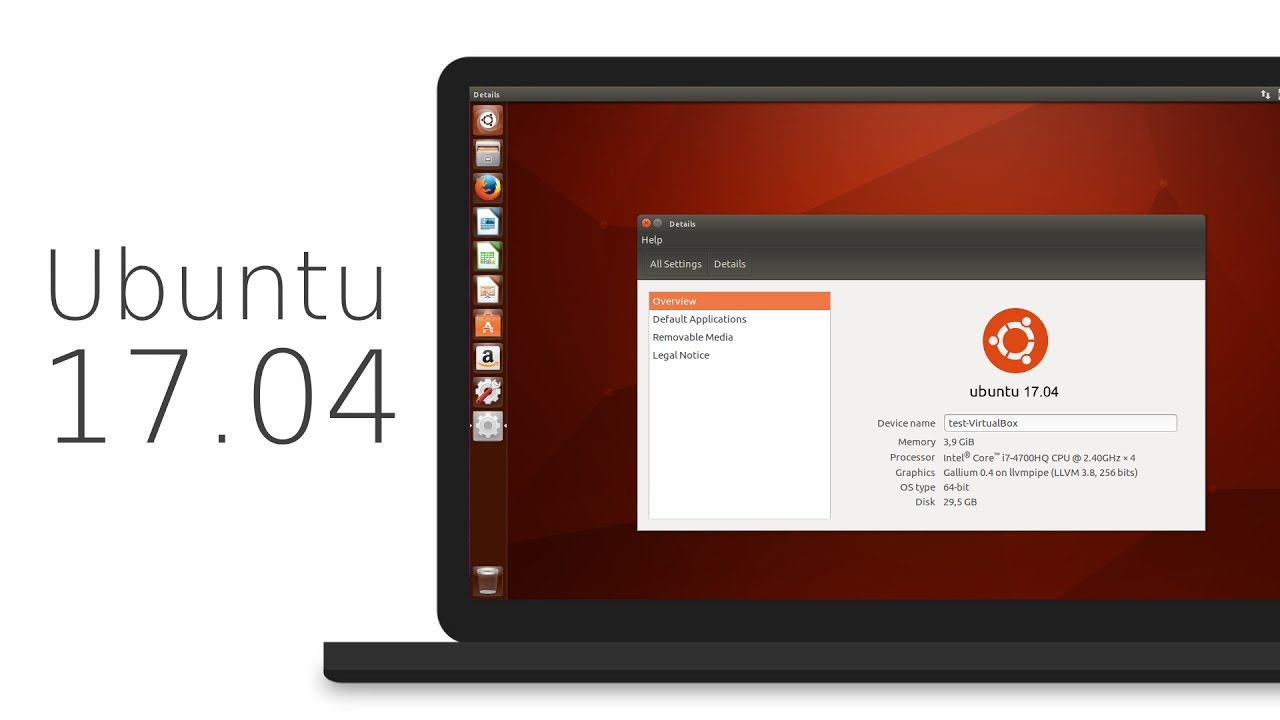
ubuntu 17.04
As you may have already noticed that most of these updates discussed above are found in Desktop version. So, in general, a common question automatically comes up, ‘isn’t there any changes for the new Ubuntu 17.04 server version?’ Well, of course Ubuntu released many updates for the Ubuntu 17.04 server version as well. Ubuntu Server 17.04 also comes with these following updates,
Qemu 2.8
Qemu has been updated to the 2.8 release.
Libvirt 2.5
Libvirt has been updated to version 2.5. For administrators worth to consider is that depending on the system setup and huge page size availability the specification of a page size for huge pages in a guest xml can now be mandatory.
LXD 2.12
LXD, now at version 2.12, introduces support for GPU passthrough, including NVidia CUDA. A new storage API has also been added, allowing for the creation of multiple storage pools which can then be used to host containers or independent storage volumes. And a number of new images have been added, including support for Ubuntu Core 16.
DPDK
Ubuntu 17.04 includes the latest release of DPDK, 16.11.1.
As a tech preview DPDK is now also available for ppc64el. This includes the latest improvements made in version 16.11.1 in general, but also further improvements to enable the i40e PMD and vfio-pci scanning on spapr platforms.
OpenStack Ocata
Ubuntu 17.04 includes the latest OpenStack release. OpenStack Ocata is also provided via the Ubuntu Cloud Archive for OpenStack Ocata for Ubuntu 16.04 LTS users.
Cloud-Init
Cloud-init has been updated to be stricter when identifying the cloud platform that it is running on and searching for data sources.
Why You Might Want to Upgrade
One nice thing for home users is the availability of driverless printing. Driverless printing will allow users to install just about any modern IPP Everywhere or Apple AirPrint-compatible printer via USB or network without installing a printer-specific driver. This is a big plus to folks who don’t like going through the rigmarole of finding and setting up print drivers for CUPS.
Other updates to the 17.04 release include an upgrade to LibreOffice 5.3, and a week view in the calendar. Standard-issue desktop apps will also migrate to Gnome 3.24, with the exceptions to Terminal, Evolution (email client), the Nautilus file manager, and Software (app store).
If you want to roll with an updated kernel in 16.04 like the 4.10 kernel that was recently released, you can use the Linux-mainline PPA to get newer kernel packages. If you choose to go this route, do so with care and be sure to keep the kernel updated because Ubuntu doesn’t officially support kernels from the mainline PPA. Things can and will break by using an unsupported kernel.
Asif Raihan April 23rd, 2017
Posted In: Debian, Linux, New products, News, Open Source, Operating Systems, ubuntu
Tags: linux, New products, News, Open Source, OS, ubuntu