
eRacks Systems Tech Blog
Open Source Experts Since 1999
UEFI and the eRacks/ZENBOOK13
 Minty Zenbook
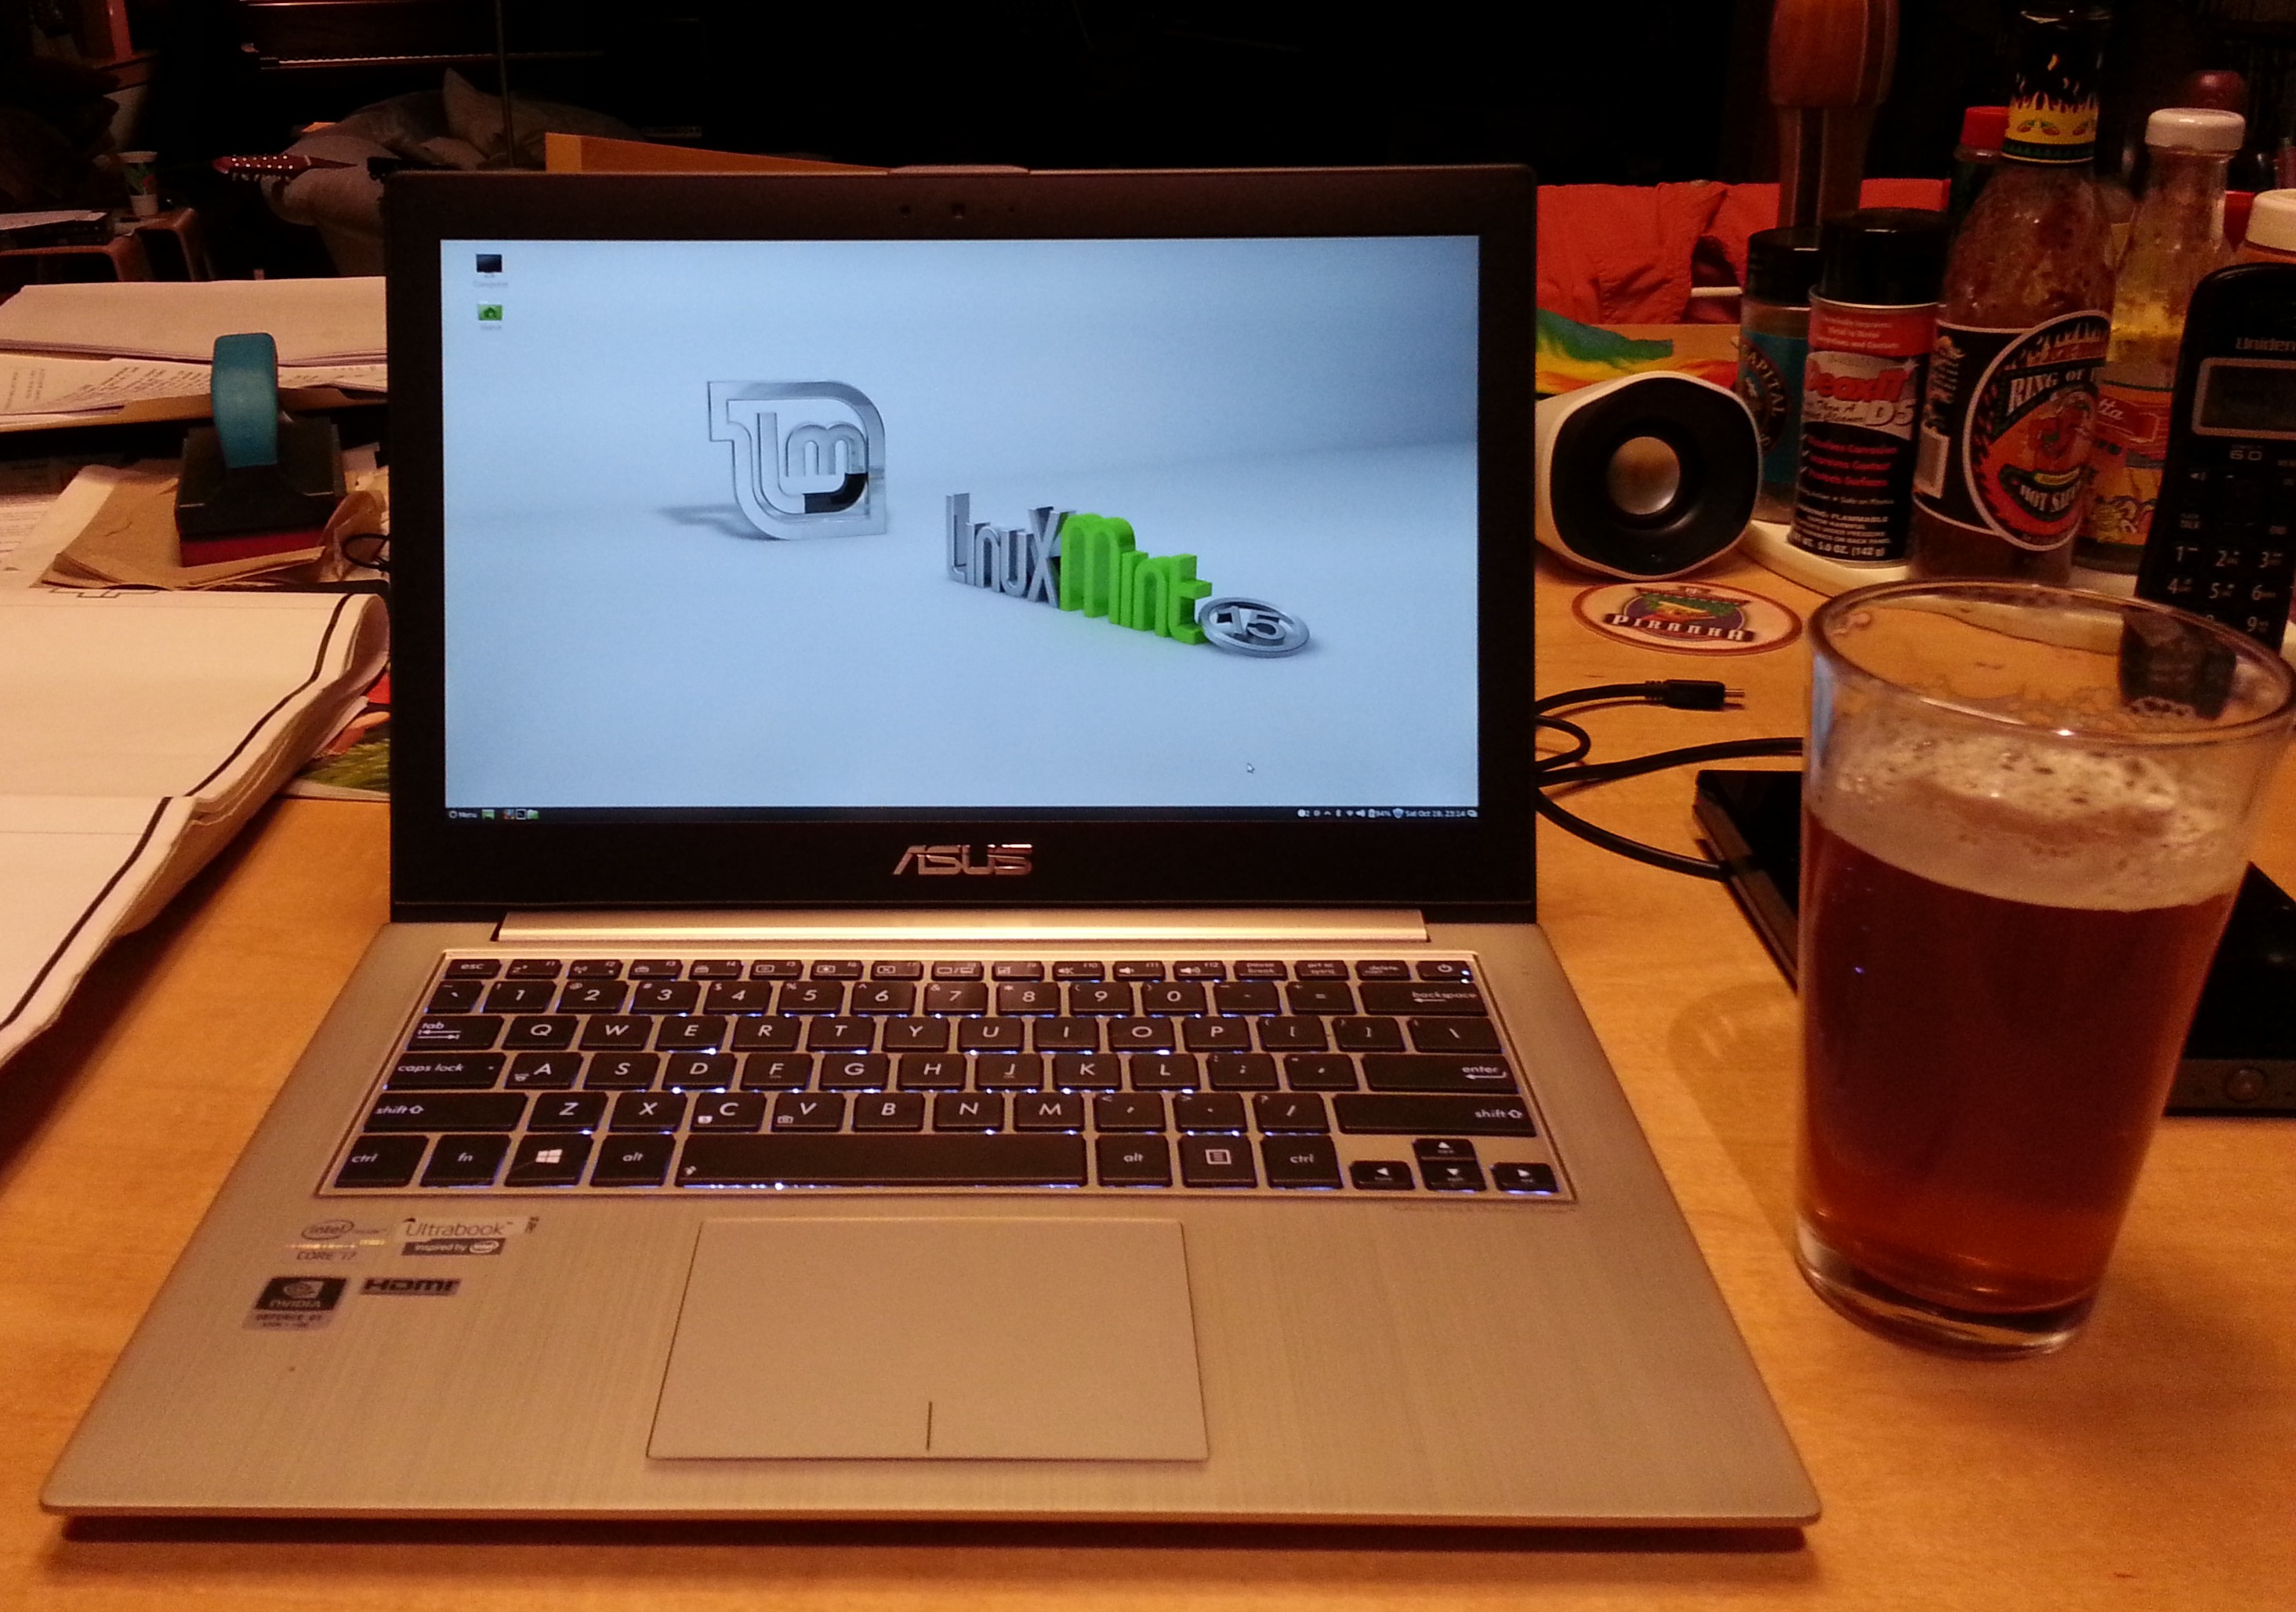
I am typing this on a nifty new eRacks/ZENBOOK13, with Linux Mint15 installed.
This is a slightly newer rev of the very pretty Asus Zenbook line, with twin 128GB SSD modules installed in a small carrier which screws into the standard 2.5″ HD space (it could also be replaced or upgraded with one of our standard HD/SSD choices, here: http://eracks.com/products/laptops/ZENBOOK13/)
This post will walk you through what we had to do for the installation, with the details.
Installation Cookbook
- Boot to an Ubuntu 13.04 install disk. (13.10 should work, or Ubuntustudio works too, that’s what I used). For some reason, the Mint installer doesn’t install the default EFI boot choice properly, so you have to start with Ubuntu, then replace it with Mint. Read on.
- Using gparted (fdisk could work, too), delete the partition tables on /dev/sda and /dev/sdb, and replace the GPT-based partition tables with with msdos-type partition tables.
- Install Ubuntu on the 1st of the two SSDs. Don’t worry about the 2nd disk (_yet_). Be sure to check the “Install with LVM” box after you select the default “Erase and install…”.
- Reboot into Ubuntu, and note the partitions cerated.
- Boot into a Mint 15 Install disk.
- Install Mint15 into the same partition structure – in other words, do NOT select the default “erase and install…” , but rather the “Something else” choice, and tell it to put the root partition on the same partition you noted in step 4.
- Install rEFInd (http://www.rodsbooks.com/refind/) from a rEFInd install disk, that you downloaded and burned from there. (I used v0.74). Be sure to install it in the /boot/efi partition (typically /dev/sda2) created earlier. The reason to install rEFInd, is it’s an invaluable tool to use to boot from any EFI-capable location on your computer, and will be used later on. I put mine in EFI\refind\refind_x64.efi
- Be sure to also copy shell64.efi into /boot/efi/EFI/tools/, so rEFInd can find it, and show you the EFI Shell choice & icon.
- Boot from rEFInd.
- Choose the EFI shell.
- Using the bcfg command, (help -v bcfg is your friend!), list the boot choices, and verify that “ubuntu” is there.
- Add “mint” as a boot choice, pointing to EFI\linuxmint\grub64.efi – mimic the way the “ubuntu” boot choice is done.
- Reboot into the boot menu (hold Esc down during the Asus logo) and verify that “mint” and “rEFInd” are there.
- Test them both out – rEFInd should also give other interesting choices you can try out.
- You should be able to launch Mint from either the “Mint” choice in the Asus boot (holding Esc), or from the Mint choice in rEFInd.
- Optionally, you can add the 2nd SSD (mentioned in step 3) to the main volume using LVM, to use the full 256GB.
That’s it!
Wrap and Beverage
I must say, this is a BEAUTIFUL machine – I want one myself!
Between the FullHD display, and being roughly the same thickness and sizeas the magazines I often carry into any given bar / restaurant here in Los Gatos, this is a joy compared to my regular 1920×1080 Asus laptop..
…And it beats the heck out of a tablet..
…And the battery life seems great, it barely made a dent in the hour or so I spent surfing with it while drinking my beverage of choice at one of the local establishments here.
…And did I mention it’s screaming fast, with the i7 CPU and 10GB RAM?!
Bon Appetit,
j
joe October 20th, 2013
Posted In: How-To, Laptop cookbooks, New products, News, Open Source, Products, ubuntu
Tags: Dual-boot, EFI, FHD, FullHD, Mint, rEFInd, rEFIt, ubuntu, UEFI
eRacks new website is now live!

eRacks Open Source Systems new website design
eRacks new website is officially live and fully functional! We completely redesigned the old website. We’ve added a ton of new products, including a custom line of high end gaming laptops.
Fremont, CA (PRWEB) January 14, 2013
Have a look at our Product Lines:
Product Showroom
About eRacks
eRacks strives to return the control of the IT department back to the business owner, by providing quality open source enterprise-level applications on easily-upgradable industry-standard hardware. eRacks believes businesses should not be required to rely on third-party closed-source software vendors
For More Information contact eRacks at info@eracks.com or visit http://www.eracks.com
Dennis
eRacks
Greg January 14th, 2013
Posted In: Laptop cookbooks, News, Open Source
Tags: eRacks, Laptops, New products, News
LSI Logic 6Gbps mps Driver for FreeBSD 8.2-RELEASE
EDIT: Binary modules have now also been provided for 7.4, 8.1 and 8.0. The instructions below should apply to all three, with the exception that you’ll want to download either mps-bin-7.4.tar.gz, mps-bin-8.1.tar.gz or mps-bin-8.0.tar.gz.
Unfortunately, the mps driver, which supports LSI Logic’s 6Gbps series of RAID controllers, didn’t make it into the FreeBSD kernel until after 8.2-RELEASE. As a result, FreeBSD users who require this driver are forced to either install 8-STABLE — which, despite the name, is a development branch — or pull the driver’s source code from 8-STABLE and build it on FreeBSD 8.2-RELEASE. Since we recently needed to use the mps driver and had to stick with a production-ready release, we opted for the second option. Along the way, we decided to bundle up the driver’s source to make the task easier for those who don’t want to install a development branch, and to pre-compile binary modules for those who wish to install 8.2-RELEASE directly to the hardware RAID array.
If you have a separate hard drive for the operating system that’s not on a 6Gbps LSI controller and simply use the hardware RAID for additional storage, you can do a normal install of FreeBSD 8.2-RELEASE to the hard drive, boot into the new system and perform the following steps:
1) Download mps.tar.gz
2) Extract it, cd to the ‘mps’ directory and type make && make install
3) Edit /boot/loader.conf and add the following line at the end: mps_load="YES"
4) Reboot (or type kldload mps.ko without rebooting)
If instead you want to install 8.2-RELEASE directly to an array on your 6Gbps LSI controller, a few extra steps are required.
First, download mps-bin.tar.gz, extract it by typing tar -zvxf mps-bin.tar.gz and place the contents on some form of removable media mountable by FreeBSD. A USB thumb drive, a floppy disk or a CD will suffice (though, a CD would be an awful waste of space… :))
Second, make sure to download the FreeBSD DVD and not the CD. We will require the live filesystem that’s contained only on the larger DVD. Once the installer is running, choose your language as usual, then select “Fixit” instead of the usual installation method. Choose the CDROM/DVD option.
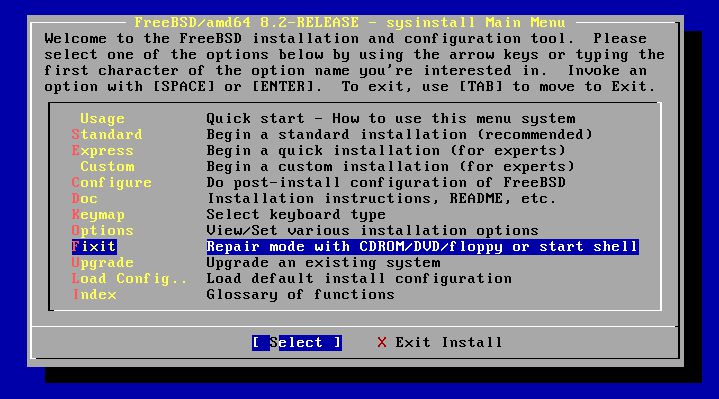
Figure 1: Select 'Fixit' instead of an installation method
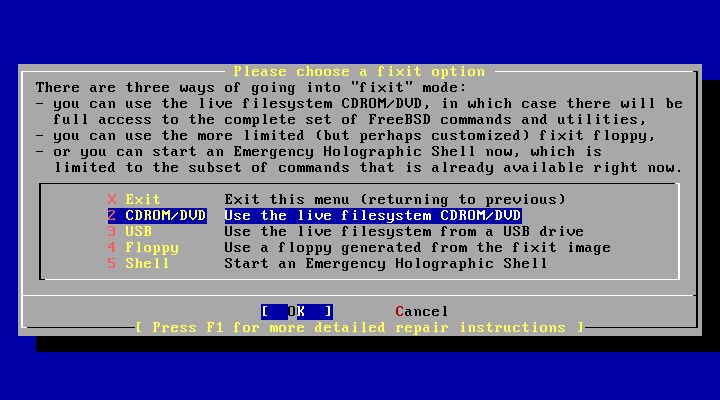
Figure 2: Select 'CDROM/DVD'
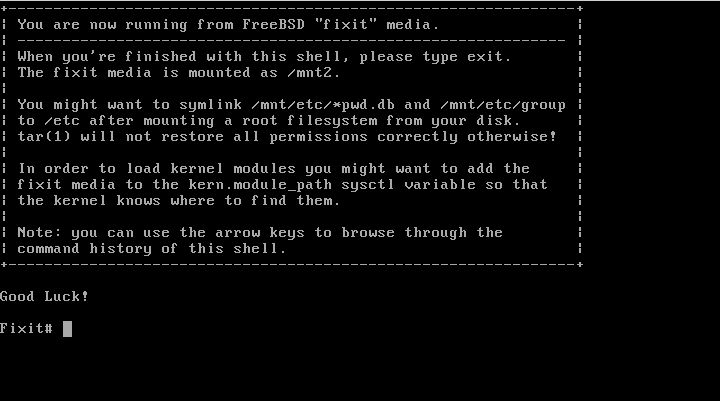
Figure 3: The 'Fixit' Prompt
Now, insert your removable media. For our example, we’ll assume a USB thumb drive with a device node on /dev/da0.
Before continuing, let me first warn you that the ordinary mount command will most likely not work. Usually, mount will determine the filesystem type and automatically call the appropriate binary. However, the way the live filesystem is setup, this doesn’t work — or at least, it didn’t work on my machine. So instead, you’ll want to call the command for your filesystem type directly. If it’s a CD, that command will be mount_cd9660. If you’re using a USB thumb drive with a FAT32 filesystem on it (as we will be in our example), the command will be mount_msdosfs.
Assuming our example with the USB thumb drive, you’ll issue the following commands:
#mount_msdosfs /dev/da0 /mnt
#cd /mnt/mps-bin/i386 for 32-bit (or #cd /mnt/mps-bin/amd64 for 64-bit)
#kldload ./mps.ko
#exit
At this point, you’ll be returned to the FreeBSD installer. Make sure to re-insert the DVD, then continue with the installation as usual. Once the installation is complete, don’t reboot! If you do, you won’t be able to start up FreeBSD, as we still have to install our kernel module and tell the boot loader to load it on boot.
So, now that the installation is finished, re-insert the DVD and return to the Fixit prompt. Once again, choose the ‘CDROM/DVD’ option. Assuming our USB thumb drive on /dev/da0 from before — the commands you use will differ based on the media you choose — type the following commands:
#mount_msdosfs /dev/da0 /mnt
#cd /mnt/mps-bin/i386 for 32-bit (or #cd /mnt/mps-bin/amd64 for 64-bit)
#./install.sh
If all goes well, the shell script will terminate without any output. Incidentally, it’s worth mentioning that the newly installed root filesystem is mounted on / when you enter the Fixit environment after installation. Now that we have the kernel module installed, we just need to tell FreeBSD to load it on boot. To do so, we just have one last command:
#echo 'mps_load="YES"' >> /boot/loader.conf
That’s it! Just unmount your media and exit the Fixit prompt.
#umount /mnt

#exit
At this point, you can exit the installer as usual and reboot. Once the system starts, you should find yourself face to face with a shiny new instance of FreeBSD 🙂
james August 10th, 2011
Posted In: FreeBSD, How-To, Open Source
Tags: 6gbps, 7.4-release, 8-stable, 8.0-release, 8.1-release, 8.2, 8.2-release, binary, driver, freebsd, howto, kernel, kernel module, lsi, lsi logic, module, mps, Open Source, raid, source, stable, tutorial
It May be Debian, but it’s also FreeBSD!
Debian. That’s a Linux distribution, right? Debian is (understandably) strongly associated with Linux. But, did you also know that a port of Debian exists that’s built on top of the FreeBSD kernel?
Say What?
The project is called KFreeBSD. At first glance, it may sound like a contradiction. After all, how can you run Linux on FreeBSD? The answer to this apparent paradox is that you’re not running Linux at all. Linux is just a kernel, and actually has little to do with the rest of the operating system. An entire Linux-based OS consists of much more, specifically a hierarchy of libraries and executables. These libraries and executables don’t have to run on top of Linux. In fact, they can operate on any *NIX-like platform. All the Debian developers have done is to port these libraries and executables over to the same kernel used by FreeBSD.
But, What’s it Good For?
Lots of stuff. Unlike Linux, the FreeBSD kernel has support for ZFS. Unlike Linux, the FreeBSD kernel has built-in support for NDIS drivers. Unlike Linux, the FreeBSD kernel interfaces have changed relatively little and have remained largely consistent.
Ok, then why not just use FreeBSD? You may prefer the Debian package manager to FreeBSD’s ports. Perhaps you prefer a Debian-style init system. Maybe you’d like to take advantage of code licensed under the GPL without having to compile third party kernel modules, like built-in support for ReiserFS or XFS.
For more information about why you might be interested in giving KFreeBSD a try, have a look at this: http://wiki.debian.org/Debian_GNU/kFreeBSD_why.
Ok, I’m Interested. Is it hard to install?
Not at all! If you know how to install Debian Linux, you also know how to install KFreeBSD. The process is identical. When you first boot off the CD image, you’re presented with the following GRUB prompt:
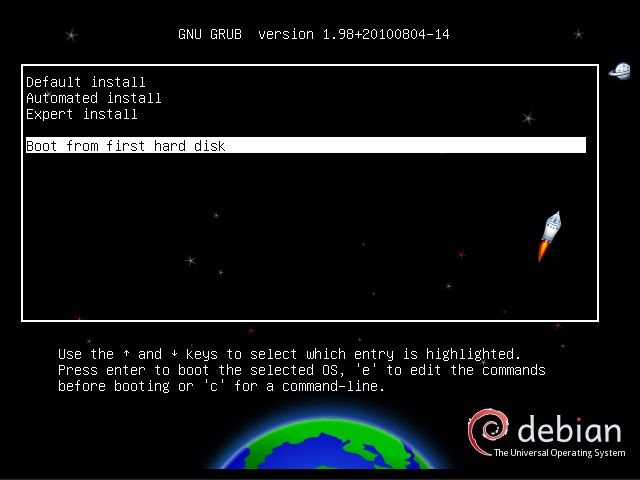
CD Boot Prompt
Once the installer starts running, you will see the following screens throughout the installation process:

Language Selection

Setting the Hostname

Disk Partitioning

Disk Partitioning

Installing Packages
Look familiar? 🙂
Is it Easy to Use?
Yes! KFreeBSD is as easy to use as Debian Linux. The only unfamiliar sight you may encounter is when the kernel starts to boot:

Booting the FreeBSD Kernel
After all the foreign kernel messages, you’ll immediately recognize the init scripts that are being called, as well as the login prompt when the system is ready:

KFreeBSD Login Prompt
Want to install an application? Simply type apt-get install <application>, just like you would on Linux:

Installing a Package
Do you prefer to use a GUI? Simply choose to install a Desktop Environment during installation and you’ll be presented with the following GDM prompt after the system boots:

GDM Login
Once logged in, you’ll get to navigate around using the already very familiar GNOME window manager:

GNOME Window Manager
What’s the Catch?
Unfortunately, there are a few. For starters, due to a bug in the Debian userland, wireless network adapters, while supported by the kernel, do not function. This can be worked around by running the FreeBSD version of ifconfig in a chroot jail. Also, there’s only partial support for Java via GIJ. This very incomplete implementation does not include Swing. The Sun JDK has yet to be ported, though there’s hope for the future on this point, since Sun’s Java does run natively when linked against the FreeBSD userland. Finally, the port is still experimental, which means you will likely encounter bugs.
For more information about KFreeBSD and the trade-offs of using it versus Debian Linux, consult the FAQ.
Conclusion
Part of what makes Open Source so attractive is choice. With the Debian userland now at least partially ported over to the FreeBSD kernel — a third port also exists based on GNU’s HURD — Debian users now have more freedom than before to mix and match technologies according to preference. While KFreeBSD’s experimental and in some respects incomplete status precludes it from ordinary use, it is nevertheless an interesting project, and one that will serve its users well when complete.
james June 15th, 2011
Posted In: Open Source
Open Source Media Center Solutions
I’ve been evaluating various open source media center applications in an effort to put together a new unit and had the opportunity to weight the relative pros and cons of each. Below, you’ll get to read about my findings and hopefully learn a little bit about what’s out there. So, without further ado, here’s a list of the packages I looked at, in order of preference.
1. Boxee
(http://www.boxee.tv/)
Boxee was my first pick. It has a slick interface, can draw from a variety of different sources such as Hulu and Youtube out of the box, makes available a plethora of plugins (called “applications”), is easy to navigate and has an interface very suited for a remote control. The biggest con for me is that, while the project itself is open source, in order to use it, you need to register for an account on their website.
2. XBMC
(http://www.xbmc.org/)
XBMC, which stands for “X-Box Media Center,” was originally designed for the X-Box and has since been made available on the PC. It sports a very polished interface, and like Boxee, is easy to navigate and makes using a remote control easy. Support for online sources such as Youtube is missing out of the box, but there are plenty of plugins to help. Unfortunately, unlike Boxee or Moovida (which is next in our list of applications), you have to go to external sources in order to find them (check out http://www.xbmczone.com/). Supposedly, it’s easy to install a plugin once you’ve downloaded it, but the directions I found online differed from how things worked with the latest version, and I ended up having to install plugins manually by unzipping them and copying the files to the right directory.
3. Moovida
(http://www.moovida.com/)
Moovida, formerly known as Elisa, is another media center option. Like Boxee and XBMC, it sports an easy to navigate interface suited to a remote control, and unlike XBMC, integrates the process of finding, installing and updating plugins a part of the application itself. The reason why I rated this one below XBMC is that there aren’t a lot of plugins available, and because the interface to XBMC is, in my opinion, slightly more polished.
4. Miro
(http://www.getmiro.com/)
(My reason for rating Miro at the bottom isn’t that Miro is a bad application. In fact, I enjoyed using it. It comes with support for many video feeds by default and does a good job of organizing media. My problem, for our purposes, is that it’s not such a great application for set top boxes. The UI is easy to use, but I don’t think it would be as friendly when hooked up to a TV with a remote control. Also, it’s difficult to add sources such as Youtube, as you have to manually add RSS feeds for the channels that interest you. Nevertheless, it’s a useful application, and I recommend giving it a try.
james August 6th, 2009
Posted In: media center, multimedia, Open Source
Tags: audio, media center, Open Source, video