
eRacks Systems Tech Blog
Open Source Experts Since 1999
LSI Logic 6Gbps mps Driver for FreeBSD 8.2-RELEASE
EDIT: Binary modules have now also been provided for 7.4, 8.1 and 8.0. The instructions below should apply to all three, with the exception that you’ll want to download either mps-bin-7.4.tar.gz, mps-bin-8.1.tar.gz or mps-bin-8.0.tar.gz.
Unfortunately, the mps driver, which supports LSI Logic’s 6Gbps series of RAID controllers, didn’t make it into the FreeBSD kernel until after 8.2-RELEASE. As a result, FreeBSD users who require this driver are forced to either install 8-STABLE — which, despite the name, is a development branch — or pull the driver’s source code from 8-STABLE and build it on FreeBSD 8.2-RELEASE. Since we recently needed to use the mps driver and had to stick with a production-ready release, we opted for the second option. Along the way, we decided to bundle up the driver’s source to make the task easier for those who don’t want to install a development branch, and to pre-compile binary modules for those who wish to install 8.2-RELEASE directly to the hardware RAID array.
If you have a separate hard drive for the operating system that’s not on a 6Gbps LSI controller and simply use the hardware RAID for additional storage, you can do a normal install of FreeBSD 8.2-RELEASE to the hard drive, boot into the new system and perform the following steps:
1) Download mps.tar.gz
2) Extract it, cd to the ‘mps’ directory and type make && make install
3) Edit /boot/loader.conf and add the following line at the end: mps_load="YES"
4) Reboot (or type kldload mps.ko without rebooting)
If instead you want to install 8.2-RELEASE directly to an array on your 6Gbps LSI controller, a few extra steps are required.
First, download mps-bin.tar.gz, extract it by typing tar -zvxf mps-bin.tar.gz and place the contents on some form of removable media mountable by FreeBSD. A USB thumb drive, a floppy disk or a CD will suffice (though, a CD would be an awful waste of space… :))
Second, make sure to download the FreeBSD DVD and not the CD. We will require the live filesystem that’s contained only on the larger DVD. Once the installer is running, choose your language as usual, then select “Fixit” instead of the usual installation method. Choose the CDROM/DVD option.
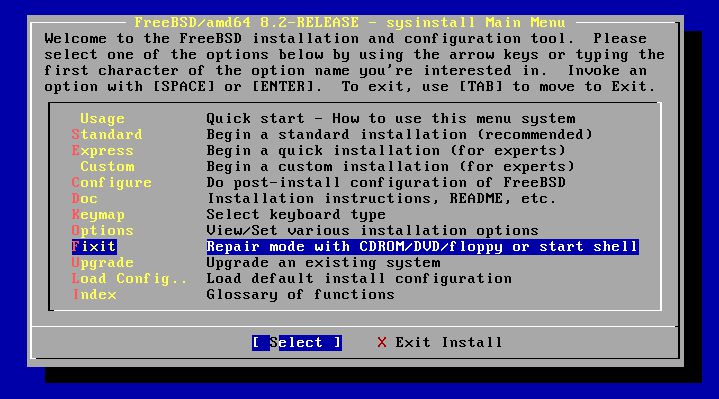
Figure 1: Select 'Fixit' instead of an installation method
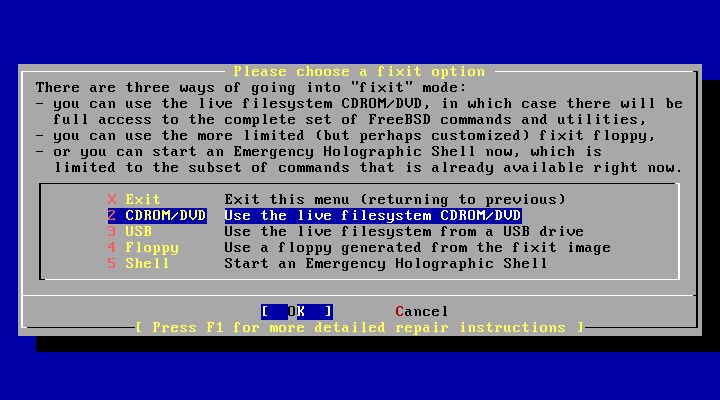
Figure 2: Select 'CDROM/DVD'
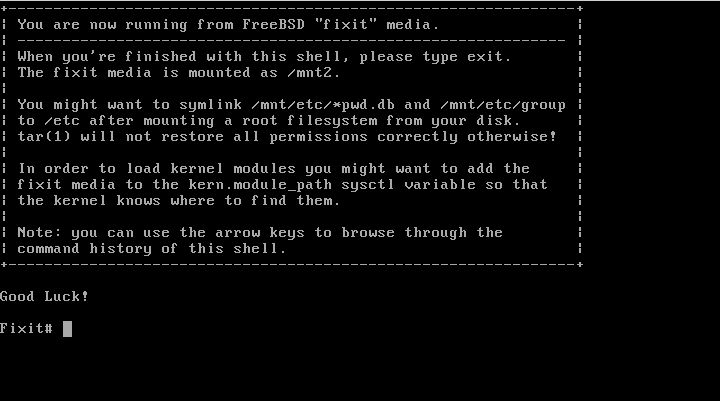
Figure 3: The 'Fixit' Prompt
Now, insert your removable media. For our example, we’ll assume a USB thumb drive with a device node on /dev/da0.
Before continuing, let me first warn you that the ordinary mount command will most likely not work. Usually, mount will determine the filesystem type and automatically call the appropriate binary. However, the way the live filesystem is setup, this doesn’t work — or at least, it didn’t work on my machine. So instead, you’ll want to call the command for your filesystem type directly. If it’s a CD, that command will be mount_cd9660. If you’re using a USB thumb drive with a FAT32 filesystem on it (as we will be in our example), the command will be mount_msdosfs.
Assuming our example with the USB thumb drive, you’ll issue the following commands:
#mount_msdosfs /dev/da0 /mnt
#cd /mnt/mps-bin/i386 for 32-bit (or #cd /mnt/mps-bin/amd64 for 64-bit)
#kldload ./mps.ko
#exit
At this point, you’ll be returned to the FreeBSD installer. Make sure to re-insert the DVD, then continue with the installation as usual. Once the installation is complete, don’t reboot! If you do, you won’t be able to start up FreeBSD, as we still have to install our kernel module and tell the boot loader to load it on boot.
So, now that the installation is finished, re-insert the DVD and return to the Fixit prompt. Once again, choose the ‘CDROM/DVD’ option. Assuming our USB thumb drive on /dev/da0 from before — the commands you use will differ based on the media you choose — type the following commands:
#mount_msdosfs /dev/da0 /mnt
#cd /mnt/mps-bin/i386 for 32-bit (or #cd /mnt/mps-bin/amd64 for 64-bit)
#./install.sh
If all goes well, the shell script will terminate without any output. Incidentally, it’s worth mentioning that the newly installed root filesystem is mounted on / when you enter the Fixit environment after installation. Now that we have the kernel module installed, we just need to tell FreeBSD to load it on boot. To do so, we just have one last command:
#echo 'mps_load="YES"' >> /boot/loader.conf
That’s it! Just unmount your media and exit the Fixit prompt.
#umount /mnt

#exit
At this point, you can exit the installer as usual and reboot. Once the system starts, you should find yourself face to face with a shiny new instance of FreeBSD 🙂
james August 10th, 2011
Posted In: FreeBSD, How-To, Open Source
Tags: 6gbps, 7.4-release, 8-stable, 8.0-release, 8.1-release, 8.2, 8.2-release, binary, driver, freebsd, howto, kernel, kernel module, lsi, lsi logic, module, mps, Open Source, raid, source, stable, tutorial
Many thanks for making this clean and simple. You’ve really covered all the bases: source or binary, 32 or 64-bit, whether during install or on a separate OS drive.
I was going to wait until 8.3 or 9.1 to start using my IT-flashed Dell PERC H200i; now I’m up and rolling.
Sep 26 22:44:37 atoz kernel: mps0: port 0xc000-0xc0ff mem 0xfb3b0000-0xfb3bffff,0xfb3c0000-0xfb3fffff irq 16 at device 0.0 on pci3
Thanks again!
Glad I could help! 🙂
I tried this and even though I could load the module and see the new device (Dell PERC H200i), when I exit “Fixit” the installer still sees NO disks.
I don’t know how to proceed.
Hey Duane, I really thought that would have worked. Sorry to have lead you astray. All is not lost, though. You actually can install FreeBSD from the fixit environment, even though it’s a bit more work and a little more messy. There are tutorials that cover how to do that (you’d take off on the tutorial after having kldloaded the driver, follow the other tutorial, then continue with this blog at the point where you install the driver to your OS installation.) I’ll search around for some instructions on how to do so, then edit this blog to make sure it doesn’t lead anyone else down the wrong path.
Duane, most of what I can find about installing from the fixit environment has to do with using ZFS. If you’re interested in a ZFS system, you can continue on in the fixit environment and follow these instructions: http://wiki.freebsd.org/RootOnZFS/GPTZFSBoot
Then conclude by installing the mps driver and telling the bootloader on the hard drive to load it.
Just in case anyone else runs into this. These instructions work great with FreeBSD 8.2 and a Dell R210 II and the PERC H200A SAS Controller. However, there was one more thing I had to do to get the installer to see the hard disk after loading the mps.ko into the kernel:
On the main menu of the FreeBSD installer, pick Options
Arrow down to “Re-scan Devices ” and press spacebar.
Hit Q to exit Options
Now when you go to the Standard install, it properly detects the newly found hard drives.
[…] support: mps (first in FreeBSD 9.0, then backported to 8.2-stable, and 8.1, 8.0, 7.4) [Added on […]