eRacks Systems Tech Blog
Open Source Experts Since 1999
Ubuntu LiveCD Won’t Boot? No Problem!
This blog is the result of at least two hours of pain and suffering while trying to boot off of an Ubuntu-based CD. If it saves even one person from the same laborious fate, it has served its purpose.
How many times have you attempted to boot from an Ubuntu CD, only to find yourself sitting in front of a very intimidating (initrd) prompt with no clue as to why the system failed to boot or how to fix it? Unfortunately, the causes of this dreaded phenomena are many, which often makes troubleshooting this problem very difficult. I myself have run into this issue on occasion, though up until a couple weeks ago it had never been caused by anything too difficult to fix. Most of the time it was simply a matter of using unsupported hardware. That all changed with my latest install.
Now, before I go any further with this, I should probably note that the distribution I had trouble with was NOT Ubuntu; it was an Ubuntu derivative, Eeebuntu, developed by a third party that is not in any way affiliated with Ubuntu. In fact, I later tried installing from an official Ubuntu CD and it booted just fine!
That being said, it’s quite possible that you have found yourself faced with the (initrd) prompt on at least one occasion. If so, you hopefully figured out what went wrong and were able to fix it. But, what if you’ve exhausted all of your obvious options? It’s quite possible that you’ll ask questions on the Ubuntu forums, only to find that nobody has an answer that solves your problem. That isn’t in any way meant to disparage the Ubuntu community. In fact, I think you’ll find that the forums are very helpful and that the community is very friendly and knowledgeable. Rather, it’s quite possible that, for whatever reason, you’ve run into a problem the community hasn’t yet encountered or been able to solve, which on some rare occasions may even turn out to be a bug. Whatever the reason may be, short of finding another Linux distribution, you may be thinking that all is lost. Fortunately, there’s another way!
When you see the (initrd) prompt, it’s because, for whatever reason, Ubuntu was unable to find or mount the root filesystem. The solution is to manually do the mounting for the Ubuntu CD. Assuming you can get the filesystem mounted, you should have no problem breaking out of what at first glance may have seemed to be a hopeless situation.
Now, you may be tempted to believe that the root filesystem of the Ubuntu CD is the same root filesystem you would see after booting the Ubuntu LiveCD, but that’s actually incorrect. Ubuntu uses a special compressed filesystem called SquashFS. If you mount your Ubuntu LiveCD, you should find it in /path/to/cdrom/casper/filesystem.squashfs. With this information in mind, we can proceed.
Step 1: Manually mount the CD
From the (initrd) prompt, manually enter the following command:
mount /dev/scd0 /cdrom
(scd0 should be replaced by the device name that refers to your optical drive.)
If you can’t find a device name for your optical drive, that may be why the initrd (short for initial RAM disk) failed to mount it. If you’re sure there’s no device in /dev for your optical drive, copy the contents of the Ubuntu disc to an external hard drive or USB thumb drive (either should be recognized immediately by the initrd after being plugged into a USB port.) Mount it instead of the CD to complete this step. To do so, use the command:
mount /dev/your_device /cdrom
(note that the device name usually shows up as sda1, sdb1, sdc1, etc.)
Step 2: Manually mount the root filesystem
Again, from the (initrd) prompt, enter the following command:
mount -o loop /cdrom/casper/filesystem.squashfs /mnt/root
At this point, things may or may not get tricky. Most likely, the command will be successful and you’ll be ready to continue booting the Ubuntu LiveCD. If that’s the case, skip directly to step 4.
Step 3: I can’t mount the root filesystem; HELP!
It’s possible that you’re more than just a little unlucky, and that for some very strange reason that I haven’t yet figured out, you don’t have support for loopback devices. Fear not! You will have some extra work to do, but the following steps should work just fine.
First, you’ll need access to another Linux machine. You’ll also need a spare hard drive or USB thumb drive. Please note that if using a thumb drive, you’ll need one larger than 2GB, as the SquashFS filesystem included on the CD will take up more than 2GB of space when decompressed. Finally, make sure that squashfs support is installed on your system, as it most likely isn’t by default. Depending on your Linux distribution, yo u may or may not have to patch your kernel and compile the squashfs module manually. If you’re using a distribution like Ubuntu, you shouldn’t have to.
Now, mount the block device you’re going to extract the filesystem’s contents to (we’ll refer to it henceforth as /dev/sda1.) We’ll assume for the sake of this tutorial that we’re mounting it to the directory /mnt/tmp. To do so, you would enter the following command:
mount /dev/sda1 /mnt/tmp
Next, we must mount the SquashFS filesystem. Assuming we’re using the mount point /mnt/squashfs, we would do so with the following command:
mount -o loop /path/to/cdrom/casper/filesystem.squashfs /mnt/squashfs
Finally, copy the contents of /mnt/squashfs to /mnt/tmp. Note that simply using the command cp will result in symbolic links being treated as real directories, which is not desirable. Instead, we’ll use tar and pipes. Enter the following commands, in order:
cd /mnt/tmp
tar -jcvp /mnt/squashfs/* | tar -jvxp
When the above commands are completed, enter this one last command:
mv /mnt/tmp/mnt/squashfs/* /mnt/tmp; rm -rf /mnt/tmp/mnt
Now, just unmount the volumes and you’re done!
umount /mnt/tmp
umount /mnt/squashfs
Step 4: Success!
At this point, you’ve succeeded in mounting the root filesystem that, for whatever reason, was unable to be mounted automatically by the LiveCD. Just type the command “exit” from the prompt and watch as Ubuntu continues where it left off. Note that you will no longer have a splash screen during the boot process, so expect to see the output of init for a few seconds as it starts background processes before seeing a graphical login.
Wrapping Things Up
Hopefully, this blog will prove useful to someone. Even if you haven’t run into this issue before, it’s good information to have on hand for the day when that changes. In addition, the techniques outlined in this blog aren’t just useful for getting a cranky LiveCD to behave. If you’re using a device that’s bootable via the BIOS but which isn’t supported by Ubuntu, and you’d rather not take the time to modify the LiveCD to make it work, simply follow the steps above to copy the contents of the CD to another device and manually mount the real root filesystem.
james October 16th, 2008
Custom-Built Quiet Machines: No Job Too Tough!
Hello again.
It’s Max, your favorite Op. Manager here at eRacks. Today, I am going to talk a bit about quiet computing, something eRacks knows a lot about!
In today’s world, not every small business, home office, studio or gaming lounge has the ability to put up with what sounds like twin 747s taking off right next to you. However, proper cooling is paramount, and for some reason, quiet and cooling seem to be at opposite ends of the spectrum, much like chaos and order, orcs and humans, or tofu and steak.

Performance vs. Decibel Level
So, you ask, what can I do? You could buy low power embedded designs like Via, but then you sacrifice performance. You could buy liquid cooling, which we like, but there is a chance of it leaking if you decide to move it or if you don’t take good care of the pump and tubing. By contrast, you could do what we do, which is to find the best components for the job. Unfortunately, I can’t give all the company secrets — I would probably get punished by a very intimidating penguin (or spiky blowfish) if I were to spill the beans.
Specialized Low-Noise Components

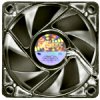
A SilenX Quiet Fan
However, I can provide some generalities. First of all, we have a great partner in SilenX that provides fans and power supplies with super airflow at a noise level that is almost undetectable! We also know the power of rubber, grommets and hard drive placement. Dual or triple layered walls and chambered chassis also help to reduce noise, and if you are really serious, use foam and vibration dampening.
Quiet and Overclocked ?
eRacks can help you avoid spending hours testing and retesting combinations of components, in your effort to achieve quiet computing. We may be one of the few vendors that is known for our customized quiet systems with overclockability, for rendering, gaming, simulation or studio work. Even, say, Quad-core CPU with SLI graphics (overclocked), yet still quiet? It can be done, and done well. Also, eRacks’ cooling and quietization process is warrantied – Try finding that elsewhere – Not going to happen!
Lower Electric Bill
Added benefit: Quiet computers actually require less power and save money. Adjusting the voltage of certain components lowers the load on the power supply, which in turn lowers your energy bill.

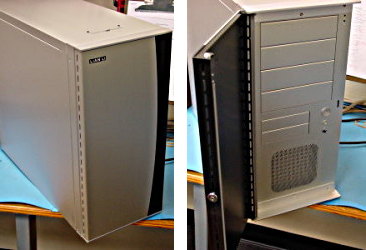
This eRacks chassis has rubber grommets for vibration dampening, isolated PSU, and fan speed-controllers.
Audio Bliss
In audio or production settings, any bit of noise or interference can turn a master work into something that goes straight to the trash. By quietizing your computer, you can avoid vibrations and fan noise that would otherwise make your Mozart sound like, well, amplified intestinal vocalizations.
Advancements in cooling, thermal wattage, performance and piping technologies have made it so that eRacks has perfected the art of constructing a quiet monster-gaming, or audiophile computer system. eRacks has numerous configurations, special designs and company expertise that gets it done within budget and exceeds expectations.
Silence, customized
If you have any questions or comments, want a more in depth idea about what we do, or if you have a configuration you think we can help you on, just let us know. I personally can help you out with whatever questions you have, and the rest of the eRacks staff is happy to discuss your options. Next time someone shows up at your LAN party with their dual CPU box that sounds like a tank rumbling over a heard of screaming shrews, just remember, eRacks can build a similar system that’s quieter than a graveyard at midnight (which is where your opponent’s avatar will end up when you no scope him from across the screen.) No hacks; just pure performance, cooling and engineering to provide you the very best in rendering, gaming and application-based work.
Max, signing out.

max October 7th, 2008
Posted In: Products, Quiet Computing

