eRacks Systems Tech Blog

Open Source Experts Since 1999

The latest (non-LTS) Ubuntu 19.10, Eoan Ermine is now available on all eRacks systems.

Here are the Release Notes for it.

Simply select it from the OS choices in the “Operating System” dropdown while configuring your eRacks system.

UPDATE Feb 2020

As always, we can also install the pre-release / beta version of the next Ubuntu release, code-named Focal Fossa, which will indeed be an LTS release, and is scheduled for April 23, 2020 –

Just say you want Ubuntu 20.04 Focal Fossa in the “Notes” field when you pace your order.

j

October 25th, 2019

Posted In: Linux, News, Operating Systems, ubuntu, Upgrades

Tags: , , , ,

Leave a Comment

Ubuntu 19.04, aka “Disco Dingo“, is now available on all eRacks systems.

Ubuntu 19.04 (Disco Dingo)

Canonical – The company behind Ubuntu published its regular (non-LTS) version as Ubuntu 19.04 (Disco Dingo) on April 18, 2019. The first Ubuntu 19.04 beta released on March 28. Other milestones during “Disco Dingo” development included feature freeze on February 21, 2019, UI freeze on March 14, 2019, and kernel freeze on April 1, 2019.

Up until this version, the codename of each Ubuntu release is traditionally made up of an adjective and an animal, both beginning with the same letter. But that’s only partly true this time – The word “Disco” is actually both a noun and a verb rather than adjective. A disco is a type of club or party at which people dance to music, often under lights.

A “Dingo” is a type of feral dog native to Australia and known for its sand-colored coat. Dingo dogs hunt alone or in cooperative packs. Inspired by the nature of the Dingo (which often sulks off when humans are around) the word has become informal Australian slang meaning ‘cowardly’, e.g., ‘he dingoes his way out of the date’.

Ubuntu 19.04 Disco Dingo is only the second Ubuntu release to use the letter ‘D’, following Ubuntu 6.06 “Dapper Drake” (released back in the land before time, aka 2006).

Since Ubuntu 19.04 (Disco Dingo) is a non-LTS version (not a Long Term Support version), it will be supported for 9 months until January 2020. If you need Long Term Support, it is recommended you use Ubuntu 18.04 LTS instead.

This article for Ubuntu 19.04 (Disco Dingo) provides an overview of the release and documents the known issues with Ubuntu 19.04 and its flavors.

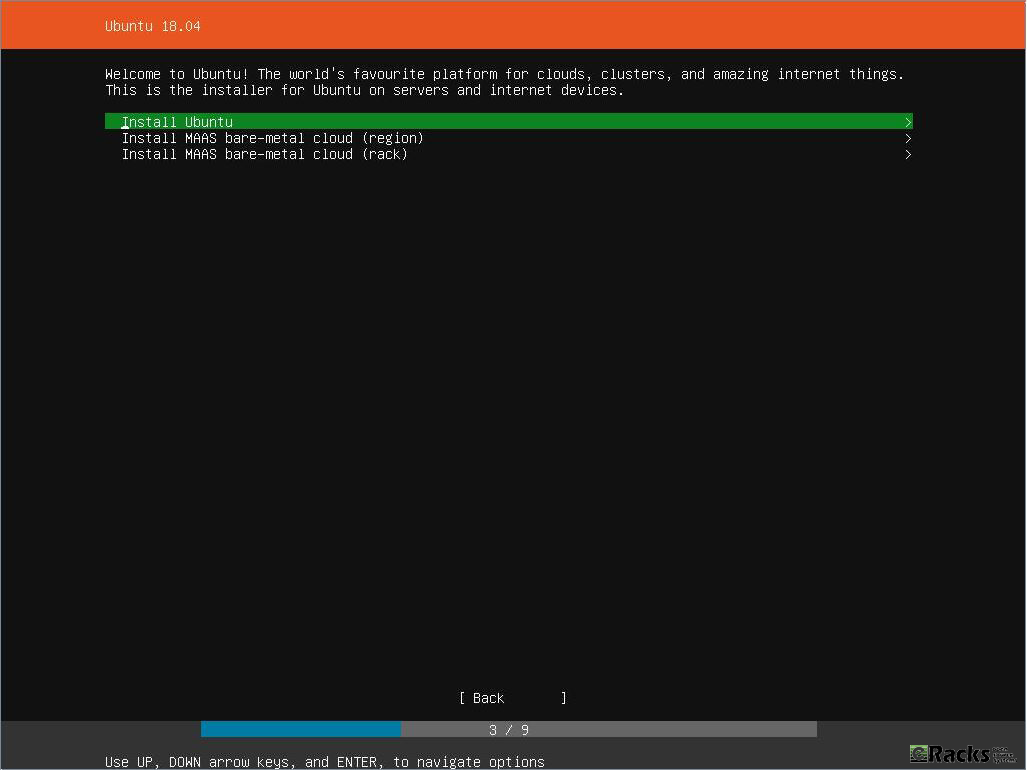
Since the release of Ubuntu 19.04, everyone is talking about its Desktop Version. We’re going to do something a little different. We’re going to start with the Ubuntu 19.04 Server version first. Let’s what’s new:

Ubuntu 19.04 (Disco Dingo) Server Updates.

Every time Canonical releases a new version, it brings many new and noticeable changes. Each new version improves the previous one and strives to provide better user experiences.

Canonical made many changes on Ubuntu 19.04 (Disco Dingo) Server – the following are notable:

QEMU

In Ubuntu 19.04, QEMU was updated to the 3.1 release.

Migrations from former versions are supported just as usual. When upgrading it is always recommended to upgrade the machine types allowing guests to fully benefit from all the improvements and fixes of the most recent version.

Qemu now has virglrenderer enabled which allows to create a virtual 3D GPU inside qemu virtual machines. That is inferior to GPU pass-through, but can be handy if the platform used lacks the capability for classic PCI pass through as well as more modern mediated devices.

For more details, see the QEMU 3.1 change log.

LIBVIRT

Among many other changes worth to mention is the ability to have GL enabled graphics as well as mediated devices to be configured while still being guarded by custom apparmor profiles generated per guest. This is required for the use of GPU based mediated devices as well as VirGL (mentioned above in the QEMU section). For bringing these changes libvirt was updated to version 5.0.

DPDK

Ubuntu includes 18.11.x the latest stable release branch of DPDK. The very latest (non-stable) version being 19.02 was not chosen for downstream projects of DPDK (like Open vSwitch) not being compatible.

DPDK dependencies were reorganized into more or less common/tested components. Due to that most DPDK installations will now have a smaller installation footprint and less potentially active code to care about.

For more details see the release notes.

SAMBA

Samba was updated to version 4.10.x, and one of the big changes here is python3 support. In Disco, samba and its dependencies are all python3 only now, with the exception of tdb. tdb still builds a python2 package, namely python-tdb, but all the others, including samba itself, are python3 only.

Open-VM-Tools

To run well integrated as VMware guest Ubuntu 19.04 comes with the latest open-vm-tools version 10.3.10. Details about the changes can be found in the upstream changelog

Raspberry Pi

Ubuntu 19.04 comes with an easy way of enabling Bluetooth support on the raspi3 Ubuntu-server preinstalled images. Install the Pi-Bluetooth package (now available in multiverse) with ‘sudo apt install pi-bluetooth’.

Please note that supported Pi devices which have Bluetooth (at the time of writing, the Raspberry Pi 3B, 3B+, and 3A+) can have either serial console or Bluetooth support enabled at any given time (not both). With the Pi-Bluetooth package installed, edit it at ‘/boot/firmware/config.txt’ and set ‘enable_uart=1’ to enable serial console, or ‘enable_uart=0’ to enable Bluetooth. The change will take effect after the next reboot.

Open vSwitch

Open vSwitch has been updated to 2.11. This updated Open vSwitch version has support for the kernel versions 4.16.x and 4.17.x. Also the following features can be found on this version.

  • “mod-table” command can now change OpenFlow table names.
  • The environment variable OVS_SYSLOG_METHOD, if set, is now used as the default syslog method.
  • The environment variable OVS_CTL_TIMEOUT, if set, is now used as the default timeout for control utilities.
  • OVN-SB schema changed: duplicated IP with same Encapsulation type is not allowed any more. Please refer to Documentation/intro/install/ovn-upgrades.rst for the instructions in case there are problems encountered when upgrading from an earlier version.
  • New support for IPSEC encrypted tunnels between hypervisors.
  • ovn-ctl: allow passing user:group ids to the OVN daemons.
  • IPAM/MACAM add the capability to dynamically assign just L2 addresses
  • IPAM/MACAM add the capability to specify a static ip address and get the L2 one and it is allocated dynamically using the following syntax: ‘ovn-nbctl lsp-set-addresses <port> “dynamic <IP>”.’

Please read the Open vSwitch release notes for more detail.

OpenStack Stein

Ubuntu 19.04 includes the latest OpenStack release, Stein, including the following components:

  • OpenStack Identity – Keystone.
  • OpenStack Imaging – Glance.
  • OpenStack Block Storage – Cinder.
  • OpenStack Compute – Nova.
  • OpenStack Networking – Neutron.
  • OpenStack Telemetry – Ceilometer, Aodh, Gnocchi, and Panko.
  • OpenStack Orchestration – Heat.
  • OpenStack Dashboard – Horizon.
  • OpenStack Object Storage – Swift.
  • OpenStack Database as a Service – Trove.
  • OpenStack DNS as a Service – Designate.
  • OpenStack Bare-metal – Ironic.
  • OpenStack Filesystem – Manila.
  • OpenStack Key Manager – Barbican.

Please refer to the OpenStack Stein release notes for full details of this release of OpenStack.

WARNING: Upgrading an OpenStack deployment is a non-trivial process and care should be taken to plan and test upgrade procedures which will be specific to each OpenStack deployment. For Upgrading successfully please make sure you read the OpenStack Charm Release Notes for how to deploy Ubuntu OpenStack using Juju. Or simply contact eRacks Systems’ experts for help.

There are many other changes on newly released Ubuntu 19.04 non-LTS Server. Please read the Ubuntu 19.04 (Disco Dingo) non-LTS Server release note for more details.


Ubuntu 19.04 (Disco Dingo) Desktop (And Kernel) updates.

Linux Kernel 5.0.0-8 “Shy Crocodile”

The Linux Kernel had its number bumped to 5.0.0-8 by Linus Torvalds, but not because of particularly noteworthy code changes. Usually, a significant number jump like this would echo an equally significant code or functionality change, but that isn’t the case. In an email to the Linux Kernel Mailing List, he explained:

“The numbering change is not indicative of anything special. If you want to have an official reason, it’s that I ran out of fingers and toes to count on, so 4.21 became 5.0.”

Torvalds went on to give a breakdown of the code changes in Linux 5.0:

This new kernel should be faster, too, as work was done to speed up the anti-Spectre and Meltdown code.

GNOME desktop 3.32

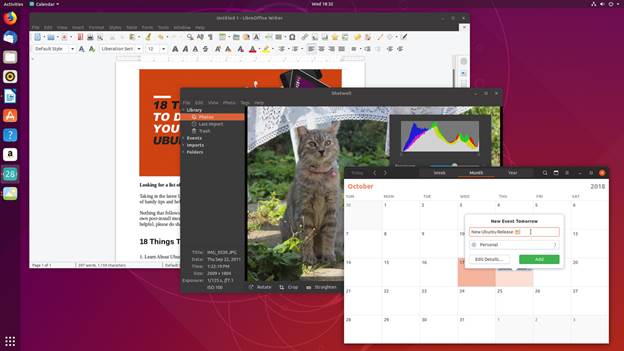
Ubuntu 19.04 ships with the latest GNOME desktop 3.32. This brings performance improvements, a host of bug fixes and some important new features. Beyond the visual changes, GNOME itself is faster and uses fewer GPU resources thanks to work done by both Canonical and the upstream GNOME team.

Of course, there’s a new wallpaper in latest GNOME desktop 3.32. But the first thing you’ll probably notice is a new icon on the desktop for your home directory. If you don’t like it, you can install GNOME Tweaks and use it to hide the home directory icon.

In keeping with modern “flat” design, the desktop’s top bar and launcher have solid-black backgrounds. The application menus have been moved back to each application’s window. They no longer appear in the toolbar. That’s a change in GNOME and not a design decision from Canonical. Some applications always kept their menus in their own application windows, which made the experience inconsistent. There were also some long-standing issues that were tough to fix. Now, that whole initiative has been canned in favor of a traditional menu placement—each applications menu is in the application’s own window.

Fractional Display Scaling (Possibly)

GNOME 3.32 includes support for fractional scaling, which is of interest to people with high DPI (Dots Per Inch) displays.

Unfortunately, in the modified version of GNOME supplied with Ubuntu, the fractional scaling settings are either hidden or not accessible to us. Eventually, a tool might allow access to these settings—or another means of accessing those settings will emerge from the user community. After all, they’re in GNOME.

Live patch for Reboot-Free Kernel Updates

Canonical introduced Live patch in Ubuntu 18.04 LTS, only to remove it again in 18.10. It’s now back, complete with this new tab in Software & Updates.

Livepatch


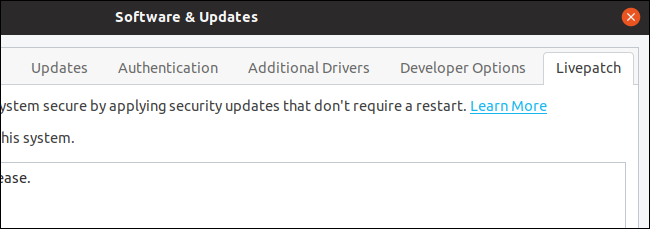
Ubuntu 19.04’s Software and Updates app has a new tab called Live-patch. This new feature is intended to allow critical kernel patches to be applied without rebooting. For people using Ubuntu at home, on machines that get powered off frequently, requiring a power cycle to install a kernel update isn’t a hardship. If your Ubuntu computer is providing an external service or is hosting a website, it becomes trickier to try to schedule in the reboots.

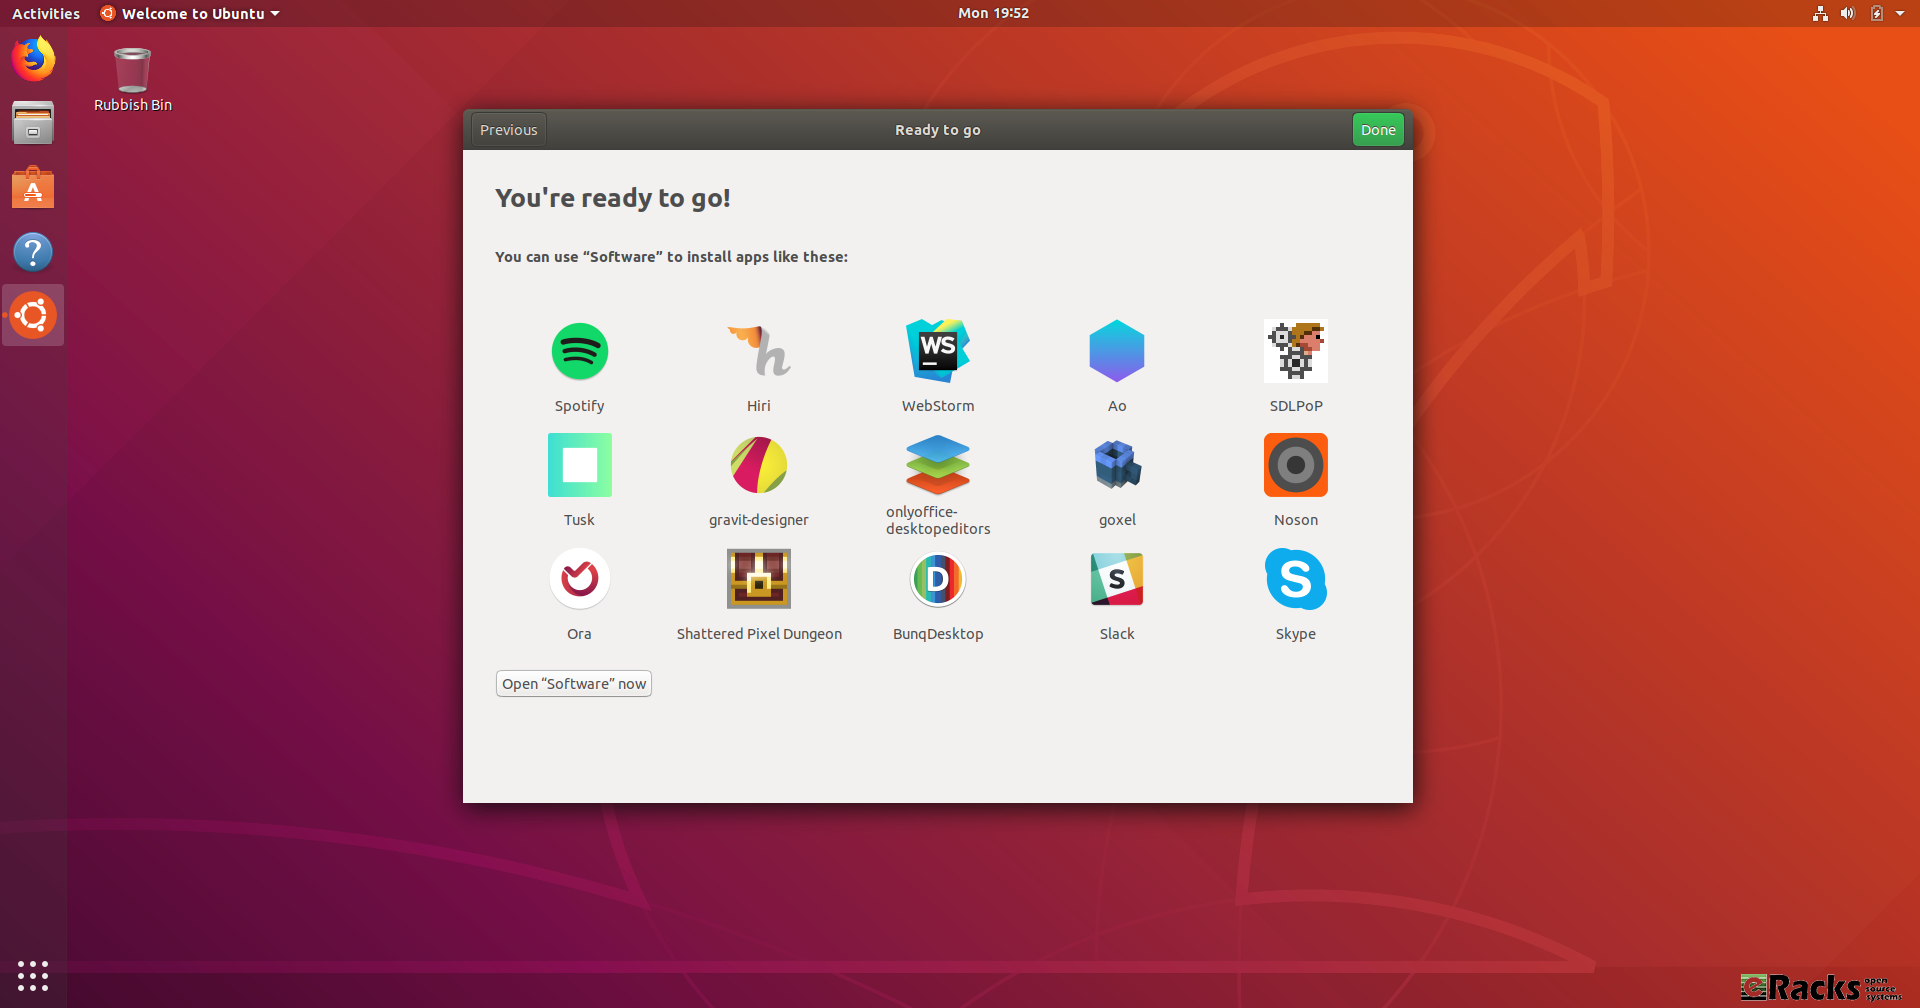
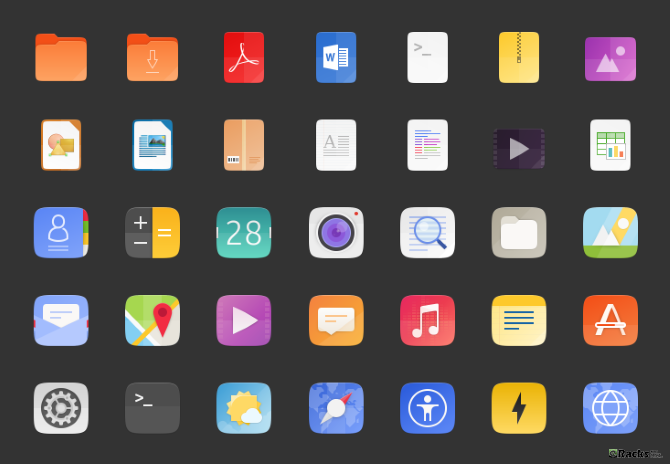
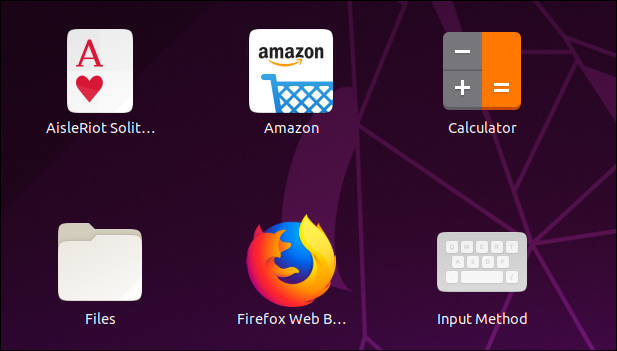
New Icons and Visual Tweaks

The Yaru icon set has had a refresh, and new icons have been added to cater for more third-party applications. This icon set looks more coherent and slick. There’s evidence of attention being paid to the user interface all over. Files has had a facelift, and it looks crisp and feels responsive. That’s not a surprise.

Icons


Even the Terminal window has been polished up. The GNOME Terminal application has a new title bar with a prominent “New Tab” button and search icon.

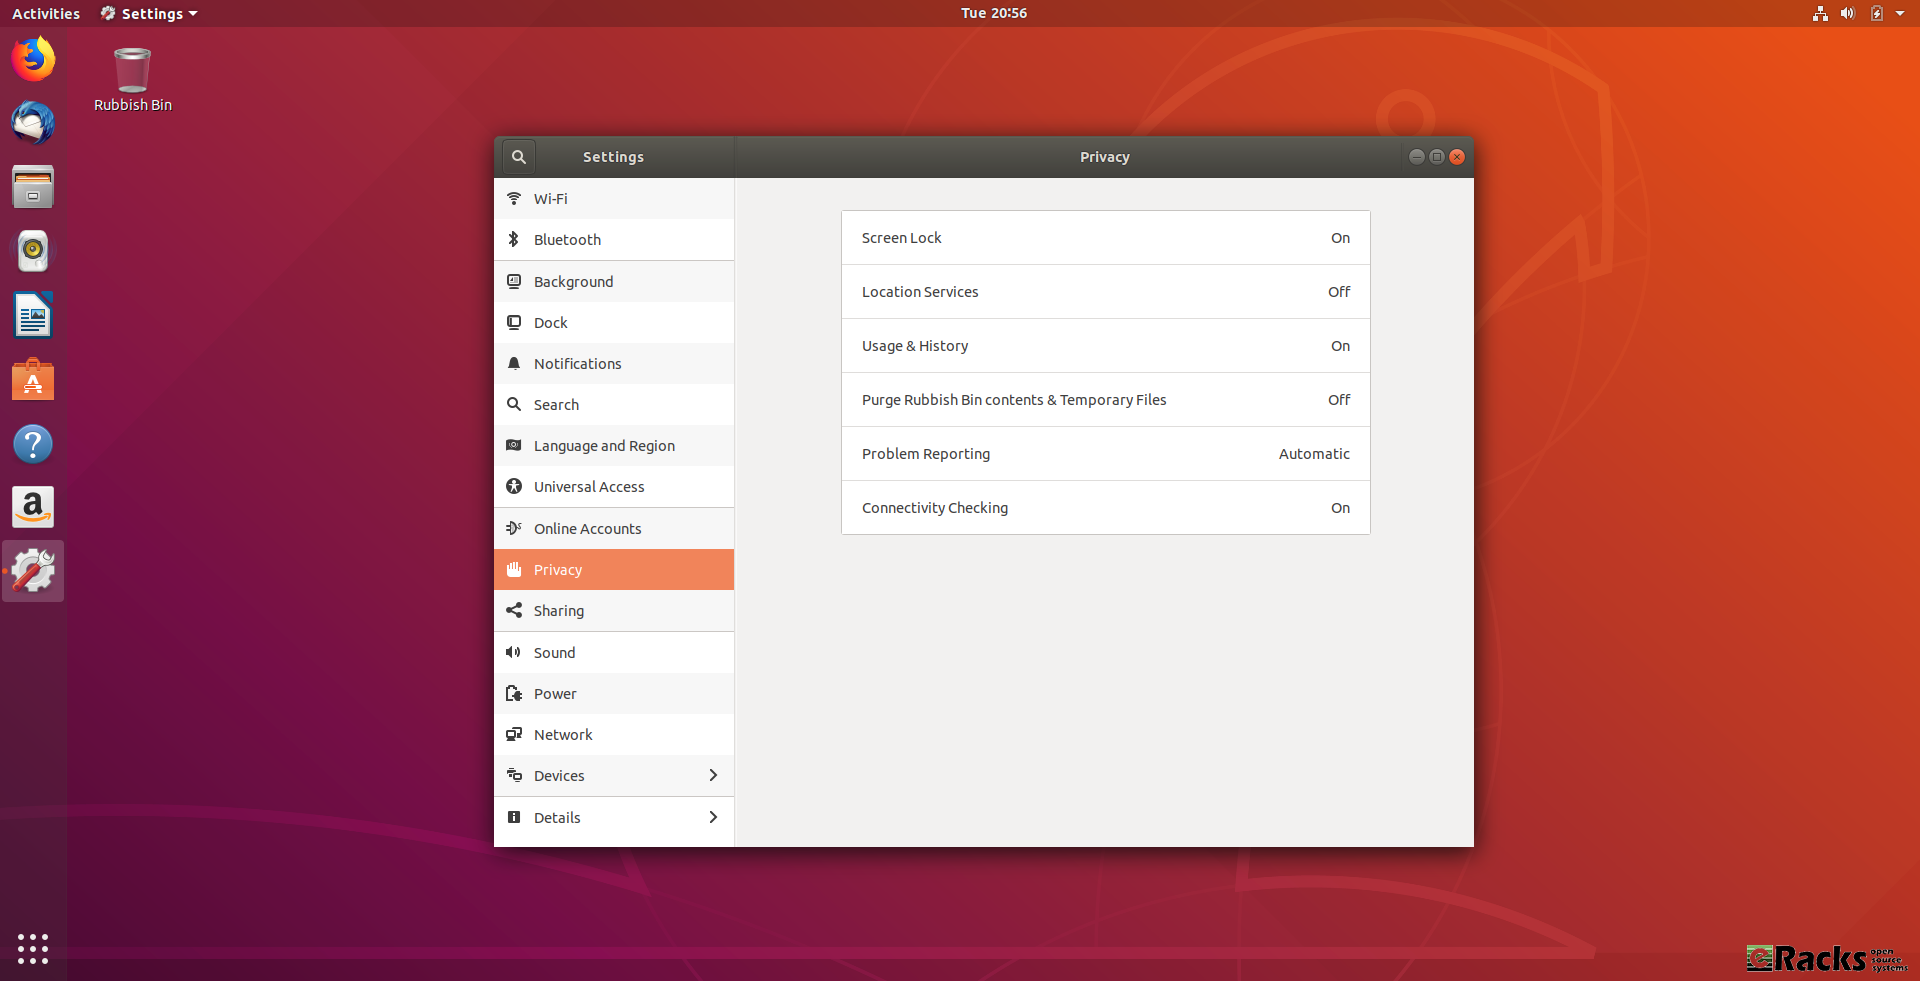
The System menu has a new cogwheel Settings icon that replaces the old “crossed wrench and screwdriver” icon.

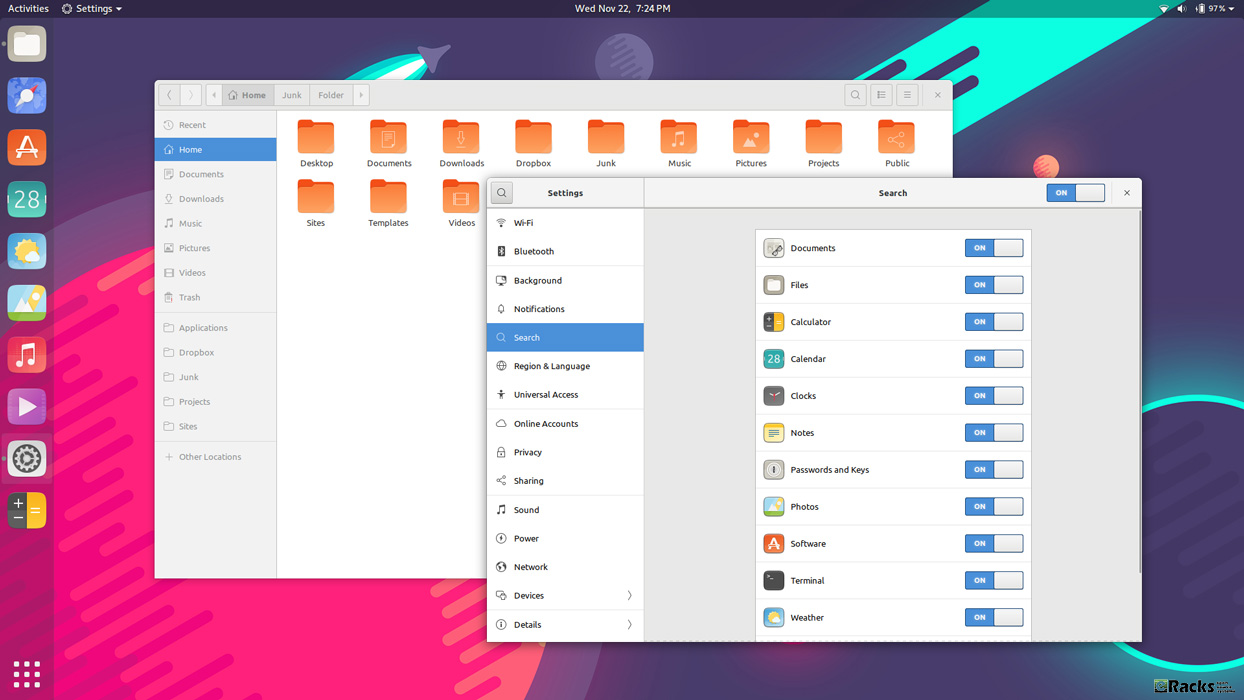
Application Permission Controls

GNOME’s Settings app now lets you control various application permissions. You can even choose whether or not each application can show notifications.

Application


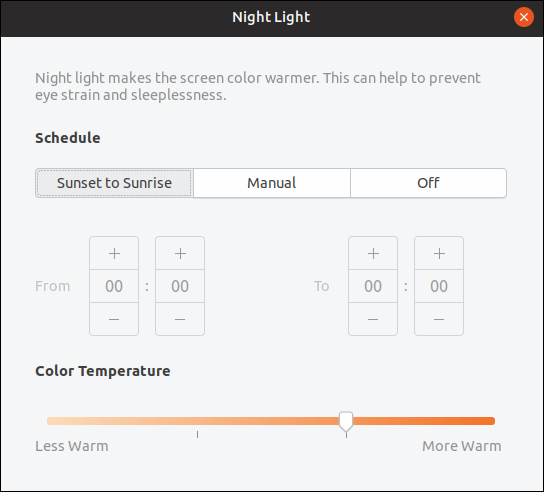
Night Light Improvements

The Night Light feature changes the hue of your computer’s display, reducing the amount of blue in the display illumination as the sun sets. You can now configure the schedule for the Night Light yourself. You can also select the color temperature—or “warmth”—of the display when Night Light is activated.

Light


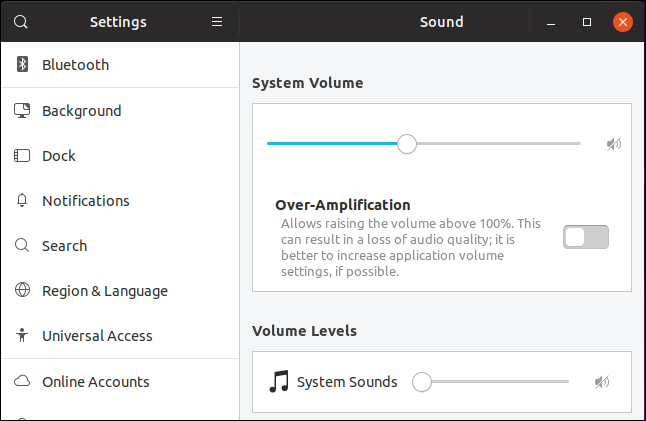
Updated Sound Controls

The Sound controls have been revamped. You don’t get more functionality than before, but the controls are laid out more conveniently and logically.

Sound


Raspberry Pi Touch Support

The bulk of the driver work in the kernel has been to graphics drivers, with enhanced support for displays ranging in size and capability—from the AMD FreeSync NVIDIA RTX Turing to the Raspberry Pi Touch Display. The Debian-derived Raspbian Linux already supported the Raspberry Pi Touch Display, but now you have the choice of using native Ubuntu with your Pi Touch.

There are many other changes as well. Some of them are mentioned below:

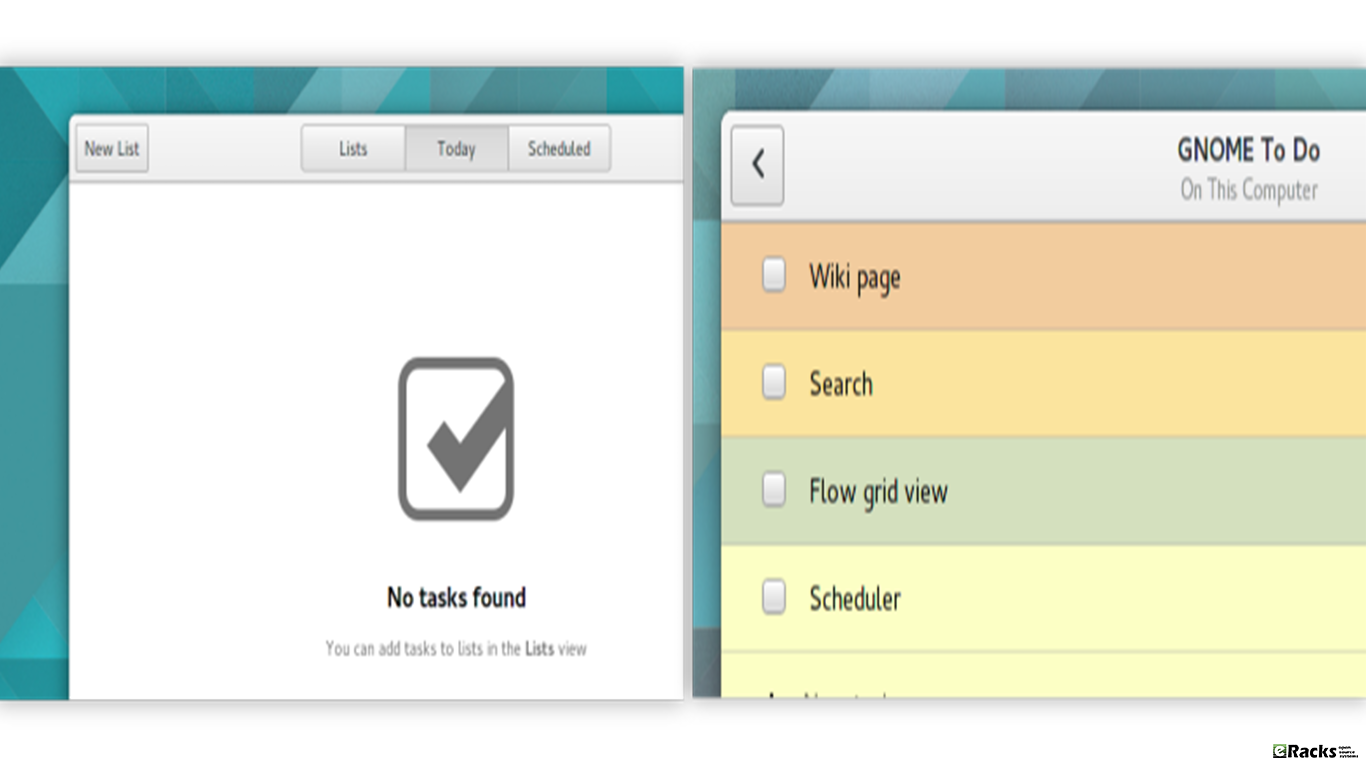
  • Tracker is now included by default. This allows the desktop to keep track of recently used files and improves searching.
  • Right click handling is now “area” by default. This allows both two-finger right clicking and clicking in the bottom right corner of the touchpad
  • alt-tab handling now switches windows by default. Switching applications by default can be done with super-tab
  • Preview order of windows in the dock is now static and based on the order in which the windows were added
  • IWD can now be enabled for use with Network Manager. IWD is a new alternative to wpa supplicant and is in testing for consideration in the future.
  • Installing Ubuntu Desktop on vmware will now automatically install the open-vm-tools package to improve integration.
  • The Yaru theme has seen further refinement and updates and includes a new icon theme.
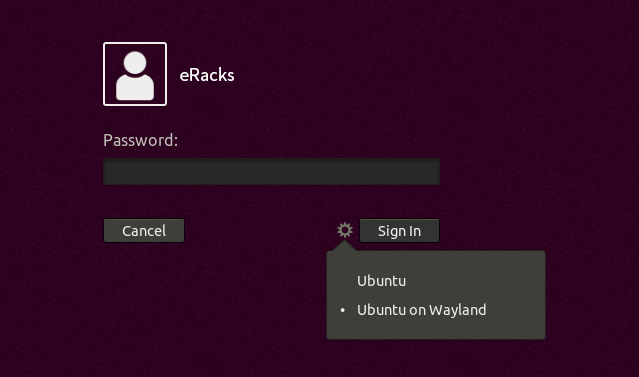
  • Safe Graphics Mode. A new option is added to the Grub menu which will boot with “NOMODESET” on. This may help you resolve issues on certain graphics cards and allow you to boot and install any propriatary drivers needed by your system.
  • The latest releases of Firefox (66.0) and LibreOffice (6.2.2) are available and installed by default.


Some of the Common New features and Updated Packages in both Ubuntu 19.04 (Disco Dingo) non-LTS Desktop and Server Version.

Linux kernel 🐧

Both Ubuntu 19.04 (Disco Dingo) non-LTS Desktop and Server are based on the Linux release series 5.0. It includes support for AMD Radeon RX Vega M graphics processor, complete support for the Raspberry Pi 3B and the 3B+, Qualcomm Snapdragon 845, many USB 3.2 and Type-C improvements, Intel Cannonlake graphics, significant power-savings improvements, P State driver support for Skylake X servers, POWER memory protection keys support, KVM support for AMD Secure Encrypted Virtualization, enablement of Shared Memory Communications remote and direct (SMC-R/D), Open for Business (OFB), and zcrypt on IBM Z among with many other improvements since the v4.15 kernel shipped in 18.04 LTS.

Toolchain Upgrades 🛠️

Ubuntu 19.04 comes with refreshed state-of-the-art toolchain including new upstream releases of glibc 2.29, ☕ OpenJDK 11, boost 1.67, rustc 1.31, and updated GCC 8.3, optional GCC 9, 🐍 Python 3.7.3 as default, 💎 ruby 2.5.5, php 7.2.15, 🐪 perl 5.28.1, golang 1.10.4. There are new improvements on the cross-compilers front as well with POWER and AArch64 toolchain enabled to cross-compile for ARM, S390X and RISCV64 targets.


There are many other changes on newly released Ubuntu 19.04 non-LTS verson. Please read the Ubuntu 19.04 (Disco Dingo) non-LTS release note for more or Disco Dingo Release Notes.

Get your system with Ubuntu 19.04 (Disco Dingo) as pre-installed from eRacks Systems’ show room with Quote request. Or download Ubuntu 19.04 (Disco Dingo) directly from below.


April 24th, 2019

Posted In: Linux, Open Source, Operating Systems, ubuntu

Tags: , , ,

Leave a Comment

Ubuntu 18.10, aka ‘Cosmic Cuttlefish’, is available now on all eRacks systems.


cosmic_cuttlefish


Ubuntu 18.10 ‘Cosmic Cuttlefish’ supported with 9 months of security updates, bug fixes and select app upgrades. Users of it will be able to upgrade to Ubuntu 19.04 when it’s released in April, 2019.

When the release of a new version as Ubuntu 18.10 ‘Cosmic Cuttlefish’, the first question arrives in mind, “What are updated comparing with the current Ubuntu 18.04 LTS version?”

Linux Kernel


The most important update in ‘Cosmic Cuttlefish’ is, it has updated Linux Kernel. Ubuntu 18.10 has Linux Kernel 4.18. This Kernel version has some improvements for AMD and Nvidia GPU, USB Type-C and Thunderbolt, and performance optimizations in CPUfreq among several other features.


Another important thing is having faster installation and boot with new compression algorithms. Working with new compression algorithms like LZ4 and ztsd, ‘Cosmic Cuttlefish’ is supposed to have around 10% faster boot. The installation will be slightly faster as well. Which is definitely the good news for all Ubuntu users.


As always Ubuntu 18.10 will have this new GNOME version. Most of the visual and under the hood changes in GNOME 3.30 will be seen in Ubuntu 18.10 as well.


GNOME 3.30


Taking cue from Fedora 28, Canonical is also working to improve battery life for laptops. Linux kernel has options to switch HDD controllers, USB controllers and other such devices to a low power state when not in use. This lowers the overall power consumption and thus improves the battery life.

Ubuntu 18.04 was supposed to have a new look with the community developed Community theme. This theme could not be completed in time for the 18.04 release. But Ubuntu 18.10 has it. The ‘Cosmic Cuttlefish’ has the Yaru Community theme installed by default, giving it a ravishing fresh look.


Some other changes in the Ubuntu 18.10 ‘Cosmic Cuttlefish’ are as follows:

  • Support for fingerprint scanner.
  • Startup time boost and XDG Portals support for Snap applications.
  • 32-Bit support diminishing from flavors.
  • UI and UX improvements to GNOME Software (possibility).
  • DLNA support for connecting Ubuntu with DLNA supported Smart TVs, tablets and other devices.
  • A new and improved installer (less likely to be completed before 18.10 release).
  • Ubuntu Software removes dependencies while uninstalling software.
  • Ubuntu Software will show a green verified tick for Snap applications developed by the owner of the brand. The same can be found on the recently redesigned Snap store website.


Ubuntu 18.10 ‘Cosmic Cuttlefish’ is a modest update compared to 18.04. The vast majority of notable improvements are tucked away out of sight, ‘under the hood’. Ubuntu 18.10 feels faster than 18.04, But you can’t “see” the changes that shape Ubuntu 18.10 ‘Cosmic Cuttlefish’, you almost certainly will feel them.

October 24th, 2018

Posted In: Linux, New products, News, Open Source, Operating Systems, ubuntu

Tags: , , , , ,

Leave a Comment

    Ubuntu 18.04 LTS (Bionic Beaver) has been released on 26th April 2018 following its planned release schedule. Canonical named this Long Term Support version with codename “Bionic Beaver”, where ‘Bionic‘ is an adjective meaning to have or use an artificial, typically electromechanical, body part. And a ‘Beaver‘ is large nocturnal rodent able to swim in water. Beavers are famous for building dams, canals, and homes along river banks.

Ubuntu 18.04 LTS (Bionic Beaver)

Ubuntu 18.04 LTS (Bionic Beaver)


    On 26 January 2018, Will Cooke (Desktop Engineering Manager) wrote in an Ubuntu’s Blog post about Ubuntu 18.04 LTS (Bionic Beaver) as, “Bionic Beaver, the codename for the next Ubuntu LTS release, is due in April 2018 and will ship with both the traditional Xorg graphics stack as well as the newer Wayland based stack, but Xorg will be the default.”


Ubuntu 18.04 LTS (Bionic Beaver) Support lifespan

    Ubuntu 18.04 is an LTS version, which means that the ‘main’ archive of Ubuntu 18.04 LTS will be supported for 5 years until April 2023 from its release date April 2018. Ubuntu 18.04 LTS will be supported for 5 years for Ubuntu Desktop, Ubuntu Server, and Ubuntu Core. Ubuntu Studio 18.04 will be supported for 9 months. All other flavors will be supported for 3 years.

Compared with the previous Ubuntu LTS edition (Ubuntu 16.04.4 LTS Xenial Xerus), there are a lot of changes in the new Ubuntu LTS release (Ubuntu 18.04 LTS Bionic Beaver).

Let’s see what’s new in Ubuntu 18.04 LTS Bionic Beaver release:

what’s new in Ubuntu 18.04 LTS Bionic Beaver

What’s new in Ubuntu 18.04 LTS (Bionic Beaver)


Xorg will be used by default instead of Wayland

    Ubuntu 17.10 used the Wayland graphics server by default. With Ubuntu 18.04, the default graphics server will change to Xorg. Wayland will still be available as an option, but Xorg will be the default, out-of-the-box one. The Ubuntu Desktop team decided to go with Xorg for its compatibility with services like Skype, Google Hangouts, WebRTC services, VNC and RDP, and more.

Xorg with Ubuntu 18.04 LTS

Xorg with Ubuntu 18.04 LTS


Ubuntu 18.04 minimal install option

    Ubuntu 18.04 will use Ubiquity, the Ubuntu installer you’re probably already familiar with. Though the developers plan on implementing Subiquity, 18.04 will use Ubiquity, which will have a new “minimal install” option that you can choose during setup. Minimal install basically means the same Ubuntu, but without most of the pre-installed software. The minimal install option saves about 500 MB, and is only 28MB in size when it is compressed.

Minimal Install

Minimal Install


CPU usage improvements and bug fixes

    The most notable improvement will be in CPU usage. The Ubuntu Desktop team has greatly improved and reduced the CPU usage caused by Ubuntu 18.04. They’ve also fixed hundreds of bugs and made hundreds of other small improvements.


Software, updates and other tweaks

    If you missed the Ubuntu Welcome tool you can still enable LivePatch via Software & Updates. Open Activities and search for Software & Updates.

Software & Updates.

Software & Updates.


    From the Updates tab you can enable and disable Live Patch:

Enable/ Disable Live Patch

Enable/ Disable Live Patch


    There are some other useful settings in GNOME Control Center which you might like to toggle:

GNOME Control Center

GNOME Control Center


    By enabling Location Services your clock can automatically switch to the correct time zone for where you are which is useful for frequent travelers. By enabling automatic error reporting crash reports will be automatically generated and uploaded. By collecting these error reports, Canonical can easily spot trends in common problems and make sure they work on getting the most common bugs fixed first.


Ubuntu 18.04 Desktop will have a new theme

    Ubuntu 18.04 will ship with Ambience and it won’t use a new theme by default. The new Communitheme won’t even be installed. The Desktop team has decided to do this for various reasons, including bugs and lack of testing.

Luckily, you can still use the Communitheme, but you’ll have to install it yourself. The Communitheme can be installed easily via a snap, but you can always install it manually.

New Communitheme with Ubuntu 18.04 LTS

New Communitheme with Ubuntu 18.04 LTS


GNOME Desktop Environment

    Ubuntu started using the GNOME desktop environment with Ubuntu 17.10 instead of the default Unity environment. Ubuntu 18.04 will continue using GNOME. This is not a major change to Ubuntu, but GNOME has also done a lot of changes to their desktop environment, as well as new features. An improved dock, an on-screen keyboard, and more.

GNOME Desktop Environment

GNOME Desktop Environment


Ubuntu 18.04 Desktop will have a new app pre-installed

    The new LTS desktop release will ship with a new app pre-installed by default. The app is GNOME To Do and it’s a very useful app for organizing lists, tasks, and more. You can prioritize them. color them, set due dates, and a number of other features.

GNOME To Do

GNOME To Do


Applications will be installed as snaps by default

    They been planning on using snaps for a while, and they finally shipped GNOME Calculator as a snap instead of a deb. This is a test to help the Desktop team find and fix any bugs. They’ll later on move more applications to snap in the final release. Using snaps will make the process of installing and updating apps much easier. You can even install snaps on any distro and device.


Some New Apps

Some New Apps

Some New Apps


    New snaps are being added to the store all the time, and you can already download essentials like Spotify, Skype and Slack. You can browse the full range of applications via GNOME Software (click the Open “Software” now button) or access the highlights directly by clicking on their icon.


A Brand New Icon Set

A Brand New Icon Set

A Brand New Icon Set


    Open source icon project Suru has been incorporated into Ubuntu 18.04. These icons were originally seen in the abandoned Ubuntu Touch mobile operating system. Despite hopes to the contrary and a dedicated community project, Ubuntu 18.04 will not boast a fresh new look. However, while the Ambiance theme is hanging around, new icons are expected in Ubuntu.


Color Emojis

Color Emojis

Color Emojis


    Some tweaks will give you color emojis on versions of Ubuntu prior to 18.04 LTS, this is the first time they’ve been included by default. The emojis you’ll find in Ubuntu 18.04 LTS are the same open source emojis as found on Android. For many users, these will be familiar.


Ubuntu 18.04 will collect data about your system and make it public

    Ubuntu 18.04 will collect data like the Ubuntu flavor you’re using, hardware stats, your country etc. Anyone can opt-out of this, but it’s enabled by default. What’s interesting about this is that the data they collect will be public, and no sensitive data will be collected. so most of the Ubuntu community supports this decision.

However, there is a potential security concern that you should be aware of. With Ubuntu 18.04 LTS, Canonical intends to collect data from your computer. Though there is nothing personally identifiable in this data. Instead, it is to establish your computer’s hardware components, what version of Ubuntu you’re running, your location (based on your choice when setting up Ubuntu) and a few other things.

Collecting data about your system

Collecting data about your system


    This marks a change from Canonical’s previous attitude to this sort of data collection, but is understandable given how flakey figures are for Linux usage around the world. Crucially, this data collection can be opted out of; if you’re upgrading from a previous version of Ubuntu, meanwhile, you can also opt in.


Alongside these changes Canonical has made some noticeable upgrade on packages for Ubuntu 18.04 Bionic Beaver too. Some of them are as follows,

Linux kernel 4.15

Ubuntu 18.04 ships with a v4.15 based Linux kernel, enabling the latest hardware and peripherals available. The 18.04 kernel delivers new features inherited from upstream, including:

  • CPU controller for the cgroup v2 interface.
  • AMD secure memory encryption support.
  • The latest MD driver with software RAID enhancements.
  • Improved power management for systems with SATA Link Power Management.
  • Linux security module stacking support.
  • Support for signing of POWER host and NV kernels.


OpenJDK

As of 18.04 release, OpenJDK 10 is the default JRE/JDK. Once OpenJDK 11 reaches GA in September 2018, it will become the default in 18.04.

OpenJDK 8 has moved to universe and will remain available there for the life of 18.04, to provide migration time for packages, custom applications, or scripts that can’t be built with OpenJDK 10 or 11. OpenJDK 8 will be updated in 18.04 after Ubuntu 16.04 LTS reaches EOL in April 2021.


Security Improvements

In Ubuntu 18.04 LTS, gcc is now set by default to compile applications as position independent executables (PIE) as well as with immediate binding, to make more effective use of Address Space Layout Randomization (ASLR). All packages in main have been rebuilt to take advantage of this, with a few exceptions. Also, bolt and thunderbolt-tools have been promoted to main to provide security controls for Thunderbolt devices.


Default CIFS/SMB protocol version change in CIFS mounts

Since 17.10, the default SMB protocol used when mounting remote CIFS file systems via “mount.cifs” is changed to 2.1 or higher, depending on what is negotiated with the server.


At a glance change in Ubuntu 18.04 LTS (Bionic Beaver) Desktop Edition

  • Wayland is provided as a Technical Preview and is expected to be the default display server in 20.04 LTS. To try it out, just choose Ubuntu on Wayland from the cog on the log in screen.
  • The installer offers a minimal install option for a basic desktop environment with a web browser and core system utilities. Many official 18.04 desktop flavors are using this new feature too!
  • Apps provided by GNOME have been updated to 3.28.
  • LibreOffice has been updated to 6.0.
  • Emoji now show in color in most apps. Keyboard shortcuts for the emoji input chooser are Ctrl+. or Ctrl+;
  • Calendar now supports weather forecasts.
  • Some utilities have been switched to the snap format for new installs. Snap apps provide better isolation which allows them to be upgraded to new stable releases during the LTS lifecycle.
  • The Characters app replaces the older Character Map by default.
  • The Ubuntu Software app allows easy switching between different channels for Snap apps.
  • The ‘To Do’ app has been added to the default normal install.
  • spice-vdagent is pre-installed for better performance for spice clients such as the GNOME Boxes app.
  • The right-click method for touchpads without physical buttons has changed to a two-finger click instead of clicking in the bottom right of the touchpad.
  • Although libinput is the default driver for mice and touchpads, it is now possible to use the synaptics driver with the Settings App. Support for the synaptics driver will be dropped in a future Ubuntu release.
  • Computers will automatically suspend after 20 minutes of inactivity while on battery power.
  • GNOME Shell now supports Thunderbolt 3.


eRacks/FLASH48

eRacks/FLASH48

Configure eRacks/FLASH48 an All-Flash Server With Ubuntu 18.04 LTS (Bionic Beaver) Server Edition.


Comparing with Ubuntu 17.10 (Artful Aardvark) & Ubuntu 16.04.4 LTS (Xenial Xerus) the latest Ubuntu 18.04 Bionic Beaver Server edition’s packages are upgraded as well. Some of them are as follows,

Server installer

The next generation Subiquity server installer, brings the comfortable live session and speedy install of Ubuntu Desktop to server users at last.

Ubuntu 18.04 Bionic Beaver Server Edition Installer

Ubuntu 18.04 Bionic Beaver Server Edition Installer


Netplan.io

ifupdown has been deprecated in favor of netplan.io and is no longer present on new installs. Backend configuration on Ubuntu Server by default is provided by systemd-networkd.


LXD 3.0

LXD is the system container manager that ships with all Ubuntu servers. Ubuntu 18.04 includes the all new LXD 3.0 release, some of the highlights include:

  • Clustering of LXD servers (one big virtual LXD)
  • Support for NVIDIA runtime pass-through
  • Remote transfer of custom storage volumes
  • Extended /dev/lxd API inside the containers
  • Support for port redirection
  • Numerous improvements to the command line tools

A new external tool called lxd-p2c is also available to turn existing systems into LXD containers.


QEMU 2.11.1

QEMU has been updated to the 2.11.1 release.

Among many other changes, fixes around Meltdown/Spectre are included. Since fully utilizing these mitigations needs more than just an upgrade, it is recommended to read details at the qemu.org blog post.

QEMU in Ubuntu 18.04 now has rdma support enabled as over the past year much unification in the rdma-core project has occurred.

Migrations from former versions are supported just as usual. When upgrading it is always recommended to upgrade the machine types allowing guests to fully benefit from all the improvements and fixes of the most recent version.


libvirt 4.0

libvirt has been updated to version 4.0.

The packaging now builds libvirt storage drivers as pluggable libraries. This slims down the installation requirements but some drivers of less general interest will now be found in universe. On the other hand, that means that a few formerly integrated features like rbd or zfs now might require you to install the package after upgrade.


DPDK 17.11.x

Ubuntu includes 17.11.x the latest stable release branch of DPDK.

By the new Stable Release exception for DPDK future stable updates to 17.11.x will be made available to Ubuntu 18.04 LTS.


Open vSwitch 2.9

Open vSwitch has been updated to 2.9.

  • NSH implementation now conforms to latest draft (draft-ietf-sfc-nsh-28).
  • Ovs-vsctl and other commands that display data in tables now support amax-column-width option to limit column width.
  • Added support to send IPv6 Router Advertisement packets in response to the IPv6 Router Solicitation packets from the VIF ports.
  • No longer send packets to the Linux TAP device if it’s DOWN unless it is in another networking namespace.


Chrony

In Ubuntu 18.04 LTS chrony will replace ntpd as the recommended server for the NTP protocol. The comparison among ntp servers by the chrony maintainers may interest some users looking to see a high-level reason why this change was made. It does lack the rather new and not yet completely ready ntpsec, but otherwise is a fair analysis.

For simple time sync needs the base system already comes with systemd-timesyncd. Chrony is only needed to act as a time server or if you want the advertised more accurate and efficient syncing.

Going along with this change, ntpd has been demoted from main to universe. ntpd will continue to work but will only receive best-effort security maintenance. When upgrading to Ubuntu 18.04 LTS it is highly recommended to migrate to chrony if you had set up ntpd before.


Cloud-Init

The version was updated to 18.2. Notable new features include:

  • VMware: support for 64-bit platforms and identifying OVF data source provided.
  • GCE: Improvements and changes to ssh key behavior for default user.
  • Azure pre-provisioning speed improvements.
  • NoCloudKVM and EC2 tests now run in continuous integration.
  • New cloud support: IBMCloud and HetznerCloud now have official data sources and OpenTelekom is now recognized by cloud-id.
  • OpenNebula: Improve network configuration support.
  • New cloud-init command-line tools available: status, analyze and clean.
  • New ubuntu cloud-config modules for managing snaps and ubuntu-advantage services.


Curtin

The version was updated to 18.1. Notable features include:

  • Add experimental zpool and zfs filesystem support, including ZFS on root.
  • Add support for installing remote sources that are a filesystem image.
  • Add pollinate user-agent configuration support.
  • Improved device teardown of dirty devices to support re-deployment.
  • Default config now automatically tars curtin logs upon error using new curtin collect-logs command.
  • storage: accept filesystem mount options.
  • Extensive integration test coverage and improvements.


MAAS

The version was updated to 2.4b2. Notable features include:

  • Add audit logging.
  • Add KVM pod support to create tags, select the storage pool, and compose machines with multiple storage pools.
  • Add UI for DNS management.
  • Add the commissioning template framework for HBA management.
  • Add the commissioning template framework for Firmware Upgrades.
  • Improve UI performance by performance.
  • Improve MAAS’ backend performance.
  • Improve the UI for the Settings.
  • Add experimental support to configure zfs as the root filesystem.
  • Switch to use Chrony instead of ntp.


SSSD

SSSD was updated to version 1.16.x and its secrets service is now enabled. Previously it was disabled because it required the http-parser library which lived in Universe, but a successful MIR brought it to main so SSSD could link with it.


Nginx

nginx was updated to version 1.14.0. New features include the mirror module, HTTP/2 push, and the gRPC proxy module.


PHP

PHP is updated to version 7.2.x.


Apache

Apache was updated to version 2.4.29. Additionally, HTTP/2 support is now enabled in 18.04 LTS.


landscape-client

landscape-client has been ported to Python 3 and is now available to install on the default image.


Ubuntu-advantage-tools

  • New dynamic MOTD support for Canonical Livepatch. This indicates, at a glance, the status of livepatches when logging in on a console.
  • New enable-fips-updates command to enable a special FIPS repository with non-certified updates for FIPS enabled systems.


OpenStack Queens

Ubuntu 18.04 includes the latest OpenStack release. OpenStack Queens is also provided via the Ubuntu Cloud Archive for OpenStack Queens for Ubuntu 16.04 LTS users.

eRacks’ Custom Cloud Server system with OpenStack Queens and Ubuntu 18.04 LTS OS.

eRacks’ Custom Cloud Server system with OpenStack Queens and Ubuntu 18.04 LTS OS.

Note: Upgrading an OpenStack deployment is a non-trivial process and care should be taken to plan and test upgrade procedures which will be specific to each OpenStack deployment.


To make things easier, eRacks Systems offers Custom Enterprise Cloud Server with OpenStack Queens (or another cloud software according to custom request) and Ubuntu 18.04 LTS OS.


To download Ubuntu 18.04 LTS (Bionic Beaver) select the desire install image or visit Ubuntu 18.04 LTS (Bionic Beaver) official download page.

    As with release of latest version of Ubuntu 18.04 LTS Bionic Beaver, we, the eRacks Systems (Open Source experts since 1999) offer latest Ubuntu 18.04 LTS (Bionic Beaver) both Desktop or Server edition with our systems as pre-configured according to your custom quote…

May 18th, 2018

Posted In: Open Source, Operating Systems, ubuntu

Tags: , ,

Leave a Comment

There are many Open Source DNS server services for Linux systems. Here we’ll discuss about installing and configuring one of the most popular DNS server services among them known as “Bind9”. We’ll use another most popular Debian based Linux server operating system distributed by Canonical which is Ubuntu 16.04 LTS Server edition.

Other good DNS implementations include the native OpenBSD DNS implementation, as well as Dan Bernstein’s tinyDNS (AKA djbdns), but these are topics for future articles. (We use djbdns on OpenBSD, internally).

Successfully installing and configuring Bind9 Server service on Ubuntu 16.04 LTS server edition require several steps. For better understanding we’ll divide the total process into two main steps as ‘Basic installs’ and ‘Securing the DNS Server’ service. Each main category could be divided into several additional steps.

Basic Installing Steps:

  1. Install fresh Ubuntu 16.04 LTS Server OS on a server.
  2. Preparing the Ubuntu 16.04 LTS Server OS for installing Bind9 DNS Server Service.
  3. Install Bind9 DNS Server Service and configure Caching-only name server.
  4. Install and configure Primary DNS server or Master DNS server.
  5. Bind9 Post installation Configurations for successful service run on Ubuntu Server.
  6. Install and configure Secondary DNS server or Slave DNS server.

Securing Bind9 DNS Server Service:

  1. Configure SPF record for securing mail server under Bind9 DNS service.
  2. Configure DKIM record for securing mail server under Bind9 DNS service.
  3. Configure DNSSEC signing on Bind9 DNS Server Services.
  4. Configure DMARC Record for securing mail server under Bind9 DNS service.

For this tutorial we’ll use ‘eracks.com’ as domain and local IP address for demo and real time configurations (tested) behind the NAT network. The global & dedicated Systems could be configured just by replacing with your own domain and real IP assigned from your ISP. If you need further assistance please contact our eRacks Systems’ experts. Also, you could buy securely configured “DNS Server” as your requirements from eRacks Systems’ showRoom without any hassle. For your requirement please checkout.

For configuring DNS Servers we’ll use private IP from 192.168.88.0/24 network block where the usable Host IP Range is: 192.168.88.1 – 192.168.88.254; and Subnet Mask: 255.255.255.0. Our Router/NAT-gateway IP address is already configured as 192.168.88.1.

IP Address Block:	192.168.88.0/24
Usable Host IP Range:	192.168.88.1 - 192.168.88.254
Broadcast Address:	192.168.88.255
Total Number of Hosts:	256
Number of Usable Hosts:	254
Subnet Mask:	255.255.255.0
Wildcard Mask:	0.0.0.255
Options Primary/Master DNS Server Secondary/Slave DNS Server Client/Host Server
Host Name dnsmaster dnsslave hostserver
Domain eracks.com eracks.com eracks.com
IP Address IPv4: 192.168.88.17
IPv6: ::8817
IPv4: 192.168.88.250
IPv6: ::8250
IPv4: 192.168.88.17
IPv6: ::8221
FQDN dnsmaster.eracks.com dnsslave.eracks.com hostserver.eracks.com

Enough talk – Let’s see how it’s done!


eRacks/DNS


Get your Own Open Source DNS Server as pre-configured as ‘plug & Play’ from eRacks Systems’ ShowRoom.


Step 1: Install fresh Ubuntu 16.04 LTS Server OS on a server.

For learn how to install a fresh copy of Ubuntu 16.04 LTS Server OS on a server system visit this link.

Step 2: Preparing the Ubuntu 16.04 LTS Server OS for installing Bind9 DNS Server Service.

After installing, login the server directly or using SSH tunnel with IP address with user with root privileges.

The login screen will look like this;


Then run the following command and press enter and your given password to update the system.

administrator@ubuntu:~$ sudo apt-get update


For avoiding “sudo” command, we’ll configure the server as ‘root’ user. To do so, type the following command and press enter.

administrator@ubuntu:~$ sudo -s


Once the Update and Upgrade are done as root user, we need to edit the network interface for setting up the static IP address for the system with the following command;

root@ubuntu:~$ nano /etc/network/interfaces

Here On the popped-up screen find # The primary network interface and replace the beneath lines with the following;

# Static Primary Network Interface IPv4 Address
# Required for IPv4 (A) Records
auto eth0
	iface eth0 inet static
	address 192.168.88.17
	netmask 255.255.255.0
	network 192.168.88.0
	broadcast 192.168.88.255
	gateway 192.168.88.1
	dns-nameservers 8.8.8.8 8.8.4.4
	dns-domain eracks.com
# Optional Static IPv6 Address for Primary Network Interface
# Required for IPv6 (AAAA) Records
iface eth0 inet6 static	
	address fe80::215:5dff:fe58:6500
	netmask 65
	gateway fe80::2a3b:82ff:fe74:58f6


Once it is done, press Ctl + X to exit and Press ‘Y’ then Enter button to save the changes.


Next, we need to set up the hostname for this server. Thus, Run the following command to edit the host name;

root@ubuntu:~$ nano /etc/hostname

On the popped up screen replace the existing default host name “Ubuntu 16.04 LTS” with “dnsmaster” (since we’ll be setting the hostname as “dnsmaster“) then Press control + X to exit. And Press ‘Y’ then Enter button to save the changes. And then Run the following command to edit the hosts file;

Replace the existing with the following host record entries with the following;

root@ubuntu:~$ nano /etc/hosts

The entries will look like this;

Once done, press control + X to exit and Press ‘Y’ then Enter button to save the changes and reboot your system with the “reboot” command.


After rebooting and login to the server we’ll see that the default host name “ubuntu” is replaced with hostname “dnsmaster”. To get assure we could check the hostname and FQDN with the following commands respectively;

root@dnsmaster:~$ hostname
root@dnsmaster:~$ hostname -f

Once these are done the system is ready for installing the Bind9 DNS Server Service. And we could proceed to the next steps.

Note:We’ll login as as root user from the start.


Step3: Install Bind9 DNS Server Service and configure Caching-only name server.

Before installing ‘Bind9’ DNS Server on this server we need to make sure all the packages are up to date. So, we’ll update and upgrade all the apt packages with following command;

root@dnsmaster:~$ apt-get update && apt-get upgrade


Once the Update and Upgrade are done, we’ll install the ‘Bind9’ Packages with the following command;

root@dnsmaster:~$ apt-get install bind9

The screen will pop up for your permission for using additional disk space. For approval, press “Y” and then Enter button for installing the packages. The installation process will take a few whiles.


When the installation is done the system is ready for configuring Caching-only name server with Bind9 DNS Server service package. For configuring Caching-only name server run the following command.

root@dnsmaster:~$ nano /etc/bind/named.conf.options


On the popped-up screen find & uncomment the forwarders & set the forwarders as follows with google public DNS IP address & or with your ISP’s DNS IP address.

The entries will look like this


Next, press control + X to exit and Press ‘Y’ then Enter button to save the changes. And restart the Bind9 DNS Service with the following command.

root@dnsmaster:~$ systemctl restart bind9.service


For testing the Caching-only name server we need to run the dig command as follows;

root@dnsmaster:~$ dig google.com

If everything is okay, the command will dig up the following records;

Step4: Install and configure Primary DNS server or Master DNS server.

Before proceeding further, first we need to make sure the Ubuntu server is up-to-date. We could make sure by running the following commands;

root@dnsmaster:~$ apt-get update && apt-get upgrade


Before configuring Primary Name Server with Bind9, we could verify all the required packages are installed by running the following command;

root@dnsmaster:~$ apt-get install bind9 bind9utils bind9-doc


Once it is done, we are ready to configure our Primary Name Server with Bind9 on Ubuntu 16.04 LTS Server. And All configuration files be will be available under /etc/bind/ directory. To do so, we need to edit ‘named.conf.local’ file first, and make entry for our domain zone.

So, we’ll run the following command line for setting up our domain’s forward look up zone.

root@dnsmaster:~$ nano /etc/bind/named.conf.local


Then make the following entries for Forward Look Up Zone

// ### Forward Look Up Zone
zone "eracks.com" {
	type master;
	file "/etc/bind/forward.eracks.com";
	allow-transfer {none;};
	};


Reverse, look up zone is also recorded here. So, we’ll add the reverse look up zone with the first there part of the IP address in reverse way by ending with “.in-addr.arpa”. The zone name it’ll look like “88.168.192.in-addr.arpa” this. So, we’ll add the following records beneath the forward look up zone as well as following;

// ### Reverse Look Up Zone
zone "88.168.192.in-addr.arpa" {
	type master;
	file "/etc/bind/reverse.eracks.com";
	allow-transfer {none;};
	};

These entries will look like this;


Then we need to save the file and exit.


We’ve identified forward lookup zone via “file “/etc/bind/forward.eracks.com”;” and reverse lookup zone via “file “/etc/bind/reverse.eracks.com”;” on the “named.conf.local” file. Therefore, we need to create those two-database files for use as forward & reverse lookup zone under “/etc/bind/” directory.

For “forward.eracks.com” database, we’ll copy the existing “db.local” database file that is created as default with Binid9 installation under ‘/etc/bind/’ directory. To, do so we’ll run the following command;

root@dnsmaster:~$ cp /etc/bind/db.local /etc/bind/forward.eracks.com

Then we’ll edit the newly copied database file with the following command;

root@dnsmaster:~$ nano /etc/bind/forward.eracks.com

Then make the following entries for the database records;

; ###########################################################################
; ### ******************************************************************* ###
; ##### Forward Look Up Zone Data Files For eRacks.Com Domain ###############
; ###########################################################################
$TTL    3600
$ORIGIN eracks.com.
@	IN	SOA	dnsmaster.eracks.com.	root.eracks.com. (
								2018110111	;	Serial
										4800	;	Refresh
										360	;	Retry
									2419200	;	Expire
										7200 )	;	Negative Cache TTL
;
@	IN	NS	dnsmaster.eracks.com.
@	IN	NS	dnsslave.eracks.com.
@	IN	AAAA	::8817
@	IN	A	192.168.88.17
; ################################
; NameServer Records
; ###########################################################################
dnsmaster.eracks.com.	IN	A	192.168.88.17
dnsmaster.eracks.com.	IN	AAAA	::8817
dnsslave.eracks.com.	IN	A	192.168.88.250
dnsslave.eracks.com.	IN	AAAA	::8250
; ################################
; Other Host Records
; ###########################################################################
hostserver.eracks.com.	IN	A	192.168.88.221
hostserver.eracks.com.	IN	AAAA	::8221
;


It’ll look like this;


Next for “reverse.eracks.com” database, we’ll copy the existing “db.127” database file that is created as default with Binid9 installation under ‘/etc/bind/’ directory as well. So, we’ll run the following command;

root@dnsmaster:~$ cp /etc/bind/db.127 /etc/bind/reverse.eracks.com

And edit using the following command

root@dnsmaster:~$ nano /etc/bind/reverse.eracks.com

Entries for the database are follows

; ###########################################################################
; ### ******************************************************************* ###
; ##### Reverse Look Up Zone Data Files For eRacks.Com Domain ###############
; ###########################################################################
$TTL    3600
@	IN	SOA	dnsmaster.eracks.com.	root.eracks.com. (
								2018110111	;	Serial
										4800	;	Refresh
										360	;	Retry
									2419200	;	Expire
										7200 )	;	Negative Cache TTL
;
@	IN	NS	dnsmaster.eracks.com.
@	IN	NS	dnsslave.eracks.com.
; ################################
; NameServer Records
; ###########################################################################
17.88.168.192.in-addr.arpa.	IN	PTR	dnsmaster.eracks.com.
250.88.168.192.in-addr.arpa.	IN	PTR	dnsslave.eracks.com.
; ################################
; Other Host Records
; ###########################################################################
221.88.168.192.in-addr.arpa.	IN	PTR	hostserver.eracks.com.
;

Once it is done, we’ll save the file and exit.

It’ll look like this;


After that, we’ll restart the bind9 DNS Server Service with the following command.

root@dnsmaster:~$ systemctl restart bind9.service
root@dnsmaster:~$ service bind9 status

Note: We should be careful that all the records that finishes with letter (other than IP addresses), we need to add full-stop (“.”) at their end point to declare it is finished. Else, the bind9 will show an error.


For instant checkup, we need to set the resolver with nameserver as localhost IP 127.0.0.1 using following command;

root@dnsmaster:~$ nano /etc/resolv.conf


And at the beginning of the name server lists we need to add the following line, then save and exit.

nameserver 127.0.0.1


For checkup we’ll use the “dig” command for specific host record like following

root@dnsmaster:~$ dig eracks.com


The command will dig up the host records from the local DNS Server as follow


If the configuration is correct then the above command will not show any error. or if there is any error, we need to look at log file and troubleshoot the error. For detail about bind9 troubleshooting on Ubuntu Server please visit Ubuntu’s official “DNS Troubleshooting Page” or contact eRacks Systems’ expertise for the help.


Step 6: Bind9 Post installation Configurations for successful service run on Ubuntu Server.

When, the bind9 shows no error, we need to set the post installation configuration for Bind9 DNS Server Service to run successfully on Ubuntu Server. To do so, we’ll run these following commands for give appropriate access permission to the Bind9 Server Service and Allow through Ubuntu Firewall (ufw).At first, we’ll enable the bind9 DNS Server Service at the system start up with the following command. So that the Bind9 always starts automatically after the system reboot.

root@dnsmaster:~$ systemctl enable bind9.service


Then for the access permission for Bind9 on ubuntu server, we’ll run the following commands;

root@dnsmaster:~$ chmod -R 755 /etc/bind
root@dnsmaster:~$ chown -R bind:bind /etc/bind


We’ll also configure the Ubuntu firewall in order to allow Bind9 through Ubuntu firewall (ufw). For configuring ufw we’ll run the following commands one by one.

root@dnsmaster:~$ ufw app list
root@dnsmaster:~$ ufw allow “Bind9”
root@dnsmaster:~$ ufw reload
root@dnsmaster:~$ ufw status
root@dnsmaster:~$ ufw status verbose


Then we’ll restart both servives Bind9 and the ufw with the following commands;

root@dnsmaster:~$ systemctl restart bind9.service
root@dnsmaster:~$ systemctl restart service.service


We could always restart and check status of the Bind9 DNS Server Service with following command.

root@dnsmaster:~$ service bind9 restart
root@dnsmaster:~$ service bind9 status


If everything is alright, the Bind9 status report will show no error. Beside, we could always visit this MxToolbox website for more detail reports and troubleshooting by entering the domain.

May 8th, 2018

Posted In: How-To, Linux, Open Source, servers

Tags: , , ,

Leave a Comment

« Previous PageNext Page »